|
|
|
Export Items Wizard
The
Export
Items Wizard allows
you to export all the images and binary data from the existing or
new query to disk. You start the Wizard by clicking on the
Export
to disk  button. button.
Select image source
|
|
You
can export images in one of 2 ways:
|
|
|
·
|
using
the results of the existing query
|
|
|
·
|
using
the results of a new query
|
|
|
See
this guide on why you
may want to use a different query during the export process.
|
|
|
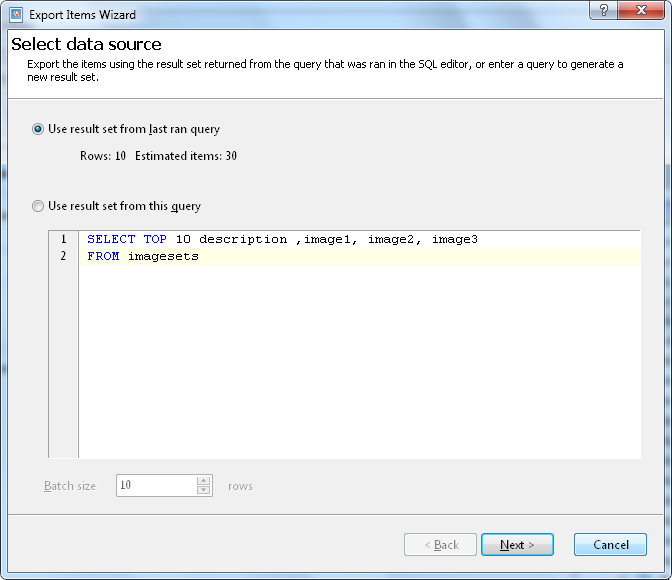
If you
want to use a new query, select the Use
result set from this query option
and enter your new query.
|
|
|
The
Batch
size value
is the number of rows that SQL Image Viewer retrieves each time
from the database. If the query returns very large images, it is
better to use a smaller batch size value in order not to overload
the system memory. If the query is retrieving only small images, it
may be more efficient to use a larger batch size. Presently, this
value is only available when connected to SQL Server databases.
|
Select items to export
|
|
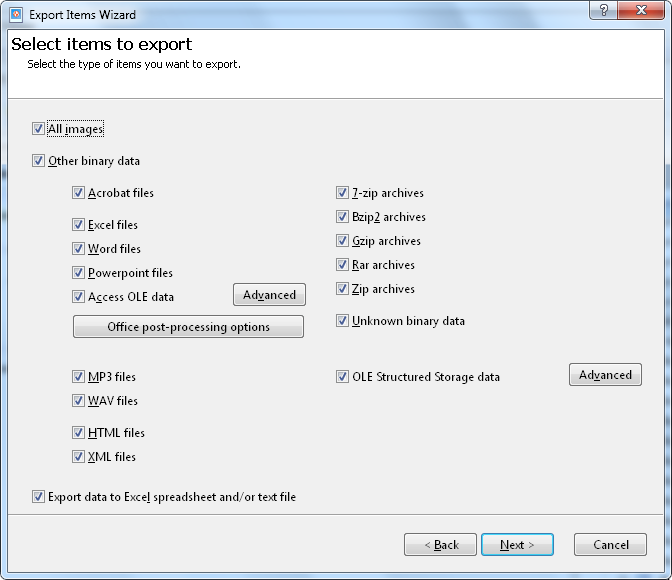
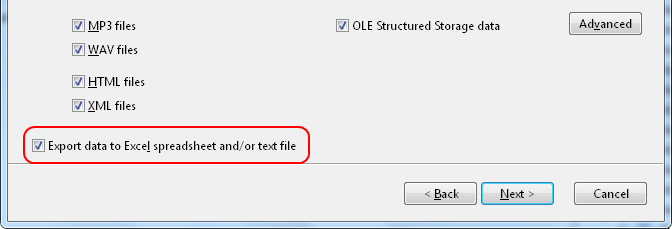
You
can choose the type of items to export, which include images and
other binary file types. For Microsoft Excel and Word files, there
are other options you can select to post-process the exported
files. To do this, click on the Office
post-processing options button.
|
|
|
You
can also choose to export the results of the query to an Excel
spreadsheet or text file, by selecting the Export
data to Excel spreadsheet and/or text file
option.
|
|
|
In
cases where you want to export HTML, RTF and XML content but they
are stored in text columns, select the Scan
text columns for HTML, RTF, and XML content
item.
SQL Image Viewer will then export any HTML, RTF, and XML content it
finds in your text columns.
|
Select
image processing options
|
|
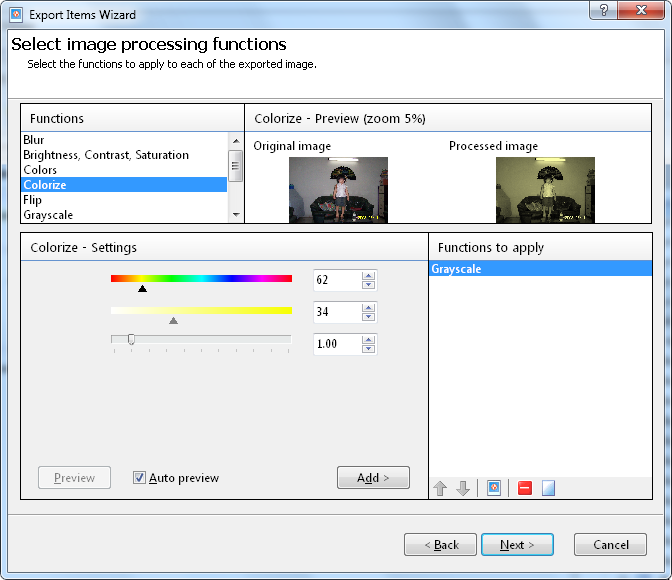
If you
choose to export images, you can apply one or more image processing
functions to each exported image. To do this:
|
|
|
-
select a processing function from the list of available functions
|
|
|
-
enter the function's values
|
|
|
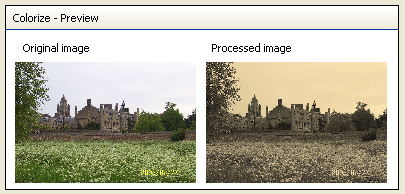
-
click the Preview
button
to view the effect on the image
|
|
|
-
click Add
to add
the function to the list of functions to apply to each image
|
|
|
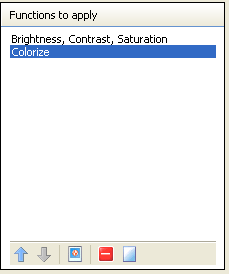
If you
have added multiple functions to apply, each function will be
applied in the order that they appear in the list. You can reorder
functions in the list, or delete unnecessary
functions.
|
|
|
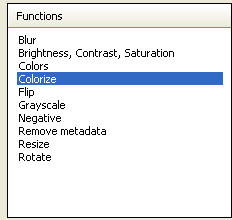
Function
|
Description
|
Blur
|
Applies
a Gaussian blur filter with specified radius.
|
Brightness,
Contrast, Saturation
|
Modifies
the brightness, contrast and saturation.
|
Colors
|
Increases
or decreases the image color count.
|
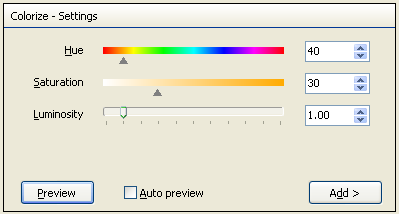
Colorize
|
Colorize
sets hue and saturation for all pixels of the image. It also
changes the luminosity using this parameter as a multiplicator to
increase or decrease the luminosity.
Hue assumes values between 0 and 359 (corresponding to 0..359
degrees around hexcone).
Saturation assumes values between 0 (shade of gray) to 99 (pure
color).
Luminosity is 1 when you don't touch the original
luminosity.
|
Flip
|
Flips
the image horizontally or vertically.
|
Grayscale
|
Converts
the image to a grayscale image.
|
Negative
|
Inverts
all colors of the image.
|
Remove
metadata
|
Removes
all metadata associated with the image. For jpeg images, this
removes all EXIF metadata, which reduces the size of the
image.
|
Resize
|
Resizes
the images based on:
|
|
·
|
a
percentage of the original image
|
|
|
·
|
longest
side pixel size
|
|
Rotate
|
Rotates
the current image (negative or positive degrees).
|
|
|
|
|
|
Image
processing functions will not be applied to multi-frame images e.g.
multi-frame TIFF files and animated GIFs.
|
|
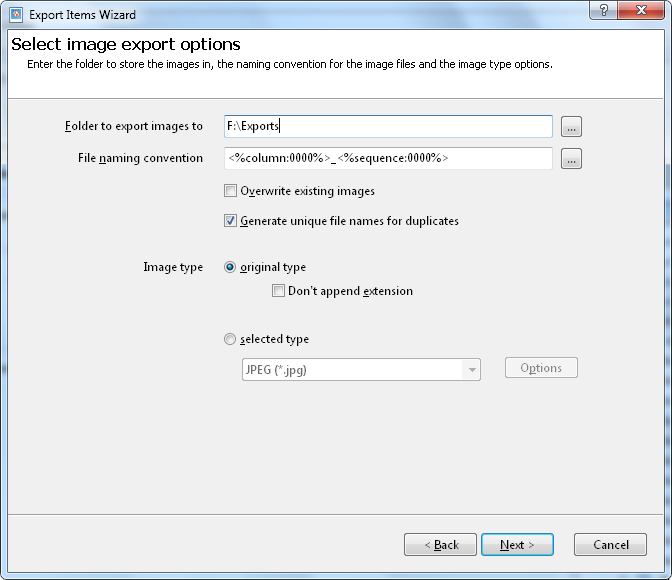
Select image options
|
|
|
|
|
Folder to export images to
|
Enter
the name of the folder to store the images in. You can also use
values of text or numeric columns that were retrieved as part of
the SQL query, to dynamically generate folders depending on those
values.
For e.g. if your query is something like this:
SELECT category, imagename, imagedata FROM ...
You can choose to group the images by the 'category' value, using
the following value for the folder name:
|
File
naming convention
|
Enter
the file naming convention to use for each image file that is
created.
The file naming convention can use system attributes, like the
record number or column number. It can also use image attributes,
like the image width, height and size. Lastly, it can also use the
values of text columns that were retrieved as part of the SQL
query.
Click on the ...
button
to open the File Naming
Convention dialog to easily set up the naming
convention.
|
Overwrite
existing images
|
Select
this option if any existing image file of the same name should be
overwritten with the current image.
|
Generate
unique names for duplicates
|
Select
this option when your naming convention may result in duplicate
file names, and you want SQL Image Viewer to adjust the file name
to make it unique.
SQL Image Viewer does this by appending a number after the file
name.
|
Image
type
|
Select
original
type if you
want to save the images in their original format.
Select Don't
append extension if the
naming convention you enter already contains a valid file name
complete with the right extension.
Select selected
type if you
want to save the images in a specific format. If you select the
JPEG or PNG image types, you can adjust options for those types.
|
|
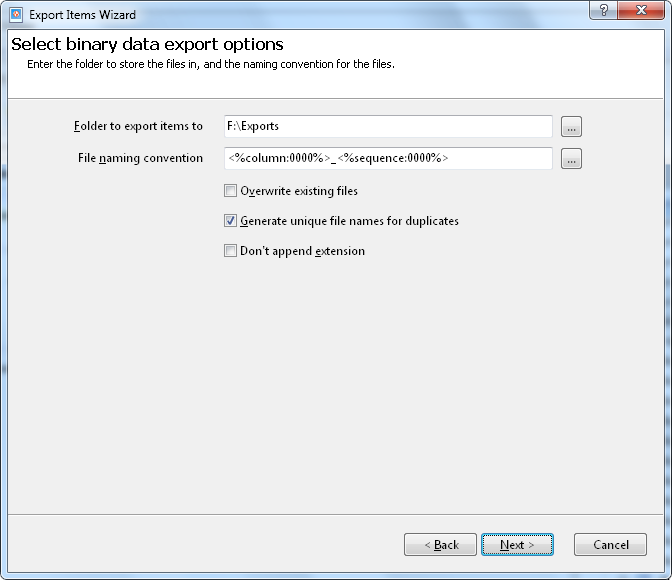
Select binary data export options
|
|
|
|
|
Folder
to export items to
|
Enter
the name of the folder to store the binary files in. You can also
use values of text or numeric columns that were retrieved as part
of the SQL query, to dynamically generate folders depending on
those values.
For e.g. if your query is something like this:
SELECT category, imagename, imagedata FROM ...
You can choose to group the images by the 'category' value, using
the following value for the folder name:
|
File
naming convention
|
Enter
the file naming convention to use for each binary file that is
created.
The file naming convention can use system attributes, like the
record number or column number. It can also use the values of text
columns that were retrieved as part of the SQL query.
Click on the ...
button
to open the File Naming
Convention dialog to easily set up the naming
convention.
|
Generate
unique names for duplicates
|
Select
this option when your naming convention may result in duplicate
file names, and you want SQL Image Viewer to adjust the file name
to make it unique.
SQL Image Viewer does this by appending a number after the file
name.
|
Overwrite
existing files
|
Select
this option if any existing binary file of the same name should be
overwritten with the current file.
|
Don't
append extension
|
Select
this option if the naming convention you enter already contains a
valid file name complete with the right extension.
|
|
Select Excel data
export options
|
|
To
export the result set to an Excel spreadsheet, you must first
select the 'Export
data to Excel spreadsheet and/or text file'
item
on the 'Select
items to export' page.
|
|
|
|
|
|
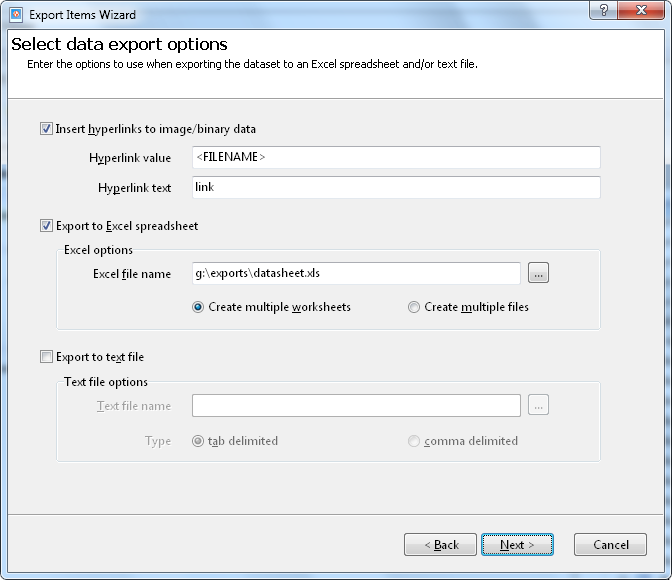
Insert
hyperlinks to image/binary data
|
Select
this option if you want to insert hyperlinks in the Excel
spreadsheet to the image/binary data that is exported.
|
Hyperlink
value
|
Enter
the hyperlink value that will be used in the spreadsheet to link to
the exported images/binary data. You can use relative path values
instead of fixed path values, so that you do not need to preserve
the same folder structure when using the hyperlinks on different
workstations.
E.g. the hyperlink value '.\images\<FILENAMEONLY>' will
create hyperlinks to the items in the 'images' subfolder under the
folder where the spreadsheet file is stored.
Use the <FILENAME> tag if you want to use the fully qualified
file name of the exported item.
|
Hyperlink
text
|
This
is the text that is displayed in the spreadsheet for the hyperlink.
In addition to fixed text, you can use 2 tags:
<FILENAME> which is the fully qualified file name of the
exported item
<FILENAMEONLY> which is the file name of the exported
ite,
|
Export
to Excel spreadsheet
|
Select
this option if you want to export the query results to an Excel
spreadsheet.
|
Excel
file name
|
Enter
the name of the file to save the Excel spreadsheet under. You can
use the <DATETIME> tag to dynamically name the file.
E.g. if the current date time is September 8, 2011 14:00:
'g:\export\<DATETIME:yyyymmdd>.xls' returns
'g:\export\20110908.xls'
'g:\export\<DATETIME:yyyymmdd hhnn>.xls' returns
'g:\export\20110908 1400.xls'
See here for the list of
possible date time formatting values.
|
Create
multiple worksheets
|
Select
this option if you want to create multiple worksheets in the same
workbook.
|
Create
multiple files
|
Select
this option if you want to create multiple Excel workbooks, each
with a single worksheet of data.
|
Export
to text file
|
Select
this option if you want to export the query results to a text
file.
|
Text
file name
|
Enter
the name of the file to save the text file under. You can use the
<DATETIME> tag to dynamically name the file.
E.g. if the current date time is September 8, 2011 14:00:
'g:\export\<DATETIME:yyyymmdd>.xls' returns
'g:\export\20110908.xls'
'g:\export\<DATETIME:yyyymmdd hhnn>.xls' returns
'g:\export\20110908 1400.xls'
See here for the list of
possible date time formatting values.
|
Tab
delimited
|
Select
this option if the values in the text file should be tab
delimited.
|
Comma
delimited
|
Select
this option if the values in the text file should be comma
delimited.
|
|
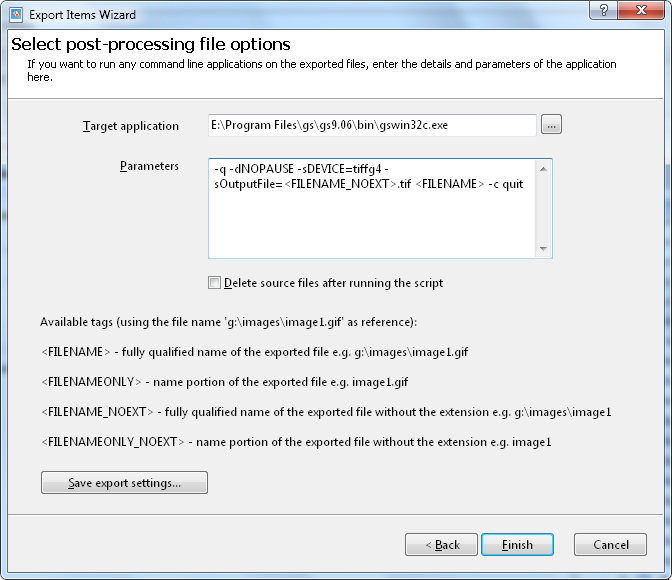
Select post-processing file
options
|
|
You
can run external applications to process the exported image/binary
files on this page. In the example above, we are using the
Ghostscript command line application to convert PDF files exported
from our database, into TIFF files.
|
|
|
There
are four tags you can use to provide the exported file names and
also to build the output file names using the external application.
|
|
|
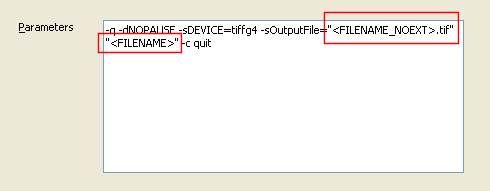
If
your exported files are stored in folders where there are spaces,
remember to encode the file name parameters in double quotes, e.g.
|
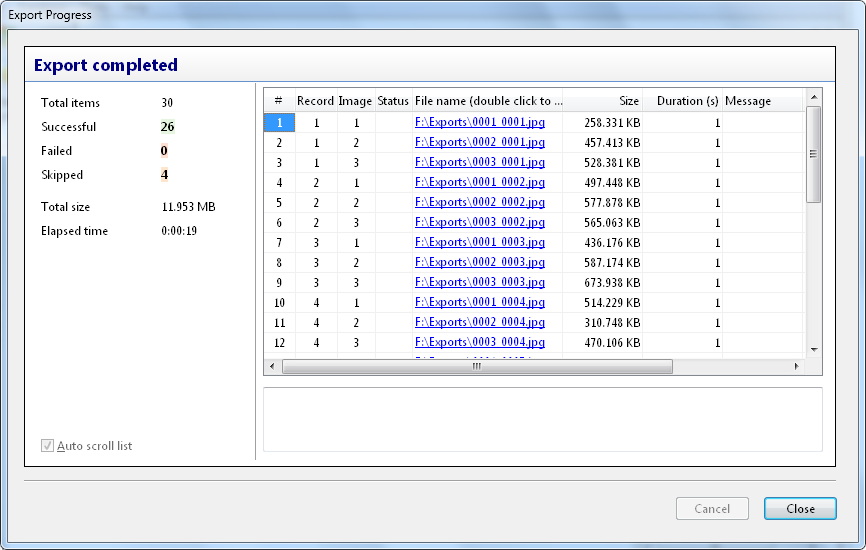
Click on the Finish
button
to start the export process. A progress dialog is then displayed,
and the status of the export process is constantly updated. You can
cancel the export process anytime by clicking on the Cancel
button.
|