Home
SQL Image Viewer online help Prev Page Prev Page
Introduction
About SQL Image Viewer
Version history
Contact us
User Guide
System requirements
Editor command selection
Exporting large number of images
Reference Guide
Main menu
Connect to Database
Connecting to databases directly without client libraries installed
Connecting to an Oracle database
Connecting to a DB2 database
Options
General options
Thumbnail options
Hex view
The work area
SQL editor
Results
Other binary data
Image viewer
Hex viewer
Export items wizard
Post-processing Office files
Image options
File naming convention
Datetime format specifiers
Command line interface
Parameters, logs and exit codes
Advanced options
CROP option
Troubleshooting
Expired trial
Invalid licenses
Unidentified images or binary data
DICOM images
Hidden Excel worksheets

Image options

When you save JPEG or PNG images, you can specify certain options related to each of those image types. When you save an image, the dialog displays an Options button next to the image type. Click on this button to open the Image Options dialog.

save_options_jpeg  


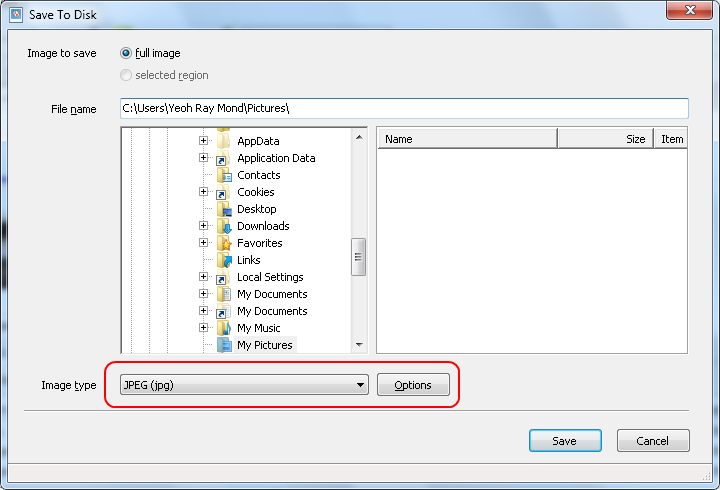
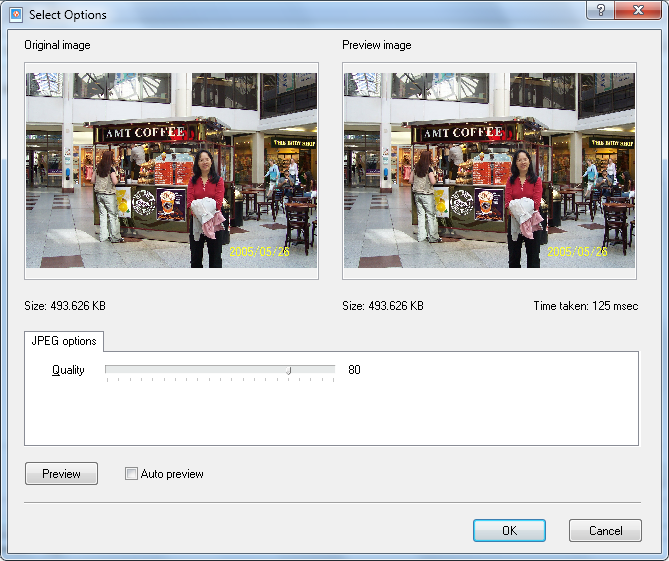
For JPEG images, you can adjust the compression level.

save_options_jpeg2  

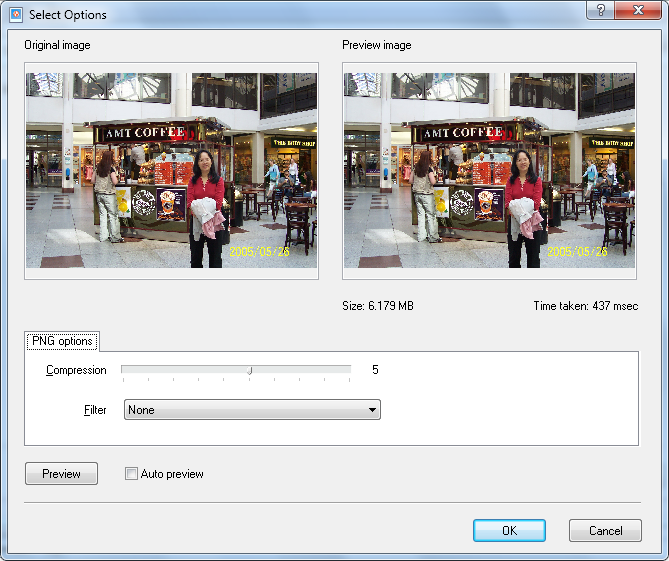
For PNG images, you can adjust the compression level and the filter type.

save_options_png  

In this dialog, two images are displayed: the original image and the image after the settings have been applied. You can zoom in and out of the image by clicking on the left and right mouse buttons in the original image. You can also pan the image when it does not fit fully in the window by holding down the left mouse button and moving the cursor.

Click on Preview
to apply the options you have selected to the preview image. Select the Auto preview option to automatically apply the options to the preview image after every change.