Monthly Archives: May 2020

Naming the exported files in Access OLE Export and SQL Blob Export

When exporting your database blobs to files using Access OLE Export and SQL Blob Export, the default naming convention is the row number and column number (of the blob column).

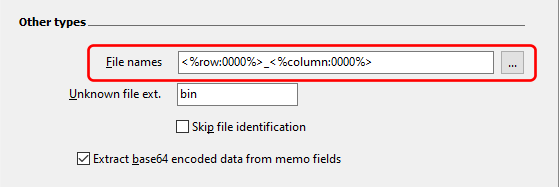
For example, if your data set contains 10 rows and 2 columns of blobs (say columns 2 and 5), the files will be named in this way:

0001_0002.<file extension>
0001_0005.<file extension>
0002_0002.<file extension>
0002_0005.<file extension>

0010_0002.<file extension>
0010_0005.<file extension>

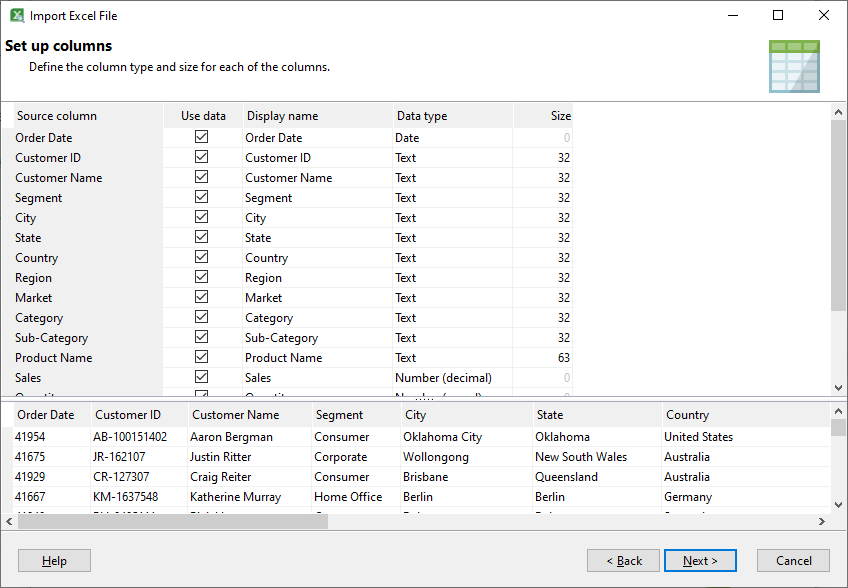
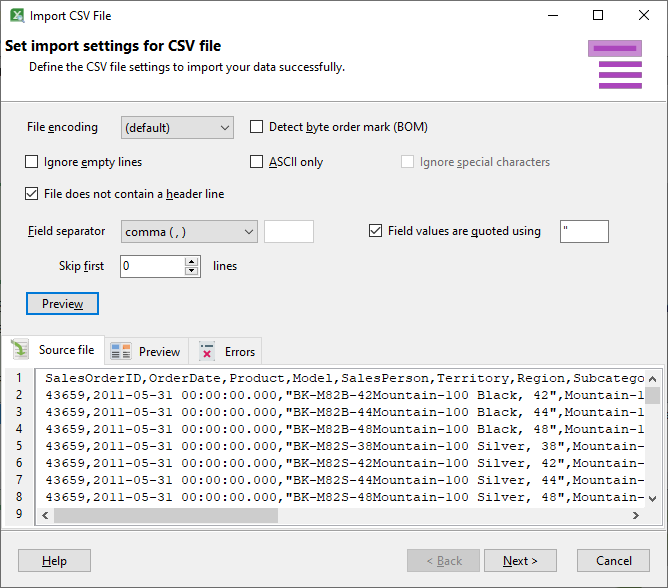
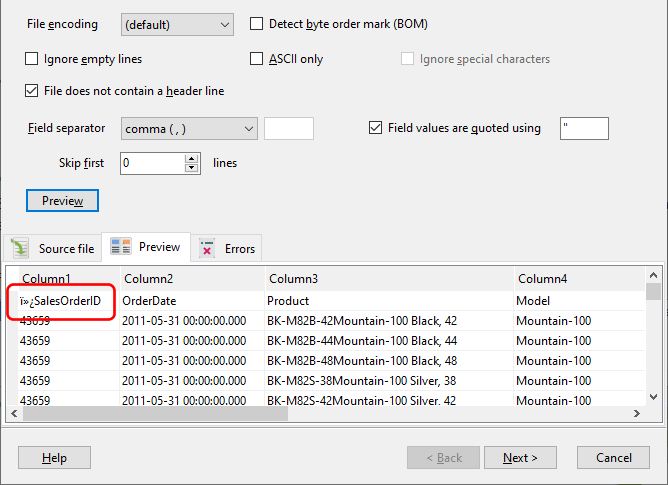
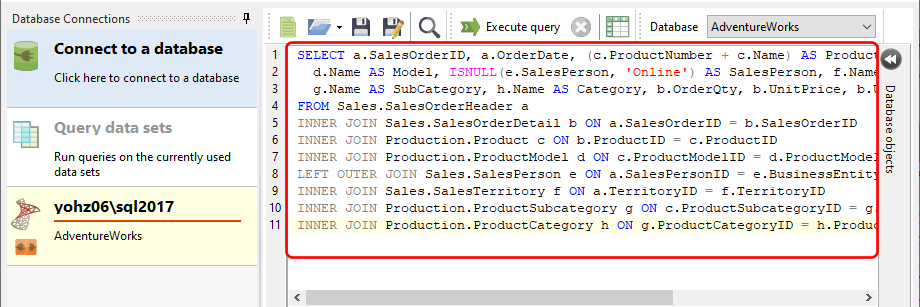
You can change the naming convention to use values from the exported table or data set (if running a SQL query).  For example, if your table or data set has the following columns:

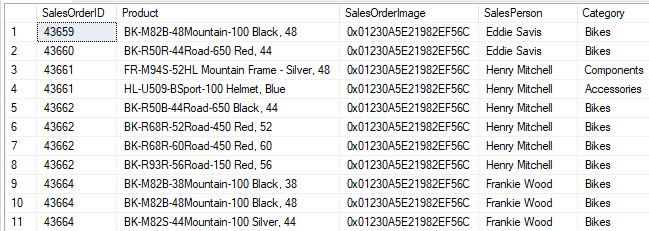
and you want to name the exported files from the SalesOrderImage column using the SalesOrderID value, you would use the following naming convention:

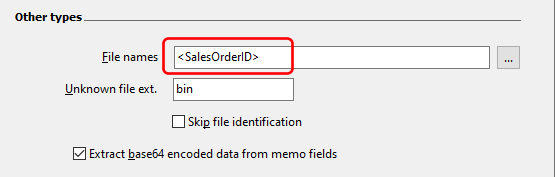
The exported files will then be named this way:

  • 43659.<file extension>
  • 43660.<file extension>
  • 43661.<file extension>

and so on.

Simply enclose any column values you want to use in angled brackets, as in <SalesOrderID> above.  You can combine multiple columns together, so for e.g. using  <Category>_<SalesOrderID> will name the files

  • Bikes_43659.<file extension>
  • Bikes_43660.<file extension>
  • Components_43661.<file extension>

and so on.

There are also attributes tags you can use as part of the naming convention.  We have already described the <%column%> and <%row%> tags above.  There is also a <%size%> tag, which would return the file size value.  You can freely mix column tags and attribute tags in the naming convention.

Using tags in output folders

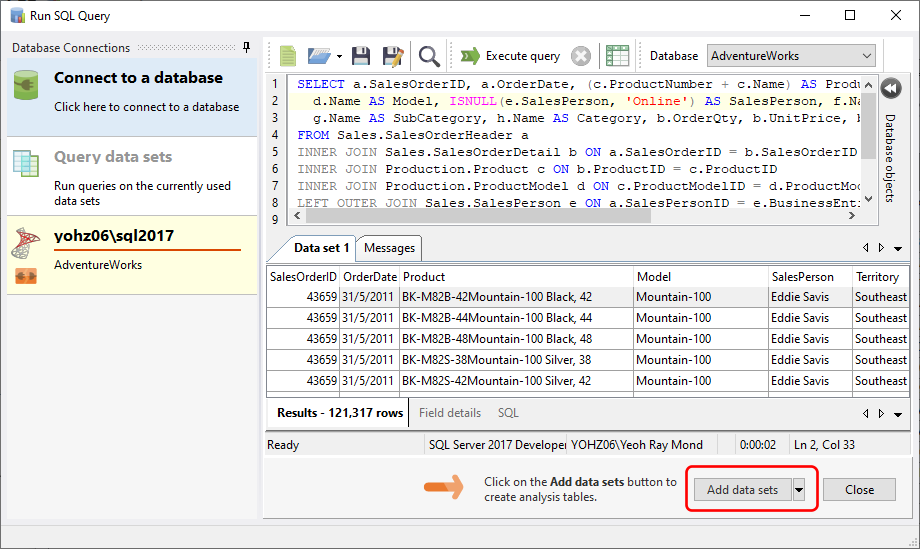
You can also use column tags as part of the folder naming convention, if you need to store the files in individual folders or grouped by folders.  For e.g. in this sample data set:

if we wanted to group our exported images by the Category value, we would enter F:\exports\<Category>\ as our output folder naming convention

This will result in the first 2 files stored in the F:\exports\Bikes\ folder, the 3rd file in the F:\exports\Components\ folder, and so on.  You can use multiple column tags in the folder naming convention if required.  Access OLE Export and SQL Blob Export will create the folders if they do not already exist, as long as you have the permissions to create those folders.
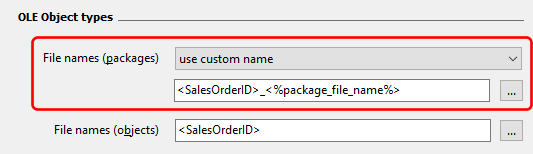
OLE-Object types

For files extracted from OLE-Object packages, you have the option of using the original file name:

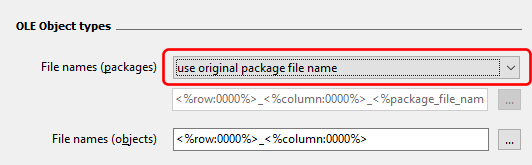
or a custom name using column and attribute tags, as described above.  If using a custom name, you can use the <%package_file_name%> tag, allowing you to mix column values with the original package file name e.g.


Importing from multiple CSV files in Easy Excel Analysis

To import data from multiple CSV files in Easy Excel Analysis, first set up the import settings for a single file as described here.

NOTE: The layout and format of the data in all the additional files must be identical to that of the initial file. 

When you reach this page of the import wizard, you can then set up the additional files to import from.

To add files, click on the Add button below the file list window.

If you need to be able to identify each data source and your worksheets do not contain any columns that identifies the source data, you can add additional columns on this page to help identify the data source.  Click on the Add button below the additional columns list.

On this page, enter the column name, type, length, and source of the column.  There are several options available to use the filename or worksheet details.

Using an example file name of G:\data\Sales_Osaka_July2020.xlsx,

  • filename = Sales_Osaka_July2020
  • filename 1st value = Sales
  • filename 2nd value = Osaka
  • filename 3rd value = July2020

Note that the separators can be a dash symbol (e.g. Sales-Osaka-July2020.xlsx), a comma (e.g. Sales,Osaka,July2020.xlsx), or a dot (e.g. Sales.Osaka.July2020.xlsx).  You cannot mix separator symbols e.g. Sales-Osaka.July2020.xlsx.

For further details, please refer to this topic in the help file.

Importing multiple worksheets and/or Excel files in Easy Excel Analysis

To import data from multiple worksheets and/or Excel files in Easy Excel Analysis, first set up the import settings for a single worksheet as described here.

NOTE: The layout and format of the data in all the additional files and worksheets must be identical to that of the source worksheet. 

When you reach this page of the import wizard, you can then set up the additional import sources.

To add a file, click on the Add button below the file list window.  For each additional file that you want to import, select the option that best fits your needs.

If you want to import data from all the worksheets in a single file, first set up the import settings for any one of the worksheets in that file.  Then on this page, add that file again and select the Import from all worksheets option.  Easy Excel Analysis will not import from the same worksheet twice.

If you need to be able to identify each data source and your worksheets do not contain any columns that identifies the source data, you can add additional columns on this page to help identify the data source.  Click on the Add button below the additional columns list.

On this page, enter the column name, type, length, and source of the column.  There are several options available to use the filename or worksheet details.

Using an example file name of G:\data\Sales_Osaka_July2020.xlsx,

  • filename = Sales_Osaka_July2020
  • filename 1st value = Sales
  • filename 2nd value = Osaka
  • filename 3rd value = July2020

The same extraction rules apply to worksheet names.  Note that the separators can be a dash symbol (e.g. Sales-Osaka-July2020.xlsx), a comma (e.g. Sales,Osaka,July2020.xlsx), or a dot (e.g. Sales.Osaka.July2020.xlsx).  You cannot mix separator symbols e.g. Sales-Osaka.July2020.xlsx.

For further details, please refer to this topic in the help file.

Easy Excel Analysis Guide

The Easy Excel Analysis Getting Started Guide

getting started
Explains how to import an Excel or CSV file into an analysis table.

formatting date and time values in CSV files
Explains how to import date and time values from CSV files when the format differs from the local machine regional settings.

importing from multiple Excel worksheets and/or files
Explains how you can import data from multiple worksheets and/or files.

importing from multiple CSV files
Explains how you can import data from multiple CSV files.

using data files
Explains data files, and how they can be used to share data with other users without having to grant them access to your databases.

using analysis tables
Explains how to create groups, summaries, and use charts with your data sets.

working with copies of the same data sets
Explains how you can create multiple analysis and pivot tables from the same data set without having to repeatedly run the same query.

working with analysis table columns
Explains how to hide and freeze columns, and create multi-row headers in your analysis tables.

working with charts
Explains how charts can be used to get a big picture analysis of your data set, and used as a navigation tool to support the analysis table.

Getting started with Easy Excel Analysis

To create an analysis table from an Excel file using Easy Excel Analysis, here are the basic steps to follow:

Importing your Excel file

Click on the Import Excel/CSV file item, and select the Excel file you want to import.

Select the worksheet you want to import data from.

A preview of the selected worksheet is displayed on the right.  Adjust the settings accordingly if your worksheet does not have a header, or has blank rows before the data rows.  Click Next.

On the next page, adjust the column types where necessary.  Check that the date and time columns are identified correctly.  If the columns have been formatted as date and/or time columns in Excel, they will be identified correctly in Easy Excel Analysis.  Click Next when done.

On this page, you can add additional columns that extract individual elements from date and time columns.  In our example, we have chosen to add columns for the year, month, and quarter based on the Order Date column.  Click Next after you have added the elements you require.

On this page, you can choose to import data from additional Excel files and/or worksheets.  See this post for further details.

Click Next, and your Excel data will be imported into an analysis table.

Importing your CSV file

The steps to Import a CSV file is similar to importing an Excel file.  When you select a CSV file, the Import CSV File wizard displays a preview of the file.  You may need to adjust the settings to import your file correctly.  To determine if the settings are correct, click on the Preview button.

In this example, we see a strange character next to the first column description.

This is a common issue, and is fixed by selecting the Detect byte-order mark option.  Easy Excel Analysis will try to set this option automatically depending on the CSV file format.

Other common settings to change include the Field separator symbol (default is the comma symbol), and the quote symbol.

To check if the CSV file will be imported correctly, click on the Preview button to check the lines that will be imported.

The rest of the steps is identical to that for importing Excel files described above.


Working with copies of the same data sets in Easy Excel Analysis and SQL Data Analysis

In Easy Excel Analysis and SQL Data Analysis, you can create multiple analysis tables and/or pivot tables by clicking on the Add analysis table and Add pivot table buttons on the toolbar.

You do not need to re-import the Excel/CSV file (in Easy Excel Analysis) or re-run the query (in SQL Data Analysis).  Each analysis table and pivot table is independent, and you can customize the layout of each analysis and pivot tables to your needs.

Because each analysis/pivot table consumes memory resources, the number of tables you can create from each data set is determined by your settings.  In Easy Excel Analysis, this limit is set in the Data loading settings in the Import file wizard.

In SQL Data Analysis, the limit is set in the Data options settings.

You can increase this limit if you need to be able to create more analysis/pivot tables per data set, and your machine has the available memory capacity.

SQL Data Analysis guide

The SQL Data Analysis Getting Started Guide

getting started
Explains how to connect to a database, run a query, and use the data set in an analysis table.

connecting to database servers
Explains how to connect to your database server in greater detail.

using data files
Explains data files, and how they can be used to share data with other users without having to grant them access to your databases.

running internal queries
Explains how SQL Data Analysis allows you to run SQL queries on data sets retrieved from different database servers.

using analysis tables
Explains how to create groups, summaries, and use charts with your data sets.

working with copies of the same data sets
Explains how you can create multiple analysis and pivot tables from the same data set without having to repeatedly run the same query.

working with analysis table columns
Explains how to hide and freeze columns, and create multi-row headers in your analysis tables.

working with charts
Explains how charts can be used to get a big picture analysis of your data set, and used as a navigation tool to support the analysis table.


Using data files in Easy Excel Analysis and SQL Data Analysis

In Easy Excel Analysis and SQL Data Analysis, you can save data sets to an external file, which you can then use later without having to import the Excel/CSV file again (for Easy Excel Analysis) or connect to your database and running the SQL query again (for SQL Data Analysis).

Another use for data files is to be able to share data with your users, who can use Easy Excel Analysis or SQL Data Analysis to open the file.  In the case of SQL Data Analysis, you can provide them the required data to analyse without having to grant them access to the underlying database.

To save a data set to a data file, you must already be using the data set, either in an analysis table or pivot table.

Click on the Save analysis data button, and enter a file name to save the data in.

Opening a data file

To open a data file, click on the Open data file button,

or click on the Open data file item on the main page.


Getting started with SQL Data Analysis

To create an analysis table from a data set using SQL Data Analysis, here are the basic steps to follow:

Connect to your database

Click on the Run SQL query item from the SQL Data Analysis main screen.

Click on the Connect to a database item in the Database Connections panel.

Enter the connection details in the Connect to Database window and click Connect.

Run your SQL query

Enter the query you want to run in the SQL editor window for your connection.

Click on the Execute query button to run your query.

Once the data set has been retrieved, click on the Add data sets button to create an analysis table using that data set.

See also:


Connecting to your database in SQL Data Analysis

SQL Data Analysis supports the following databases:

  • PostgreSQL 8.0 onwards
  • MySQL and MariaDB 4.0 onwards
  • Oracle 8.0 onwards
  • SQL Server 7 onwards
  • SQL Server Compact 3.1 onwards
  • SQL Azure
  • SQLite 3.0 onwards
  • Microsoft Access 2000 onwards
  • Firebird 1.x onwards
  • ODBC supported databases

To connect to a database, click on the Run SQL query item:

Details of previous connections are also listed, and you can double-click on the connection item to re-open that connection.

In the Run SQL Query window, a list of existing connections will be displayed on the left.

To establish a new connection, click on the Connect to a database item.  Enter the connection details, and click Connect.

On a successful connection, a new query window will be created.  The active connection will be highlighted in the Database Connections panel.

Enter your SQL queries in the editor window, and click on the Execute query button (or press F5) to run your query.

See also: