Category Archives: SQL Blob Export

Using the column name in your file naming convention in Access OLE Export / SQL Blob Export

When you export images and files using Access OLE Export / SQL Blob Export and each row of your table or result set contains multiple columns that contain the blob data e.g.

you could previously only use the column index in the file naming convention to identify the source column of the exported file e.g.

which would then name the exported files this way:

Files with the suffix 0002 indicates that it was exported from the 2nd column (ThumbnailPhoto), and 0003 from the 3rd column (LargePhoto).

From version 3.17 onwards, you can now use the column name in the naming convention, using the <%columnname%> tag e.g.

The exported files are then named this way:

which is more meaningful.

See also:

Merge or combine TIFF files

We had a user who recently asked if SQL Blob Export is able to merge or combine the extracted single-page TIFF files from her database into multi-page TIFF files.  This feature isn’t built-in, but we have provided an external command line application (MergeTiff) that you can freely use to perform the same task.

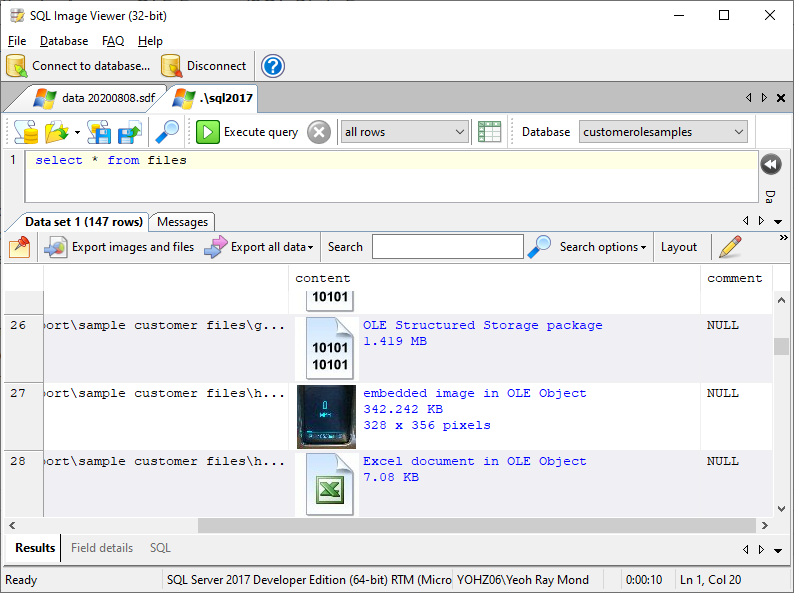
You can use MergeTiff on any tif files, including those extracted using SQL Image Viewer, SQL Blob Export, and Access OLE Export.  It is important that the extracted files use names that group the pages into the right order.

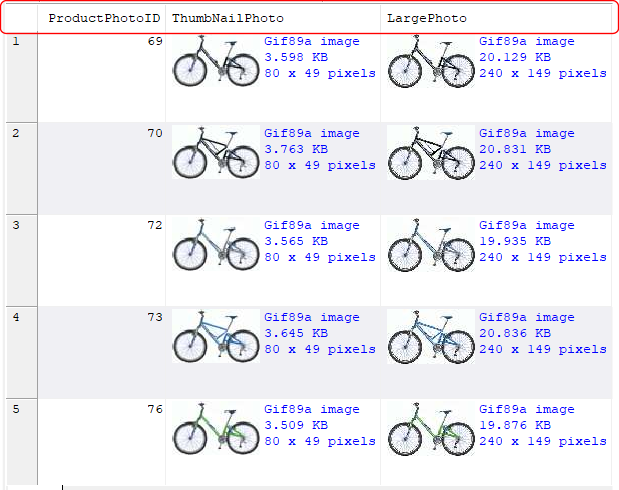
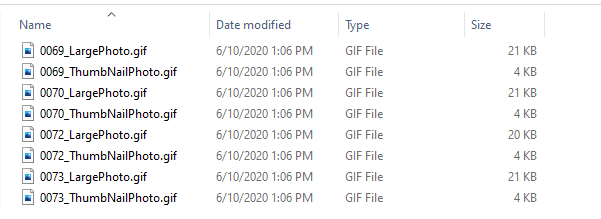
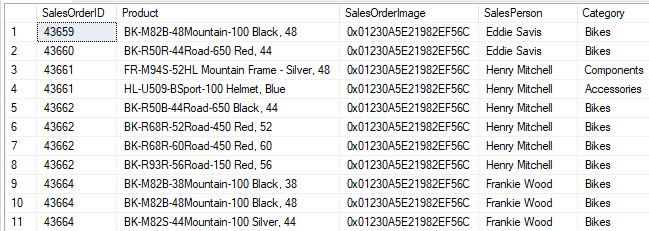
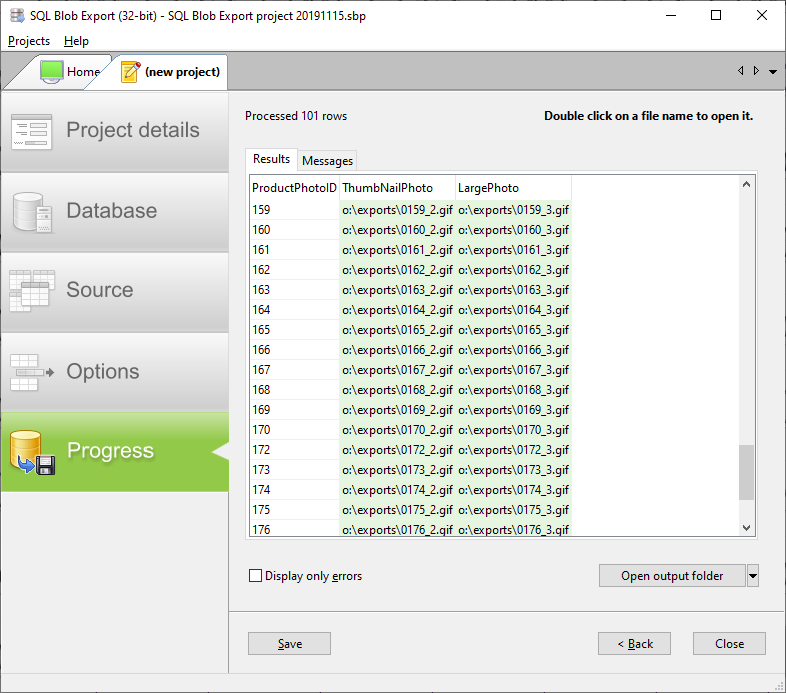
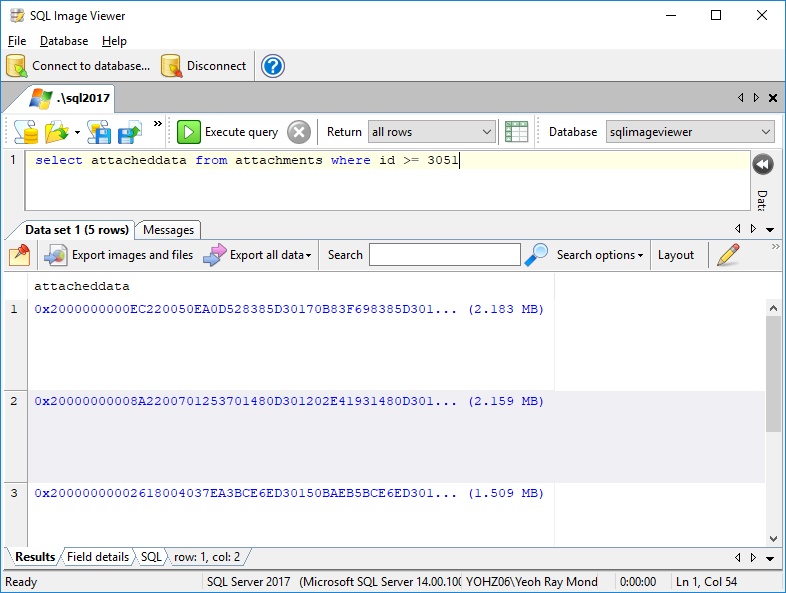
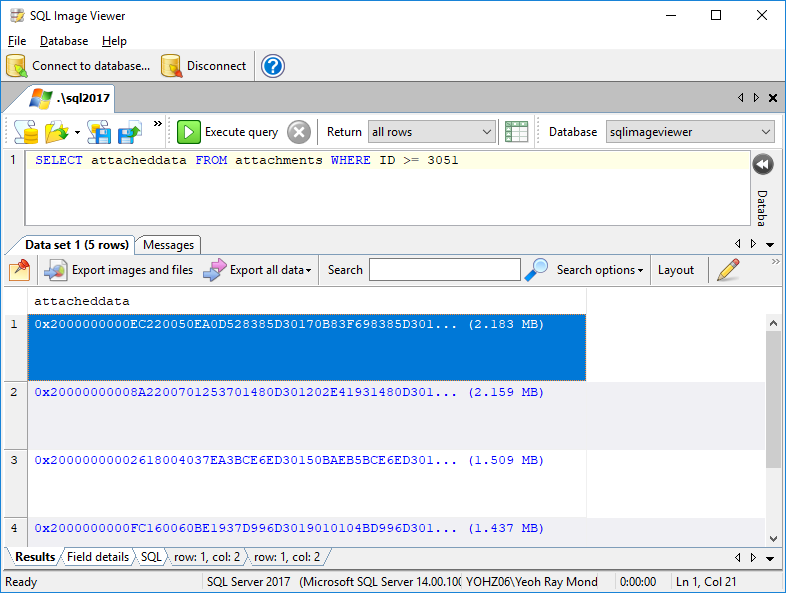
For e.g. the default naming convention for exported files in SQL Image Viewer is row and column index, so assuming each row in your result set only had 1 blob column, your exported files would be named this way:

0001_0001.tif
0002_0001.tif
0003_0001.tif

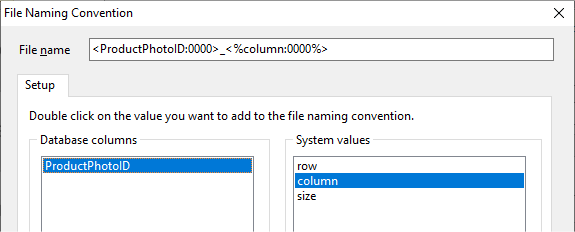
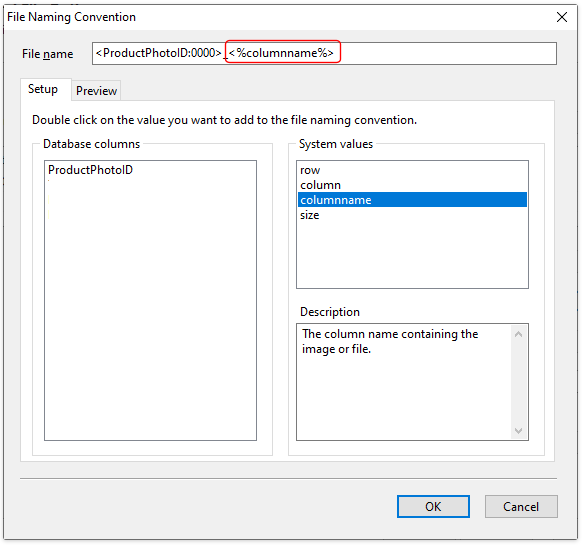
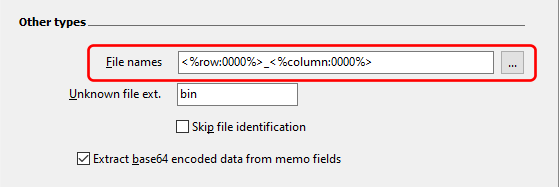
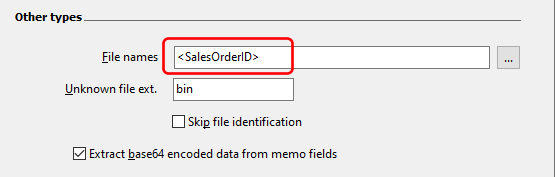
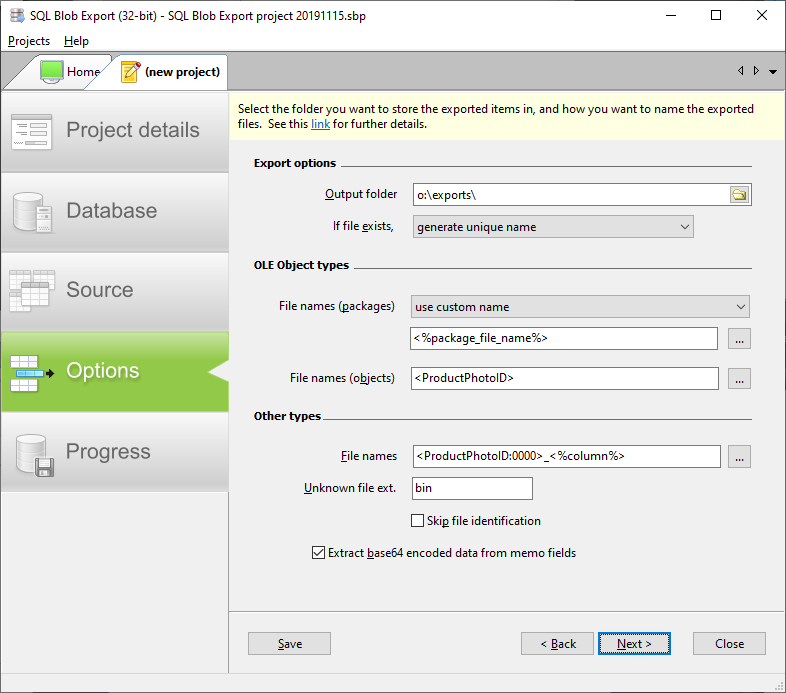
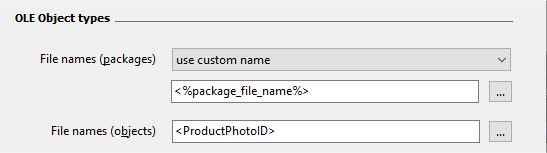
This isn’t going to help MergeTiff determine how to group the files.  What you need is a ‘grouping’ value e.g. say a CustomerID column that identifies the customer each image belongs to.  We then use this naming convention in SQL Image Viewer/ SQL Blob Export/ Access OLE Export:

<CustomerID>_<%row:0000%>

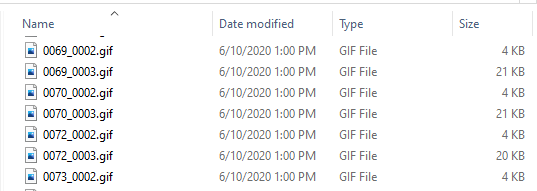
and our exported files may be named this way:

A00123_0001.tif
A00123_0002.tif
A00123_0003.tif
C72186_0006.tif
D12472_0007.tif
E88822_0004.tif
E88822_0005.tif

In this way, we know that for customer A00123, we need to merge 3 files, for customer E88822, we need to merge 2 files, and so on.

To use MergeTiff, you need to provide at least 1 parameter:

  • the search pattern for the files to process using the -i  parameter e.g.

MergeTiff.exe -i “g:\exported images\*.tif” 

Other parameters supported by MergeTiff:

-o

this is the output folder to store the merged files.  If not provided, the merged files will be stored in the same folder as the source files.  If you want to store the merged files in a different folder, you would need to provide the -o parameter e.g.

MergeTiff.exe -i “g:\exported images\*.tif” -o “g:\exported images\merged\”

-d

this is the delimiter that the source file name uses to separate elements, default value is _

In our example, our file name elements use the underscore character e.g. _.  You might use another symbol e.g.

A00123-0001.tif
A00123-0002.tif
A00123-0003.tif
E88822-0004.tif

In this case, you need to provide the -d parameter and the delimiter character e.g.

MergeTiff.exe -i “g:\exported images\*.tif” -o “g:\exported images\merged\” -d “-“

-g

this is the grouping element index, default value is 1.  In our example, the grouping element is the first element i.e. all the characters before the first delimiter i.e.

A00123
E88822
C72186
D12472
E88822

If instead our file named had been named this way:

scanneddocsA00123_invoice1005_A00123_0001.tif
scanneddocsA00123_invoice1005_A00123_0002.tif
scanneddocsA00123_invoice1006_A00123_0003.tif
scanneddocsC72186_invoice1008_C72186_0006.tif
scanneddocsD12472_invoice2010_D12472_0007.tif

and we still wanted to merge all documents belonging to the same customer, then our grouping element is the 3rd element, and we would need to use the -g parameter e.g.

MergeTiff.exe -i “g:\exported images\*.tif” -o “g:\exported images\merged\” -g 3

-n

this is the naming element index, default value is 1.  Following on from the above example, supposing we merge our files by invoice number instead of customer code, we would need to use both the -g and -n parameters e.g.

MergeTiff.exe -i “g:\exported images\*.tif” -o “g:\exported images\merged\” -g 2 -n 2

-ow

use this parameter to overwrite any existing files of the same name

If you want MergeTiff to overwrite any existing files, use the -ow parameter e.g.

MergeTiff.exe -i “g:\exported images\*.tif” -ow

-r

use this parameter to also process files in the input path subfolders

To process files recursively beneath the input path, use the -r parameter e.g.

MergeTiff.exe -i “g:\exported images\*.tif” -r

You can download MergeTiff from here.

Incorrectly extracted files in Access OLE Export/SQL Blob Export

Access OLE Export / SQL Blob Export may sometimes extract items that appear to be wrong.  For e.g. it might extract an expected PDF file as an image file.  To troubleshoot such issues, we need your help in sending us the data exactly as stored in your database to us for further investigation.

One way to extract the data is to use SQL Image Viewer.  Once installed, connect to the same database you were trying to extract your items from, and run your query to select the wrongly extracted item(s).

Select the item you’re having problems with, right click to bring up the context menu, and select the View as hex option.

SQL Image Viewer will display the selected item in a hex viewer.  Click on the Save button to save the raw data to a file.

and send us that file at support@yohz.com.  Having the raw data to work with will help us immensely to determine why Access OLE Export / SQL Blob Export appears to be extracting your files wrongly.


Naming the exported files in Access OLE Export and SQL Blob Export

When exporting your database blobs to files using Access OLE Export and SQL Blob Export, the default naming convention is the row number and column number (of the blob column).

For example, if your data set contains 10 rows and 2 columns of blobs (say columns 2 and 5), the files will be named in this way:

0001_0002.<file extension>
0001_0005.<file extension>
0002_0002.<file extension>
0002_0005.<file extension>

0010_0002.<file extension>
0010_0005.<file extension>

You can change the naming convention to use values from the exported table or data set (if running a SQL query).  For example, if your table or data set has the following columns:

and you want to name the exported files from the SalesOrderImage column using the SalesOrderID value, you would use the following naming convention:

The exported files will then be named this way:

  • 43659.<file extension>
  • 43660.<file extension>
  • 43661.<file extension>

and so on.

Simply enclose any column values you want to use in angled brackets, as in <SalesOrderID> above.  You can combine multiple columns together, so for e.g. using  <Category>_<SalesOrderID> will name the files

  • Bikes_43659.<file extension>
  • Bikes_43660.<file extension>
  • Components_43661.<file extension>

and so on.

There are also attributes tags you can use as part of the naming convention.  We have already described the <%column%> and <%row%> tags above.  There is also a <%size%> tag, which would return the file size value.  You can freely mix column tags and attribute tags in the naming convention.

Using tags in output folders

You can also use column tags as part of the folder naming convention, if you need to store the files in individual folders or grouped by folders.  For e.g. in this sample data set:

if we wanted to group our exported images by the Category value, we would enter F:\exports\<Category>\ as our output folder naming convention

This will result in the first 2 files stored in the F:\exports\Bikes\ folder, the 3rd file in the F:\exports\Components\ folder, and so on.  You can use multiple column tags in the folder naming convention if required.  Access OLE Export and SQL Blob Export will create the folders if they do not already exist, as long as you have the permissions to create those folders.

OLE-Object types

For files extracted from OLE-Object packages, you have the option of using the original file name:

or a custom name using column and attribute tags, as described above.  If using a custom name, you can use the <%package_file_name%> tag, allowing you to mix column values with the original package file name e.g.


SQL blob to file

This post shows you how to export and extract your SQL blob to file using SQL Blob Export.  You can download a free 14-day trial here.

Start SQL Blob Export, and click on the Export images and files item.

Enter your project details if you plan to reuse the export settings.  Otherwise, you can just accept the default values.

Enter the connection details to connect to your database server.

Select the table you want to export your blobs from.  Tables containing blob columns are highlighted in green.

You can also enter a SQL command to select the blobs you want to export.  We will use the following SQL command to retrieve our blobs.

Now you need to tell SQL Blob Export how to name the exported files.

Enter the folder to store the files in.

You can ignore the OLE Object types section if your blobs are not stored in Microsoft Access OLE Object-type fields.

In the Other types section, enter the naming convention for your files.

We use the value <ProductPhotoID:0000>_<%column%> to name our files.  <ProductPhotoID> is one of the columns we retrieved using our SQL command, and is a number.  The suffix :0000 means we want SQL Blob Export to format the number to 4 digits e.g. 14 is formatted to 0014, 234 is formatted to 0234 etc.

We can use any column names to name our exported file, as long as the column exists in the table we chose to export, or is a column retrieved by our SQL command.

The <%column%> value is a system value indicating the index of the column storing the blob.  Remember that our SQL command selects 2 blob columns (ThumbnailPhoto and LargePhoto), so our naming convention needs to be able to identify from which column the file was extracted from.

Once we have set up our export options, SQL Blob Export will extract the SQL blob to file.

One important thing you should note is that we did not tell SQL Blob Export the type of blob that’s stored in our tableSQL Blob Export can identify the blob type and use the correct file extension accordingly.  It can identify most image formats (jpg, png, tif, bmp, gif, tga, emf, wmf), Office files (doc, docs, xls, xlsx, ppt, pptx), Open Office files, PDFs, and many more.  For a complete list of recognised file types, see here.

Connecting to a Microsoft Access (.accdb) database

If you have problems connecting to a Microsoft Access database with the .accdb extension (using SQL Image Viewer, SQL Blob Export or Access OLE Export) and see this error:

there are a few possibilities this error is being raised.

You can connect to that database using Access on the same machine

If you have Access installed on the machine and can connect to the .accdb file without problems, then it’s possible that you are using Microsoft Office 365.

Microsoft Office 365 runs in a self-contained virtual environment, and 3rd party products do not have access to the necessary library files to connect to the .accdb file.  In this situation, you will need to install the Microsoft Access runtime files.  You have the following options:

There is, however, one caveat. You cannot install Office 365 and the above Redistributable/Runtime files of the same major version together (see here). You will have to install the Redistributable/Runtime files of a lower version than your current Office 365 version.

For example, if you have Office 365 in version 2016 installed, you will have to install the ‘Microsoft Access 2013 Runtime’ or ‘Microsoft Access Database Engine 2010 Redistributable’ and not ‘Microsoft Access 2016 Runtime’.

Another possibility is that you already have the Redistributable/Runtime files installed, but you are currently using the wrong version of SQL Image Viewer/SQL Blob Export/Access OLE Export.  All 3 products come in 32-bit and 64-bit versions, and are installed automatically on your computer.  If you only have the 32-bit Redistributable/Runtime files installed on your machine, you will need to use the 32-bit versions of our products; likewise if you have the 64-bit Redistributable/Runtime files installed.

You have never connected to the Access database on the same machine

To connect to the .accdb file, you will need to install the Microsoft Access Runtime/Redistributable files first.  You have the following options:

Usually, you can just download and install the latest version (Microsoft Access 2016 Runtime) to connect to your database successfully.


Merge multiple blobs into a single file

Some applications break up a file into smaller chunks before storing them into a table.  So for e.g. a 200 Kb file might be stored in 4 rows, each storing a maximum of 60 Kb, in the following layout:

ID  fileID  sequence  blobdata
1     201       1              (60 Kb)
2     201       2              (60 Kb)
3     201       3              (60 Kb)
4     201       4              (20 Kb)

When you export the blobs using SQL Image Viewer/Access OLE Export/SQL Blob Export, 4 files will be created using the default settings.  This is because those products treat each row as containing a separate file.

To export the 4 rows as a single file, you need to first select the ‘append to file‘ option for existing files.

This will cause the blob data to be appended to any existing file of the same name.

Next, you need to ensure that the 4 rows will all export to the same file name.  In our example above, we might use the fileID value as the name of the file, so all 4 rows will export to the same file.

Then, your SQL to export the blobs need to sort the rows so that the blobs get appended to the file in the correct sequence.  In our example, this means we need to sort the rows by the sequence value e.g.

SELECT fileID, blobdata FROM mytable ORDER BY sequence

Lastly, we need to ensure that in our output folder, there are no existing files of the same name, otherwise our blobs will get appended to those files.

That’s basically all you need to do to ensure that the blobs are exported in the correct sequence to a valid file.  In summary:

  • select the append to file option for existing files
  • use a naming convention that ensures the related blobs use the same file name
  • sort the rows in the correct sequence so that the blobs are appended in the correct order
  • before the export, ensure that no files of the same name are already in the output folder

Why is SQL Image Viewer not displaying details of my blobs

If you are using a third-party application to upload images and/or files into your database, and SQL Image Viewer cannot identify the image or file type, then there’s a high probability that your application has modified the data.

Examples of such applications include the MAZE School Information System and the Financial Edge system by Blackbaud.  We had a user who had the following data stored in their Financial Edge database.  In SQL Image Viewer, the following is displayed:

SQL Image Viewer is unable to identify the data that’s stored in the fields (they’re actually PDF files).  If we look at the data using the SQL Image Viewer hex viewer:

we can see that the OLE wrapper (or the original source data) begins at offset 32.  This means that Financial Edge has added 32 bytes of data to the beginning of the original file, which is why SQL Image Viewer does not recognize the file format.

To identify and extract the data correctly, we need to skip the first 32 bytes, so that we only retrieve the original source file.  In SQL Server, we can use the following syntax:

Now, SQL Image Viewer is able to identify the file type correctly.

Ok, admittedly not everybody knows what an OLE wrapper looks like, or any of the other file headers, which is why if SQL Image Viewer cannot identify your blobs, please send us a couple of samples to analyze.  We need the data exactly as stored in your database, so to extract the data, please perform the following steps and send us the resulting files.

Select the column containing the unidentified blob data.

Right click the mouse button to bring up the context menu, and select the ‘Save item’ option.

Enter a file name, save the blob data, and send the file to us at support@yohz.com.

The same issue applies to Access OLE Export and SQL Blob Export too.  If these products cannot identify the file type because the original files have an additional header, they will be exported with a .bin extension.  Please send us a couple of those .bin files to analyze, or you can also use SQL Image Viewer to retrieve the data and follow the steps above to send us the samples.