CONTACT US
568-3-53 (3rd Floor) Kompleks Mutiara 3 1/2 Mile, Jalan Ipoh 51200 Kuala Lumpur, Malaysia 6012-9714904 support@yohz.com https://www.yohz.com https://www.dicomsearch.com https://yohzapps.yohz.com

Copyright © 2005 - 2021 Yohz Software, a division of Yohz Ventures Sdn Bhd. ALL RIGHTS RESERVED.
All trademarks or registered trademarks are property of their respective owners
4.4
Exporting the image thumbnails and DICOM tag values to Excel (layout 2)
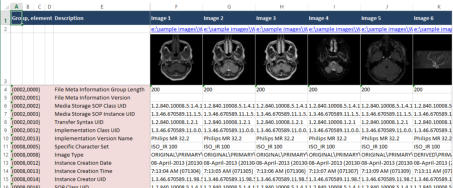
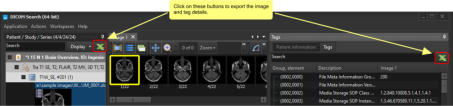
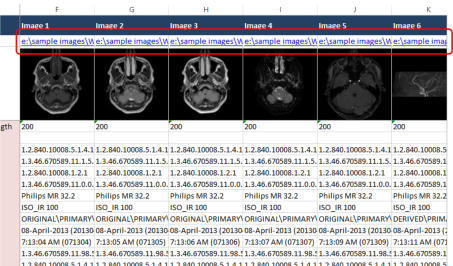
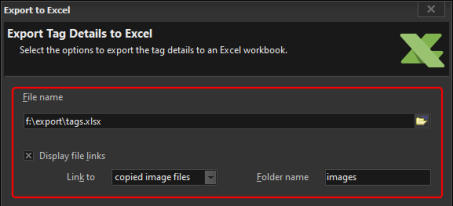
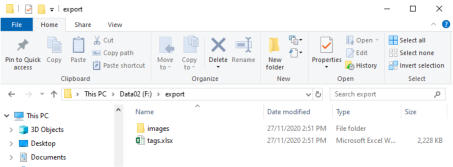
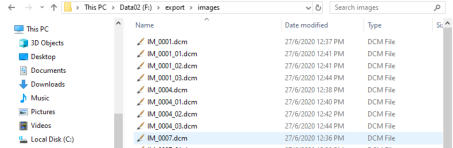
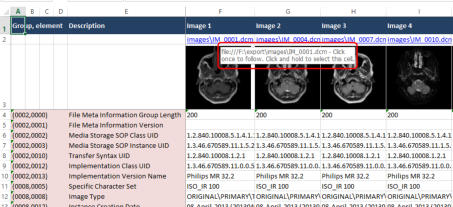
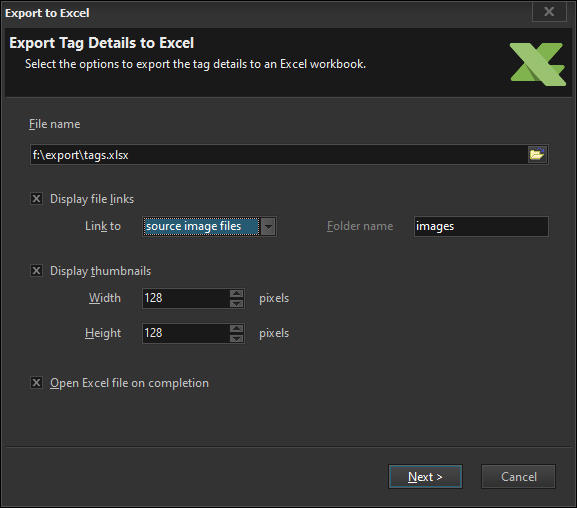
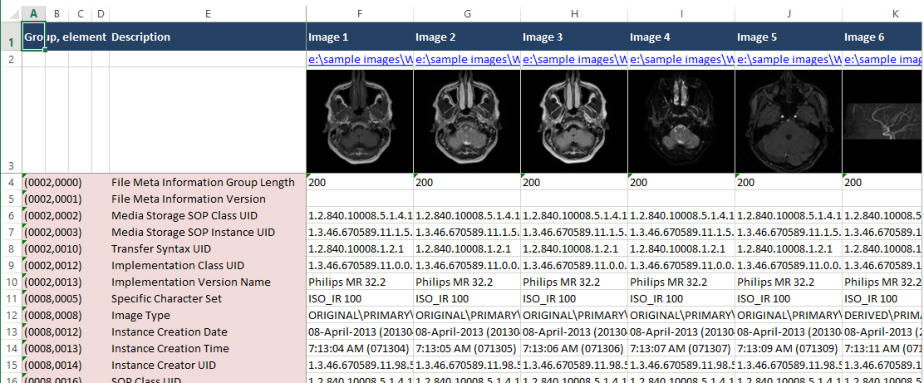
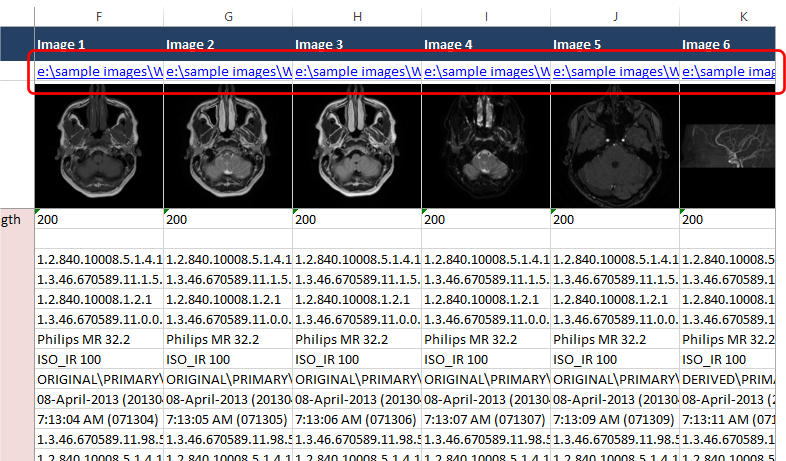
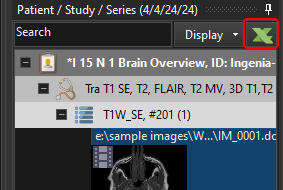
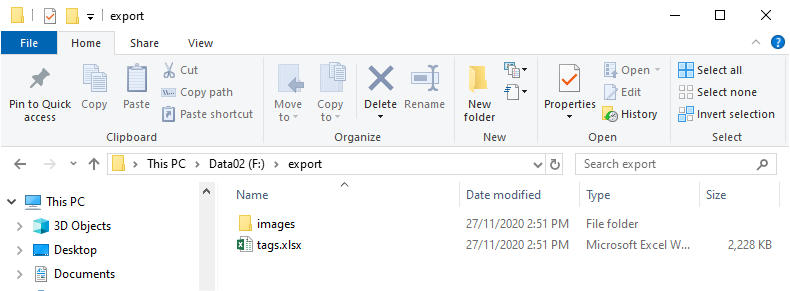
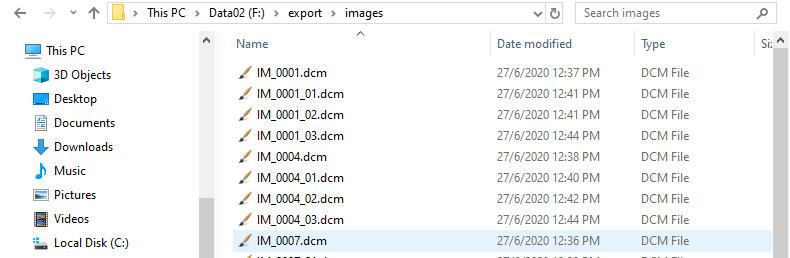
In this exercise, we will export the search results into an Excel spreadsheet, but with the columns and rows reversed compared to the first layout. Each row represents a different DICOM tag, and each column represents a different image from your search results. To start the export process, click on either of the 2 export buttons when in the patient/study/series format. If you click on the export button in the File browser, all the images will be exported. If you click on the export button in the Tag viewer, then only the images that are currently displayed will be exported. The Export to Excel window contains the various options you can customize. The option to display file links determine if this row is displayed in your Excel worksheet. If you choose to display the links, you can then choose what type of link to display. If we choose the source image files option, then the links will link to the source images. If we choose the copied image files option, DICOM Search will copy the image files to a subfolder beneath the folder where our Excel file is stored, and the links will link to those copied files. Let’s try this. Click on the Export tags to Excel button on the File browser toolbar. In the options, enter a name for our Excel file, and choose the source image files option. In this example, we will create an Excel file named tags.xlsx in the f:\export\ folder, and our images will be stored in the images subfolder. Proceed with the export. Once completed, we can see our Excel file in the folder, with the created images subfolder. We will also find the copies imags in the images subfolder. In our Excel file, the links link to the copied image files, and not to the source image files. Now, if you wanted to share your Excel file and images, you just have to copy the Excel file together with the images subfolder.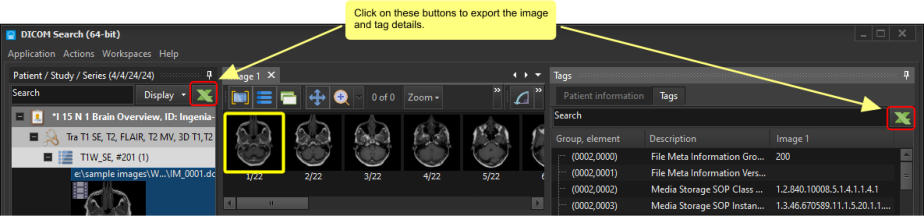


CONTACT US
568-3-53 (3rd Floor) Kompleks Mutiara 3 1/2 Mile, Jalan Ipoh 51200 Kuala Lumpur, Malaysia 6012-9714904 support@yohz.com https://www.yohz.com https://www.dicomsearch.com https://yohzapps.yohz.com
Copyright © 2005 - 2020 Yohz Software,
a division of Yohz Ventures Sdn Bhd.
ALL RIGHTS RESERVED.
All trademarks or registered trademarks are property of their respective owners
4.4
Exporting the image thumbnails and
DICOM tag values to Excel (layout 2)
In this exercise, we will export the search results into an Excel spreadsheet, but with the columns and rows reversed compared to the first layout. Each row represents a different DICOM tag, and each column represents a different image from your search results. To start the export process, click on either of the 2 export buttons when in the patient/study/series format. If you click on the export button in the File browser, all the images will be exported. If you click on the export button in the Tag viewer, then only the images that are currently displayed will be exported. The Export to Excel window contains the various options you can customize. The option to display file links determine if this row is displayed in your Excel worksheet. If you choose to display the links, you can then choose what type of link to display. If we choose the source image files option, then the links will link to the source images. If we choose the copied image files option, DICOM Search will copy the image files to a subfolder beneath the folder where our Excel file is stored, and the links will link to those copied files. Let’s try this. Click on the Export tags to Excel button on the File browser toolbar. In the options, enter a name for our Excel file, and choose the source image files option. In this example, we will create an Excel file named tags.xlsx in the f:\export\ folder, and our images will be stored in the images subfolder. Proceed with the export. Once completed, we can see our Excel file in the folder, with the created images subfolder. We will also find the copies imags in the images subfolder. In our Excel file, the links link to the copied image files, and not to the source image files. Now, if you wanted to share your Excel file and images, you just have to copy the Excel file together with the images subfolder.