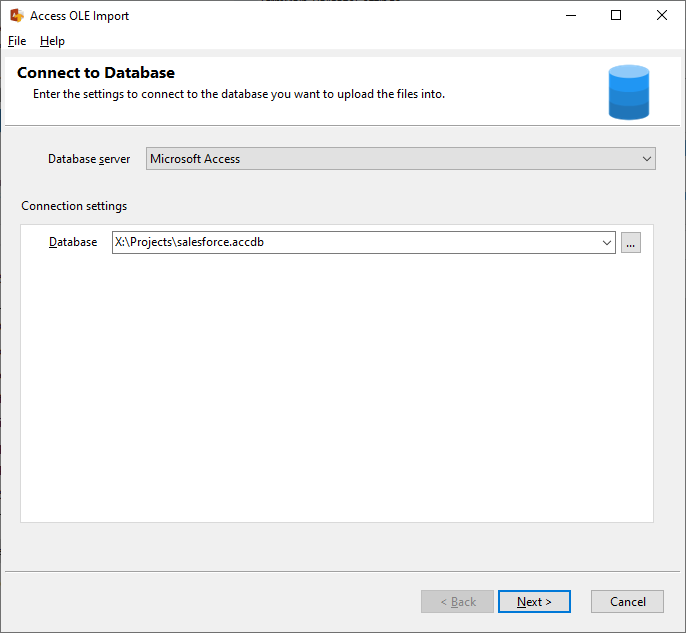
Connecting to a database
Enter the connection details to connect to your database.
Target table and data file
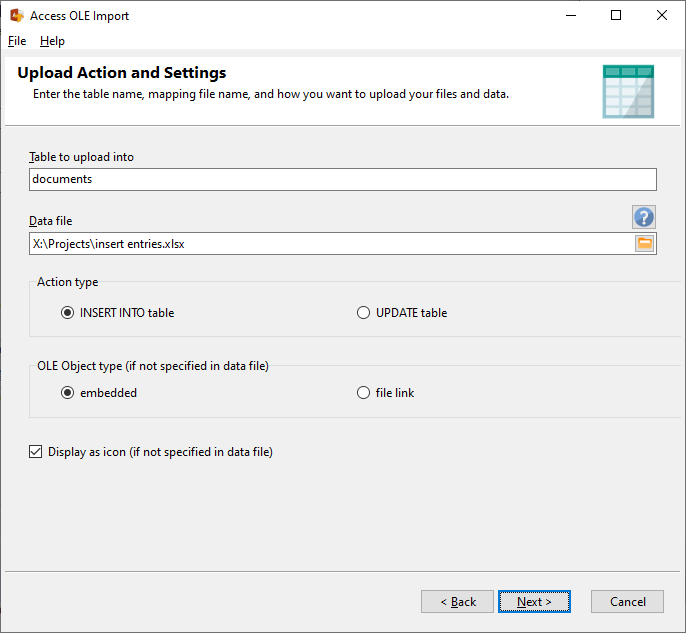
Enter the table name, and the data file you want to use to upload your files and data.
Select which type of operation you want to use - INSERT or UPDATE. If you choose the UPDATE option, ensure that you have defined the key fields and values in the data file.
You can also choose to create the file object as an embedded object, or as a file link. If you choose the file link, you need to ensure that users of that database can access the path where the file is stored in.
Select the Display as icon option if you want Access to display the embedded object or file as an icon, instead of an image of the file contents.
Additional file name columns
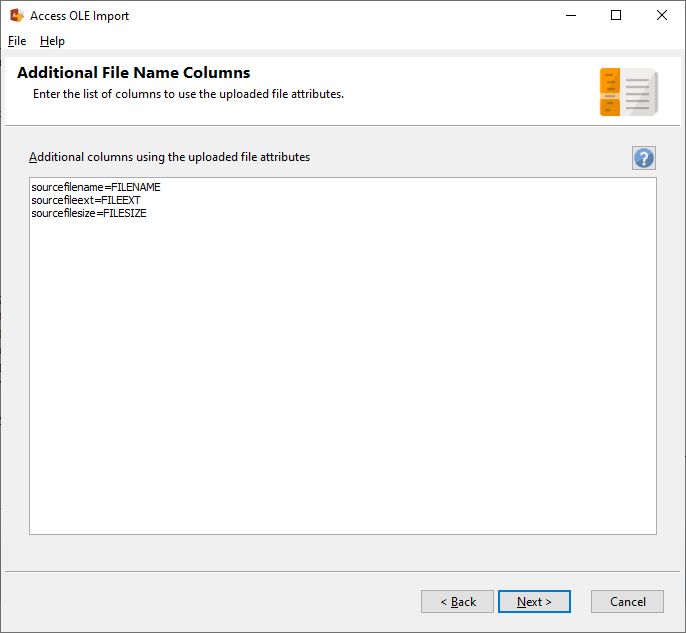
If you are uploading files, you can also upload additional values derived from the file names. In the example above, our table has 3 fields (sourcefilename, sourcefileext, and sourcefilesize) which will be updated with the source file name, file extension and file size values respectively.
See this topic for more details.
Data file errors
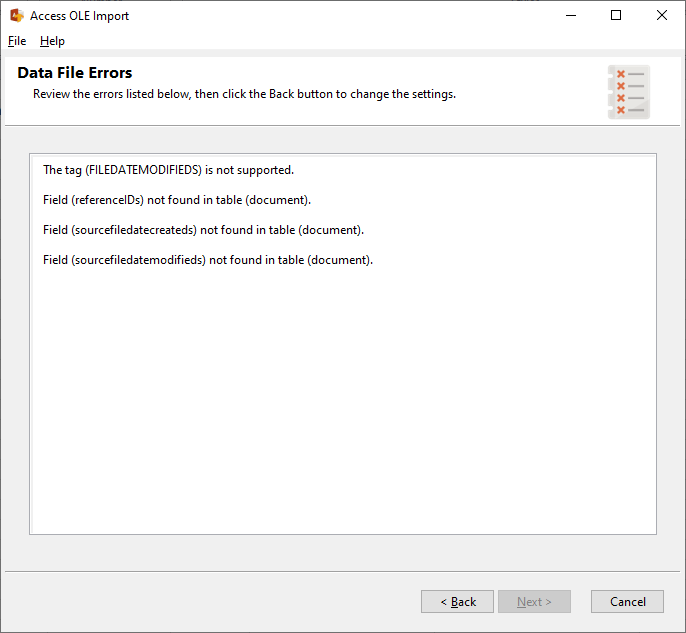
On this page, Access OLE Import will list down all the errors it finds in your settings and data file. Review the errors and make the necessary changes to your data file.
If you need to change the upload settings, click on the Back button.
If no errors are found, Access OLE Import will start uploading your files and data.