When you first open Easy DICOM Search, you will see 3 windows - an Explorer window on the left, a Search conditions window on the top of the main area, and a Results window on the bottom of the main area.

The Explorer window
The Explorer window is where you tell Easy DICOM Search which folders to search for your DICOM images. In the example below, we have selected 2 folders to search in:

You can select as many folders as you require. Each selected folder will be listed in the Search conditions window

You can also enter the folder names directly in the Folders listing.
Search parameters
The Search parameters window is where you enter the DICOM tag attributes of the images you want to search for. See this topic on how to write the search conditions.
The Folders listing displays the folders you have selected to search in. You can enter additional folders to search here.

The File extensions listing displays all the file extensions that Easy DICOM Search will use when searching your DICOM files. By default, Easy DICOM Search will search for files with the .dcm and .dicom extensions. You can enter additional file extensions if required.

The Common tags listing displays common DICOM tag values and description. This is to help you look up the tag values when you want to use them as part of your search conditions. Double click on the tag you want to use to add it to your search condition. You can also use Tags Assist to help you write your search condition.

You can filter this list by entering a value in the Filter area e.g.

Results window
The Results window is where your search results are displayed.
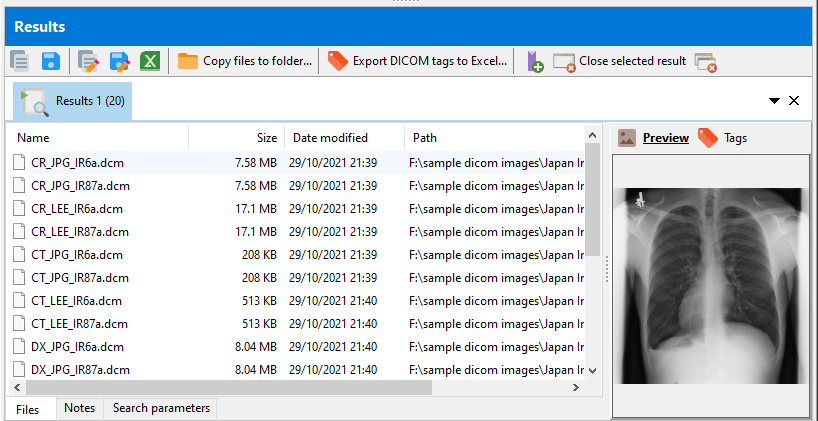
When you perform multiple searches, each search result is displayed in a separate window. You can select each result by clicking on the tab.

In the example above, we ran 2 searches. The first search returned 20 files, and the second search returned 48 files.
See this topic on what you can do with the search results.