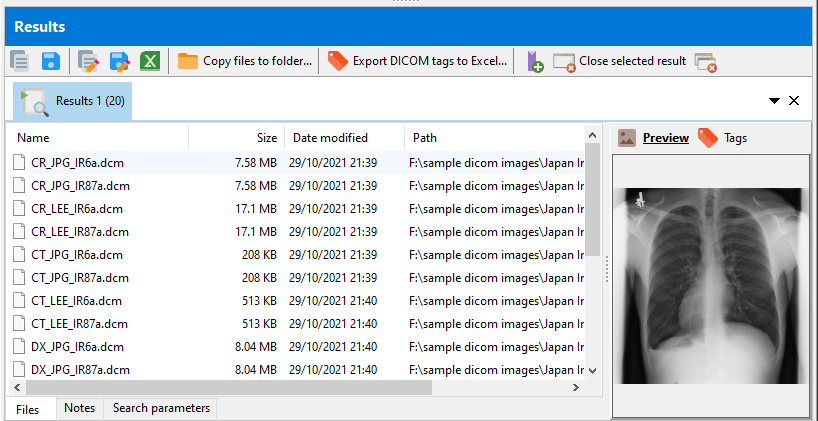
Your search results are displayed on the bottom of the window. A preview of the selected DICOM image is displayed on the right, and you can also view the DICOM tag values for that image.
Displaying DICOM tag values in the search results
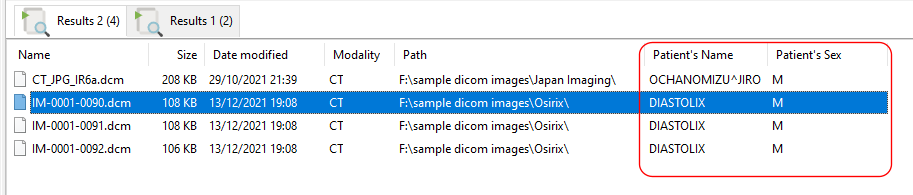
Note that the displayed columns include any DICOM tags used in your search condition.
Sometimes, the search engine does not evaluate all the search conditions, resulting in missing columns. Or you may want to display additional columns for other DICOM tags. To do that, click on the Add columns to search results button.

In the Search Results Columns window, enter the DICOM tags you want to display. You can also double-click on an item from the listing on the right to add it to the list of displayed columns.
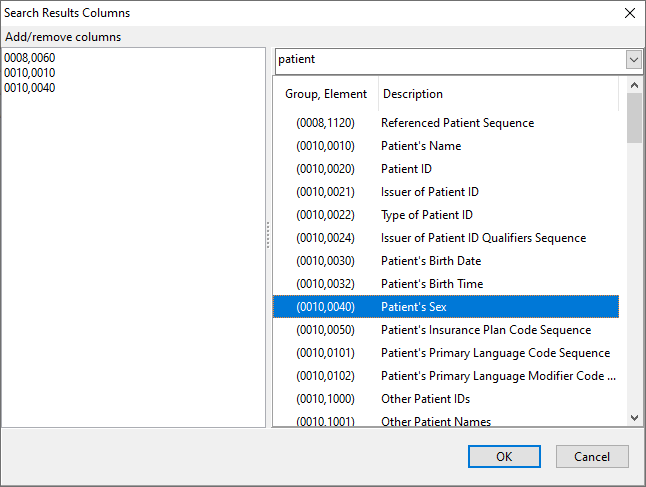
Click on the OK button to apply the changes. The additional columns are now displayed in the search results listing.
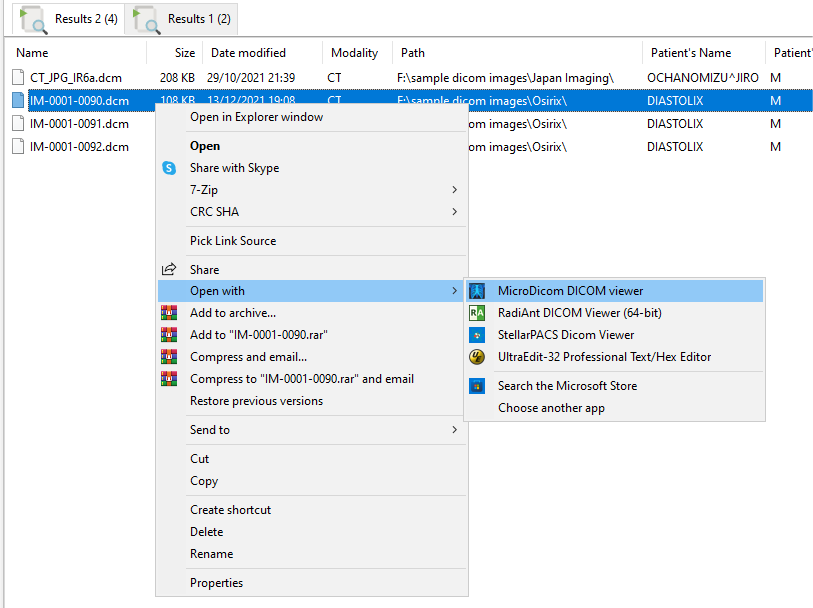
Opening the DICOM images
Double-click on any of the images to open the DICOM file using the registered DICOM viewer on your computer. You can also right-click on the file to bring up the Explorer context menu.
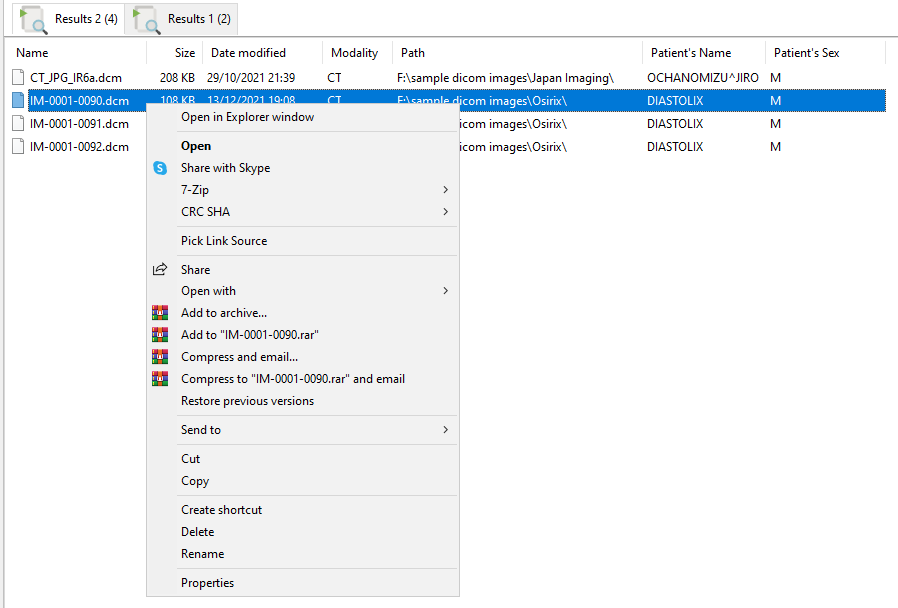
The Open with option should then display the list of registered applications on your computer that can open DICOM files.
Exporting the file list
You can export the list of files in the search results by clicking on these buttons. The first button copies the file list to the Windows clipboard, and the second button lets you save the file list to a text file.

Exporting the file list details
You can export the file list details, as displayed in the search results, by clicking on these buttons. The first button copies the file list details to the Windows clipboard, the second button lets you save the file list details to a text file, and the third button saves the file list details to an Excel worksheet.

Copying the files to another folder
You can also copy the files in the search results to another folder. Click on the Copy files to folder... button, then select the folder you want to copy to.

In the Select Path Level window, the source files are displayed, together with the path they will be copied to.
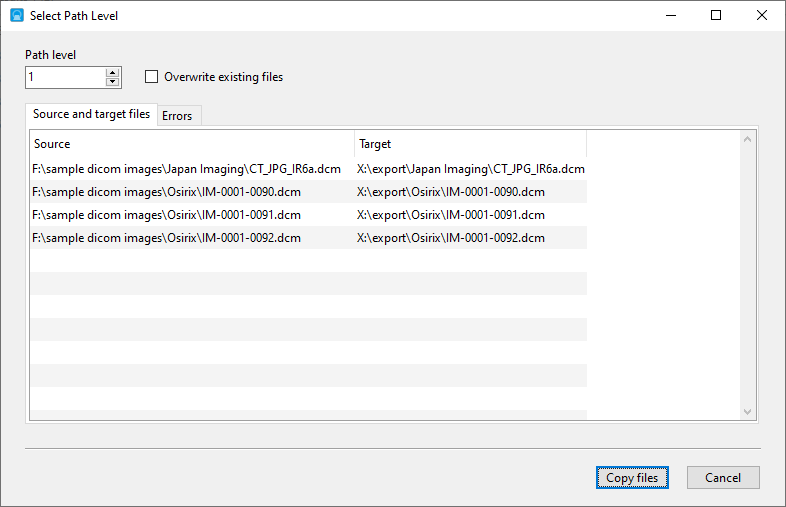
By adjusting the Path level value, you can change where the files are copied to. In the above example, we select a path level of 1. This means we use the last path value from the source file and add it to our export folder.
When we select a path level value of 2, we use the last 2 path values from the source file names.
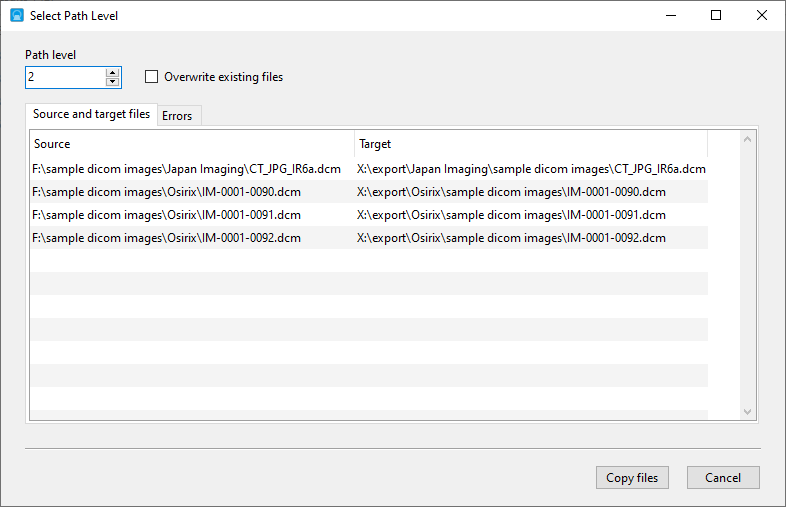
Click on the Copy files button to start the copying process once you have set up the target file names to your requirements.
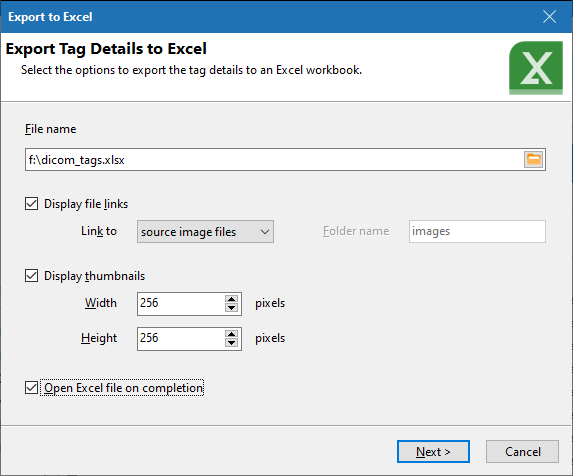
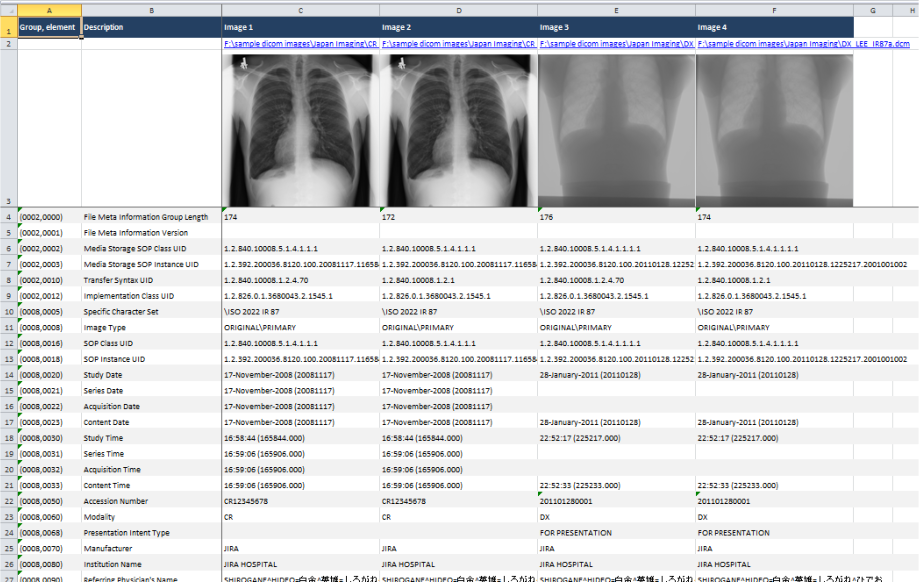
Exporting the image tags
You can export all the DICOM tags from the files in your search results to an Excel worksheet. You can also include a thumbnail of the image in the worksheet
To start the export process, click on the Export DICOM tags to Excel... button.

In the Export Tag Details to Excel window, select the options for your Excel worksheet.