Information profiles help you display the DICOM tag values directly in your image.

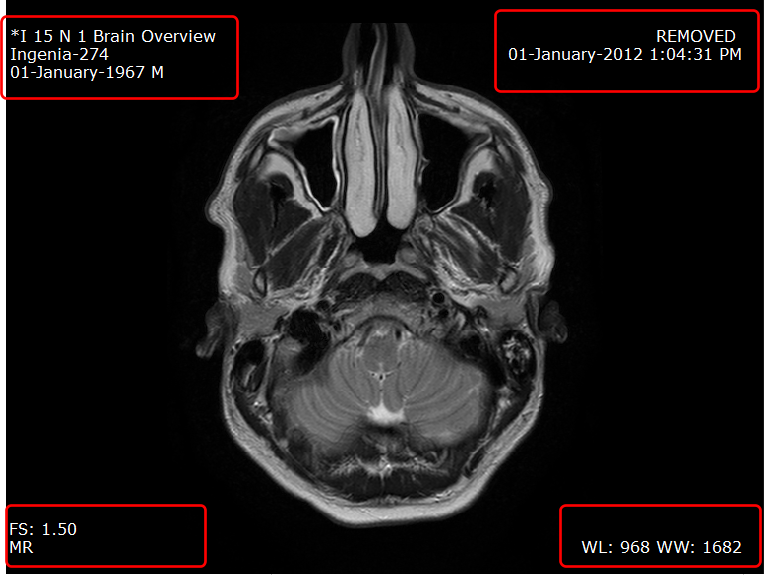
You can set up as many profiles as you require. Information profiles are used to display tag details on your image in the DICOM viewer e.g.
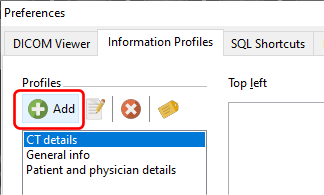
To create a new information profile, click on the Add profile button.
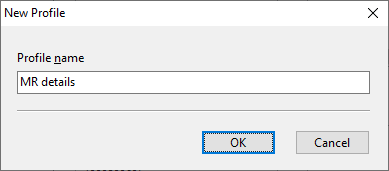
Enter a name for the profile.
Next, define the tags you want to display in each of the 4 corners. You can click on the Display tags button to help you find the group and element codes for the tags you want to display.

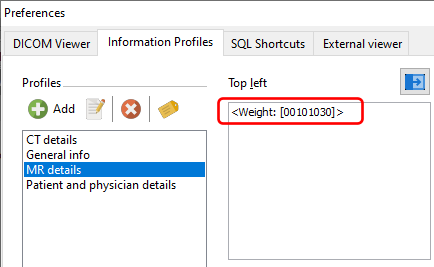
To define a line to display, you need to first enclose the text in angled brackets followed by the tag value. For e.g. we want to display the patient weight in the top left area. In the Tags and Fields window, we can see that the patient weight tag code is 00101030.

In the top left input area, we will need to enter <[00101030]> i.e.

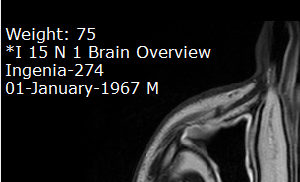
In the DICOM Viewer, the weight (if available) is then displayed in the top left area of the image.

If we want to add some context to the value, we write the text before the tag value, after the first angled bracket e.g.
resulting in this:

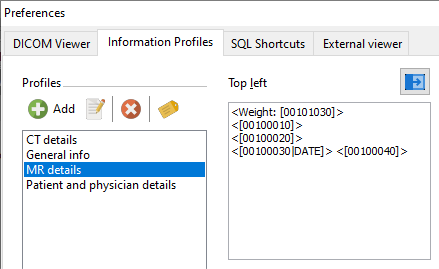
You can add as many lines of text as you want to display multiple tags e.g.
Using the information profiles
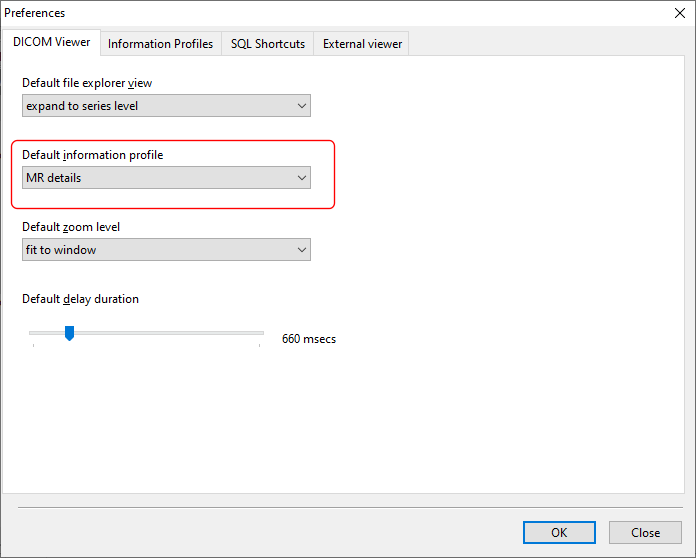
You can select the default information profile to display in the DICOM viewer preferences page.
To change the information profile in the DICOM viewer, right click on the image and select the Information profile item. The submenu displays the list of available information profiles you can use.
