When exporting your images and files, you can also choose to export images and binary data. To do this, first select the .
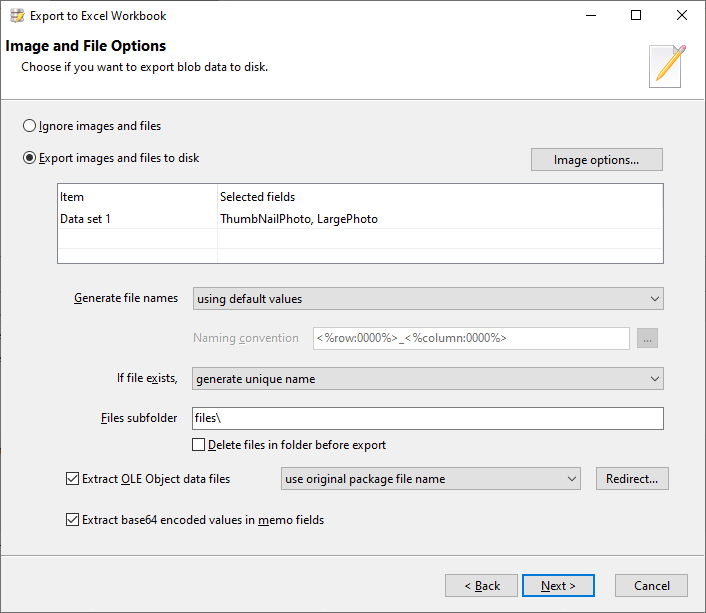
For each data set that you are exporting, you can specify the fields that you want to store to disk, and display in Excel. By default, blob fields will be automatically selected for you. You can also choose to export other fields that may contain HTML text, XML data, etc.
For each image or file that is exported, you can specify the naming convention to use. There are 3 options:

using default values |
The file is named using the row number and column number |
using values from the previous column |
The file is named using the value from the previous column. This is useful when you have a field that stores the file name, and you can use that field value to name the exported file. |
custom naming convention |
The file is named using a naming convention you define. This allows you to define a name that uses values from whichever fields you require, and also use the row index, column index, and data size system values.
|
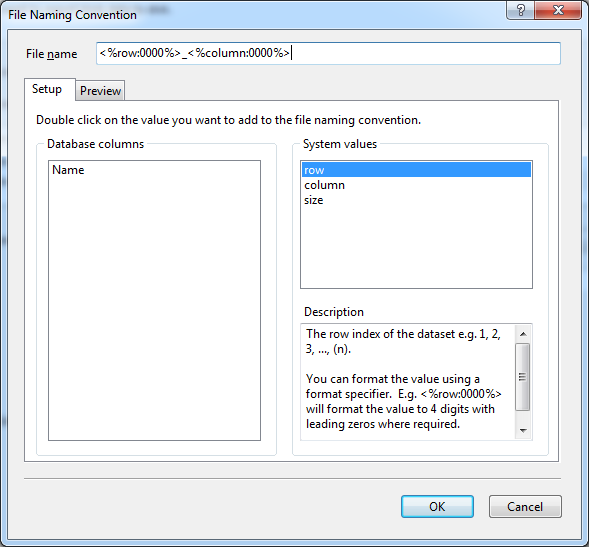
For more examples on how you can name your files, see this topic.
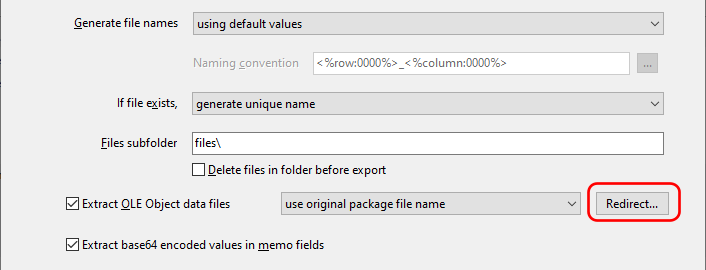
Choose the action to take when the file already exists on disk. You can overwrite the existing file, or generate a unique file name instead.

Enter the name of the sub-folder to store the files in. If no folder name is entered, the exported files will be stored in the same folder as the text file(s) or Excel workbook. You can also speed up the export process by choosing to delete all existing files in the sub-folder prior to the export process, because SQL Image Viewer does not then need to check if the files already exist prior to creating them.

If you have data stored in OLE Object fields, you can also export them to disk by selecting the option.
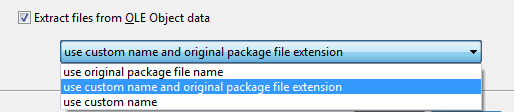
If packages are stored in those fields, you can use the original package file names to name the exported files. You can also choose to use your custom naming convention, but use the original package file extension, or you can choose to use just the custom naming convention.
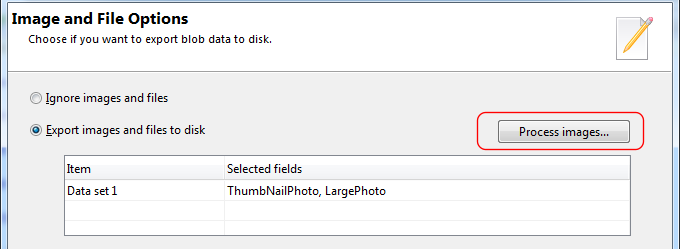
To apply effects to images before exporting them to disk or embed in Excel, click on the Process images... button. You can then apply one or more effects to your exported images.
Redirecting OLE-Object linked files
For linked OLE-Object files, you can redirect SQL Image Viewer to alternate folders to look for the files if the original folders no longer exist or are not accessible. Click on the Redirect button to open the Redirect window, where you can map old paths to new paths.