In Easy Explorer 3, we introduced an advanced search option that allows you to search for files based on attributes other than its name. To use the advanced search function, click on the Advanced Search button on the bottom of the explorer window:

This brings up the Advanced Search window, where you enter your search criteria.
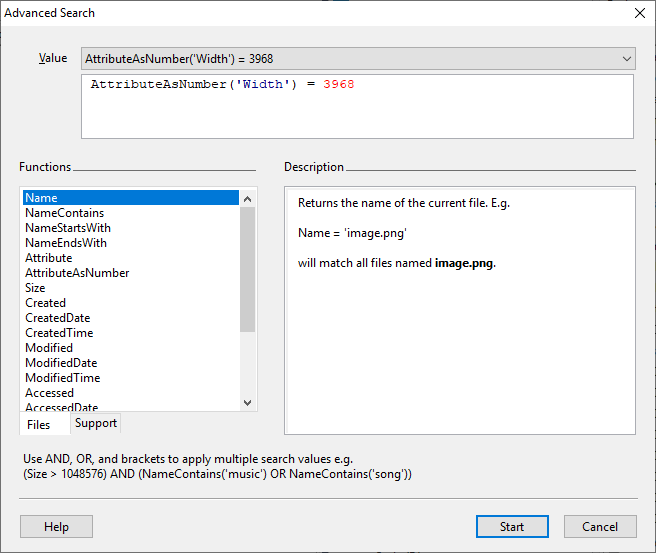
On the left panel, a list of all the available file functions are displayed e.g. Name, Size, Created, Accessed, etc. Clicking on any of the items will bring up the description on how to use that function. There is also a list of support functions that’s required when working with dates, time, and text values.
The basic rule is that you use a single function like this e.g. search only for files smaller than 1024 bytes:
Size < 1024
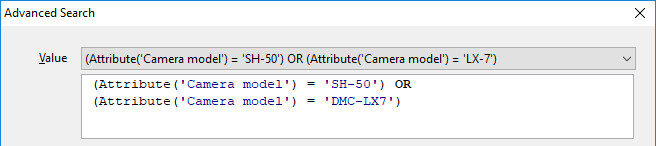
You can combine multiple search criteria using AND and OR, but you must use brackets to group the criteria e.g. search only for files smaller than 1024 bytes or the name contains the word ‘finance’:
(Size < 1024) OR (NameContains(‘finance’))
There is no limit to the number of criteria you use, but the important thing is to use the brackets to group the criteria correctly e.g.
( (Size < 1024) OR (NameContains(‘finance’) OR NameContains(‘production’)) ) AND (Modified > EncodeDate(2019, 1, 7))
will (search for files smaller than 1024 bytes OR (the name contains the word ‘finance’ or ‘production’)), AND after all that, the file must have been modified after July 1, 2019.
Extended attributes
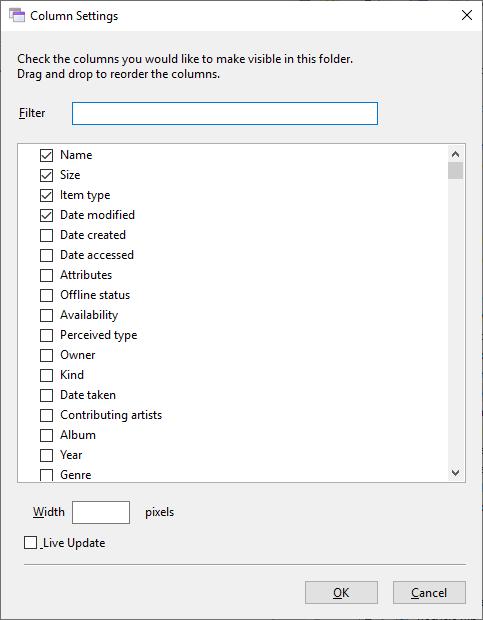
In addition to the normal file properties, you can also search based on the extended attributes. To see which extended attributes are available on your system, right click on the column header in the explorer window to bring up the list of available columns:
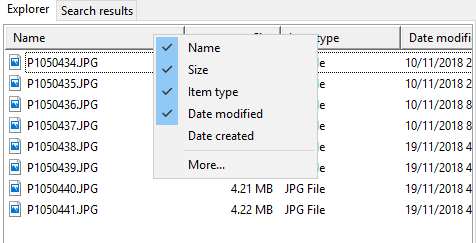
and click on the More… item. The list of extended attributes are then displayed.
To search an extended attribute, use the Attribute function e.g.
Attribute(‘Width’)
returns the Width attribute (if available) of the file. So if the file is an image file, a value will be returned. On our system, the Width attribute is displayed with a pixels suffix i.e.
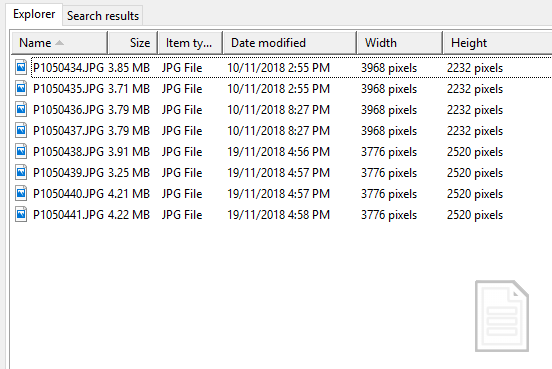
So if we wanted to search for image files with a width of 3968 pixels, we would need to use this search criteria:
Attribute(‘Width’) = ‘3968 pixels’
We can also return the attribute as a number using the AttributeAsNumber function e.g.
AttributeAsNumber(‘Width’)
This function attempts to return the attribute’s text value (in this case ‘3968 pixels’) as a numerical value (3968). If the attribute value cannot be converted to a number, a value of 0 is returned.
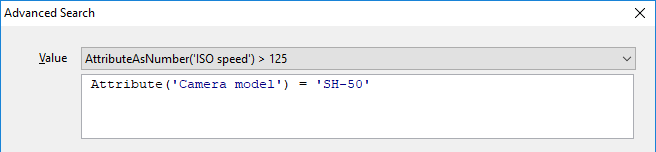
Now that we can get the width attribute as a number, we can easily apply range checks to it e.g.
AttributeAsNumber(‘Width’) > 3776
(AttributeAsNumber(‘Width’) > 3776) OR (AttributeAsNumber(‘Width’) < 1024)
(AttributeAsNumber(‘Width’) > 3776) AND (AttributeAsNumber(‘Height’) > 2048)
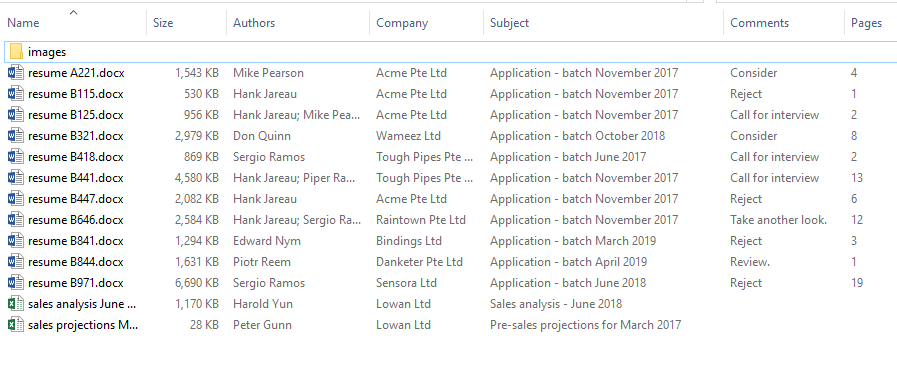
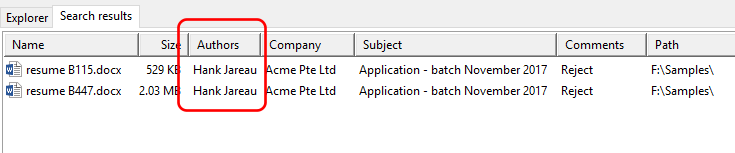
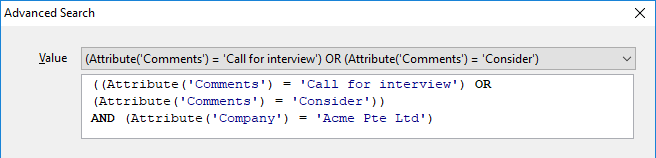
Extended attributes allow you to perform some very advanced searches. For example, say we have the following Excel files:
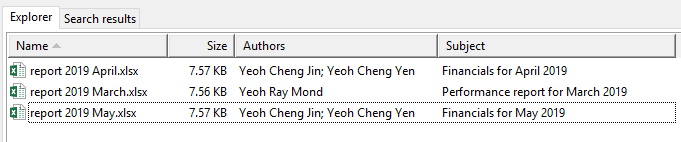
We can search on the Authors and Subject attributes easily in Easy Explorer. E.g.
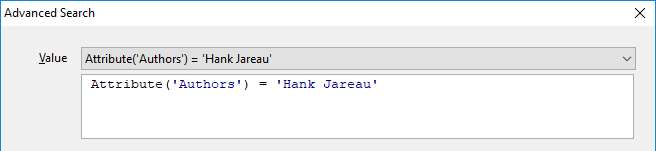
Attribute(‘Authors’) = ‘Yeoh Ray Mond’
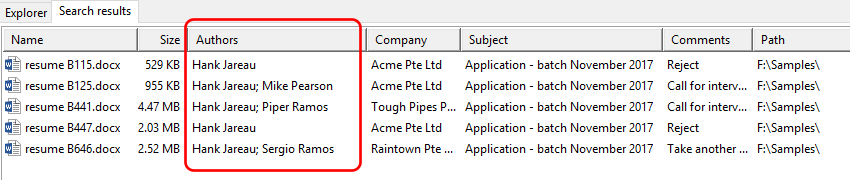
will return all files created by ‘Yeoh Ray Mond’. If we want to search for all files containing the word ‘Financials‘ in its subject, we will need to use the TextContains function in addition to the Attribute function. The Attribute function returns the full value of the specified attribute, so for the first file, it will return ‘Financials for April 2019’. We could write the search criteria like so:
Attribute(‘Subject’) = ‘Financials for April 2019’
but it will limit our search to only the first file. In this case, we want to return the third file too. To do that, we use the TextContains function e.g.
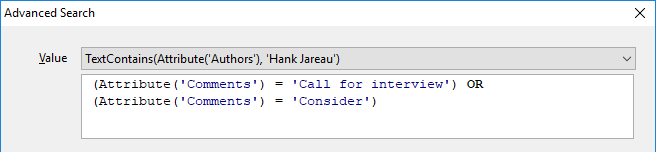
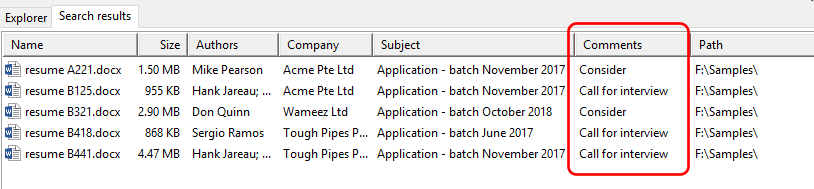
TextContains(Attribute(‘Subject’), ‘Financials’)
TextContains takes 3 parameters. The first parameter is the value to search in. In this case, it will be the value of the Subject attribute. The second parameter is the value to search for, in this case the word ‘Financials’. The third optional parameter is to indicate if the search is case-sensitive. The default value is false, so you could write the search criteria in any of these ways:
TextContains(Attribute(‘Subject’), ‘Financials’)
TextContains(Attribute(‘Subject’), ‘financials’)
TextContains(Attribute(‘Subject’), ‘finanCIALS’)
To perform a case sensitive search, pass TRUE in the third parameter e.g.
TextContains(Attribute(‘Subject’), ‘Financials’, TRUE)
There are also 2 additional text functions, TextStartsWith and TextEndsWith, that checks if the text starts or ends with a specific value respectively, and accepts the same parameters as TextContains e.g.
TextStartsWith(Attribute(‘Subject’), ‘Financials’)
TextStartsWith(Attribute(‘Subject’), ‘Financials’, TRUE)
TextEndsWith(Attribute(‘Subject’), ‘2019’)
To search for attributes with blank values, do a comparison with an emtpy value e.g.
Attribute(‘Subject’) = ”
Conversely, to search for attributes with values:
Attribute(‘Subject’) <> ”
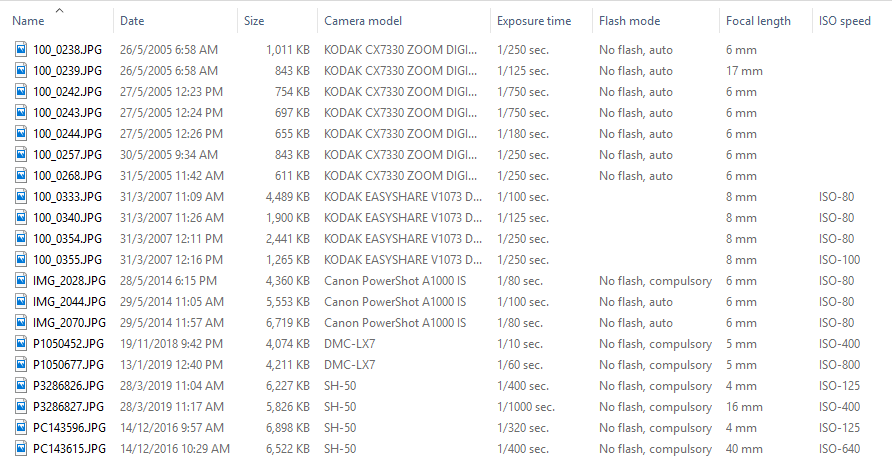
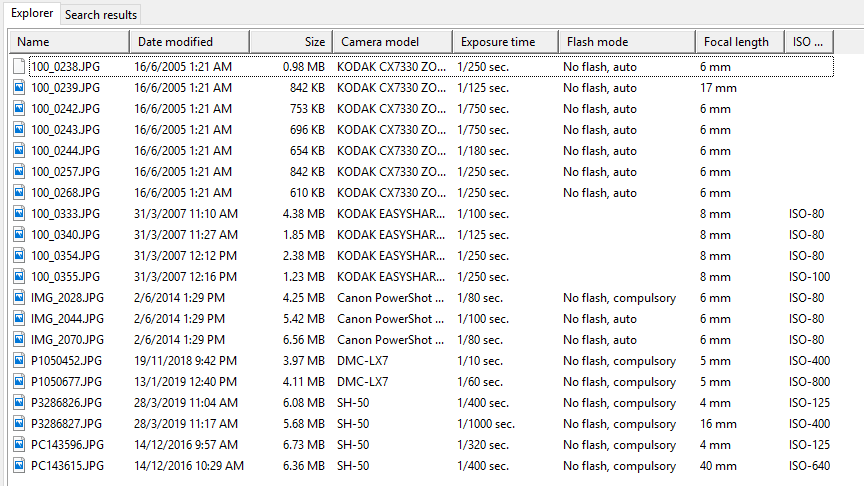
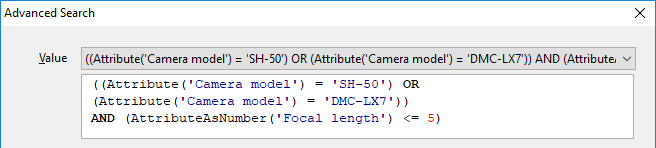
The ability to search on extended attributes opens up a lot of possibilities:
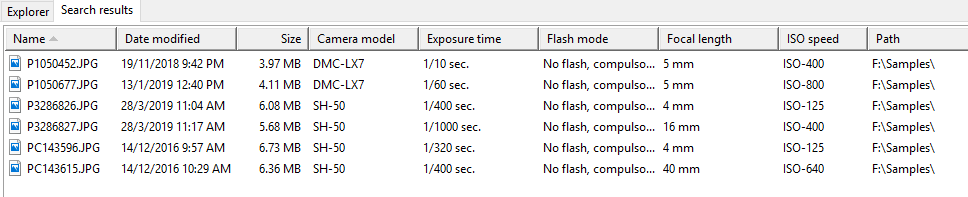
- For photos, you can search on camera attributes like exposure time, focal length, ISO speed, etc.
- For Office files, you can search on document attributes like authors, manager, subject, comments, etc.
- For multimedia files, you can search on attributes like bitrate, genre, length, etc.
- For images, you can search on image attributes like width, height, and bit depth.
If you encounter any issues using the search function on extended attributes, please do drop us a line at support@yohz.com.
Download a FREE 14-day trial now and start searching for your files using extended attributes the easy way.