Monthly Archives: July 2020

DICOM Search – querying the database (preview 2)

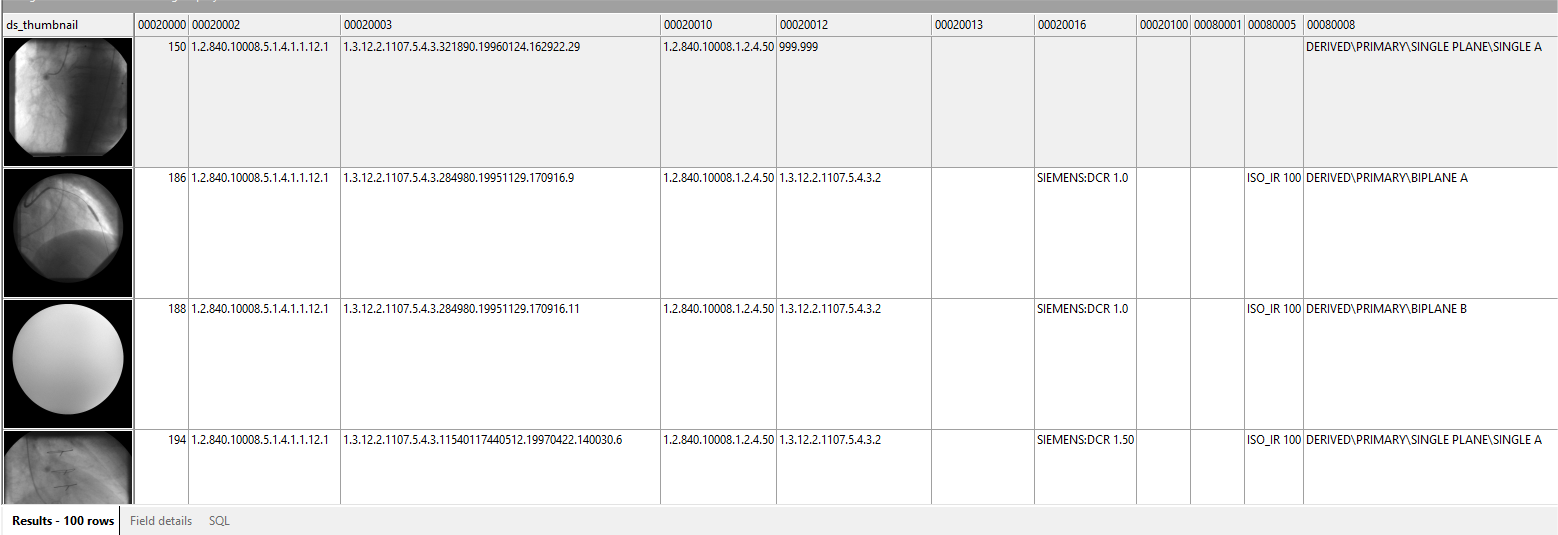
Once DICOM Search has indexed the DICOM tags in your images, you can run queries against the tags table.  Selecting everything from the tags table, while possible, isn’t very useful and is very slow.

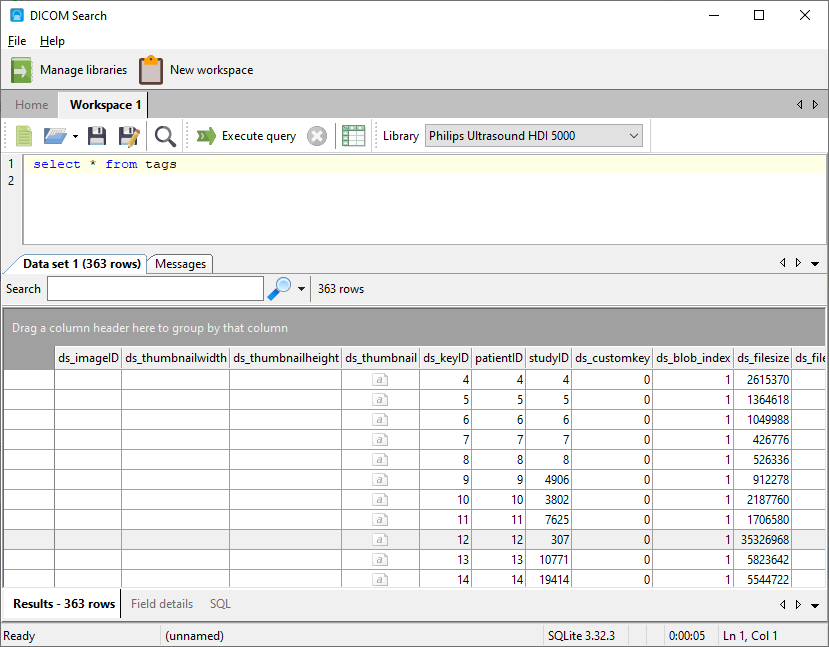
The reason is because there are over 2800 fields, and DICOM Search will struggle to maintain and display that many columns.  Thus, it is recommended that you select only the fields you are interested in.

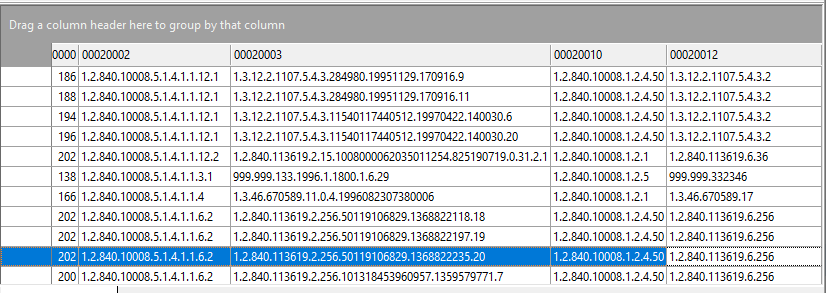
You can quickly see which fields are available in your database by pressing F2 when in the SQL editor to bring up the Tags and Fields window.

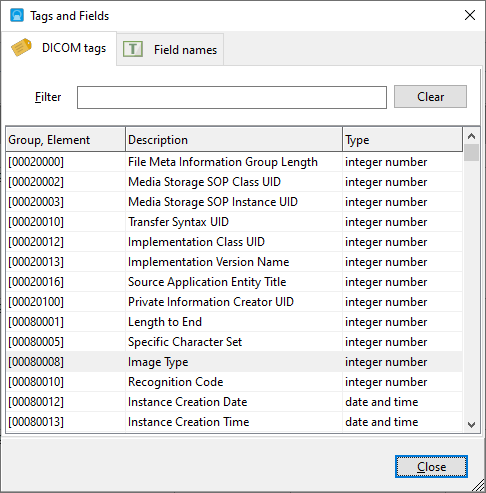
Clicking on any of the tag values will add that value to the SQL editor area, so you do not need to manually enter the tag name.  In addition to the DICOM tags, there are also additional fields that DICOM Search populates in the tags table, as listed in the Field names tab.

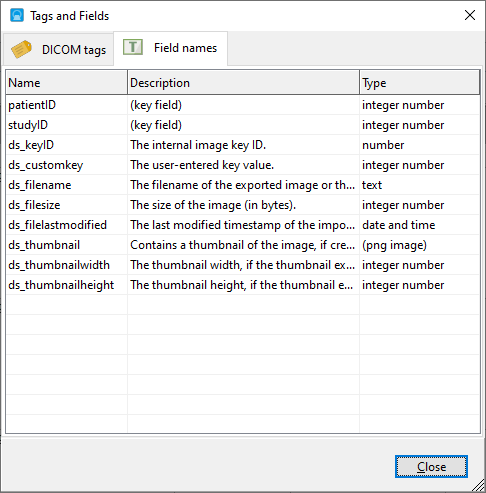
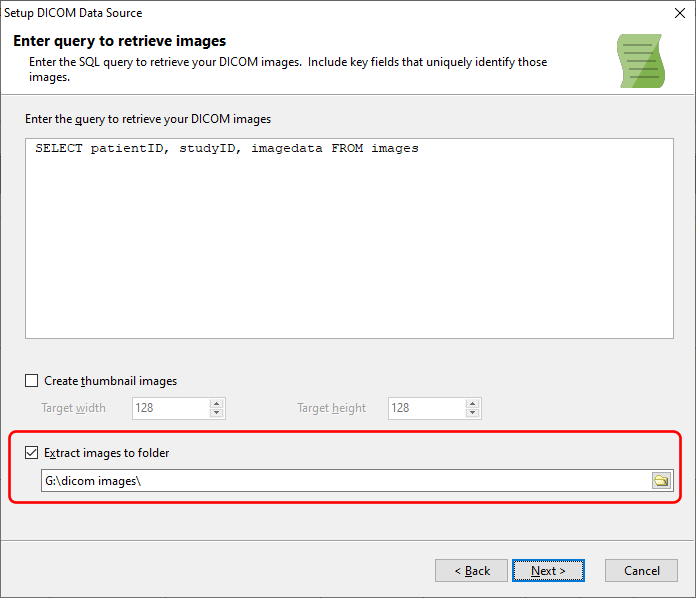
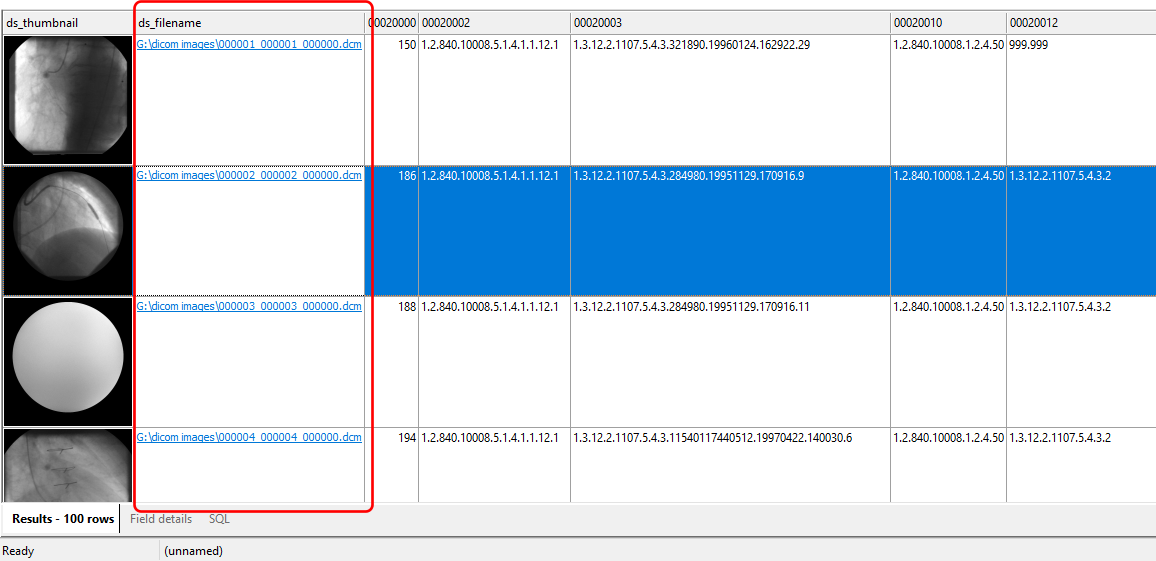
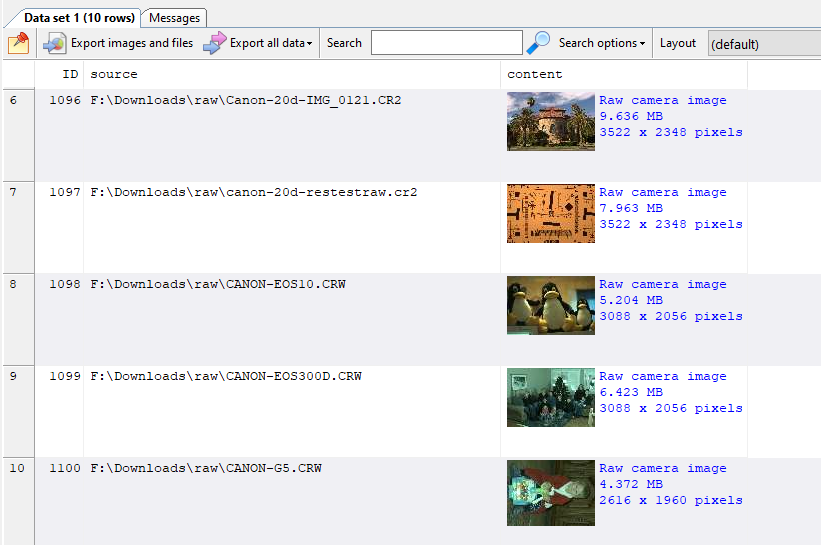
In addition to your key fields, the other fields are used by DICOM Search to maintain a record of the processed images.  For the users, the useful fields are ds_thumbnail and ds_filenameds_thumbnail stores a thumbnail of the image and ds_filename stores the location of the image file when exported from your database, or when processed from your folder.

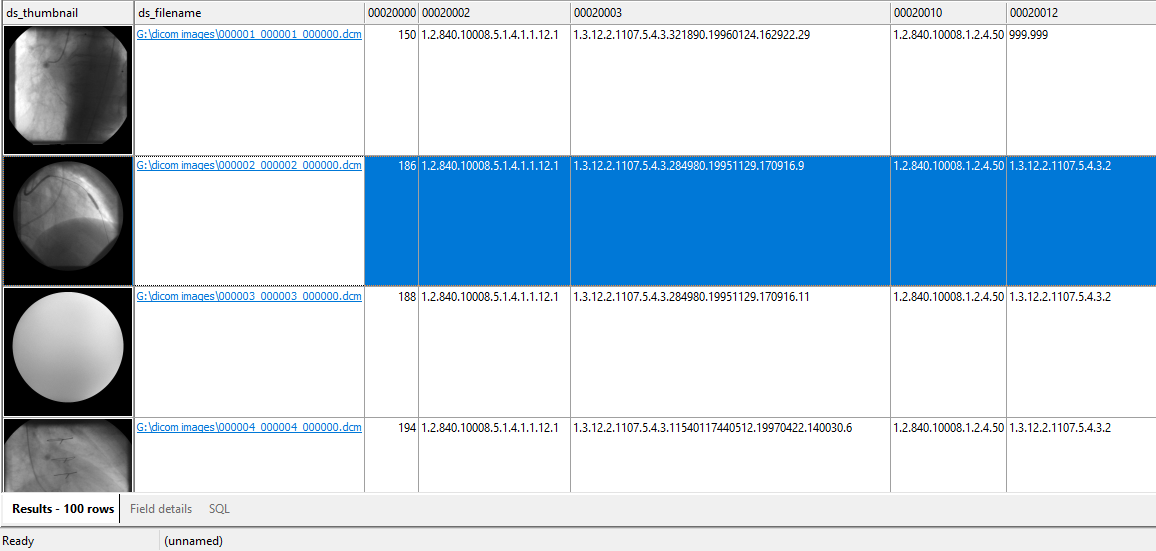
If the listed file name is present on your computer, you can open the image file in your DICOM viewer by double-clicking on the file name in DICOM Search.

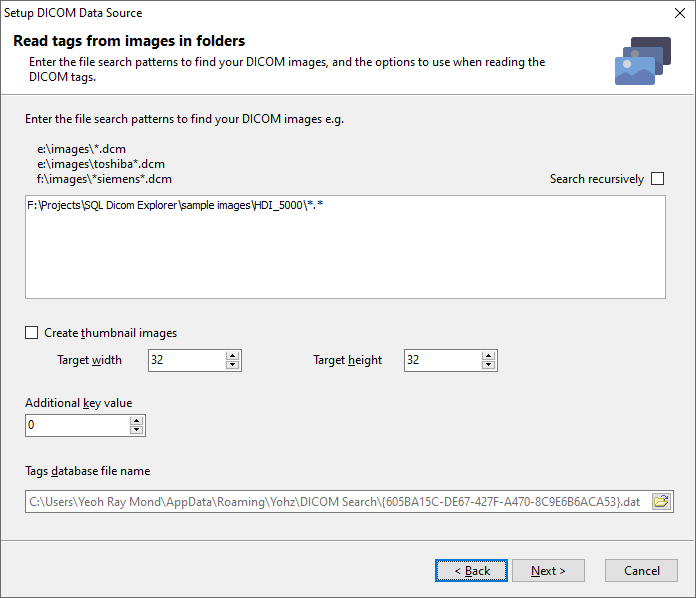
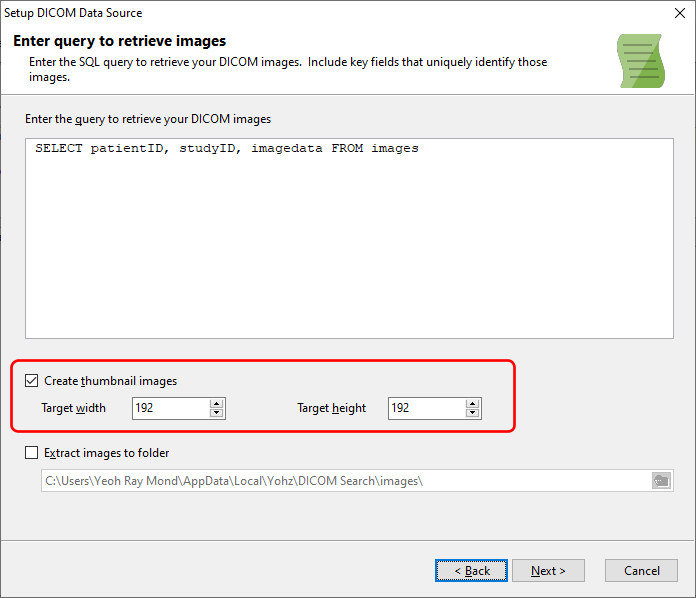
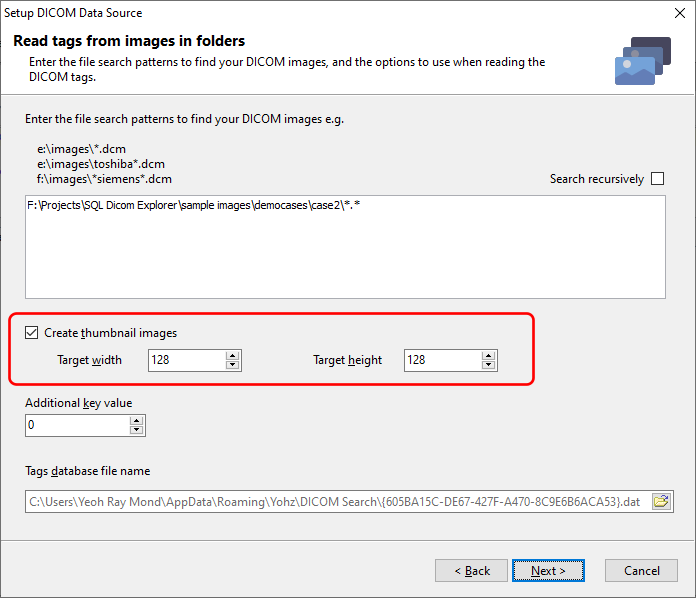
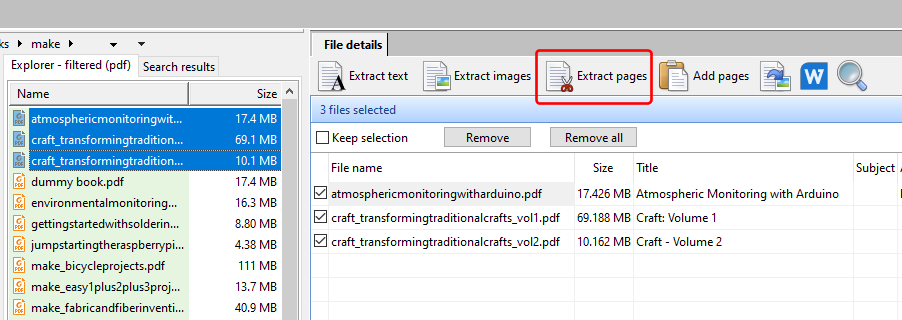
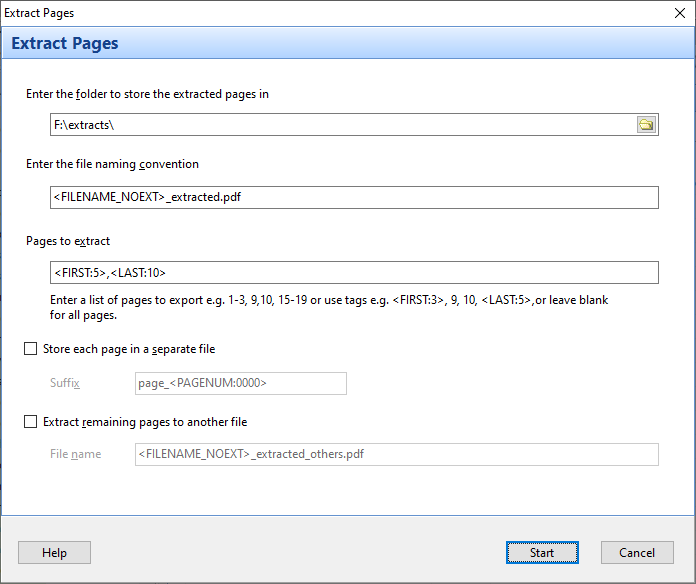
Please see this post on how to index and extract images from your database to your computer using DICOM Search, and also how to add thumbnails to the tags database.


SQL syntax

The tag values are stored in a SQLite database, so you will use the SQLite SQL syntax to query the database.  In our example, our key fields are patientID and studyID, so we will always select those columns in case we want to query the source database.  We also select the ds_thumbnail and ds_filename columns to view the image thumbnail, and also have a link to the actual image.

Here are some examples of the types of queries you can run:

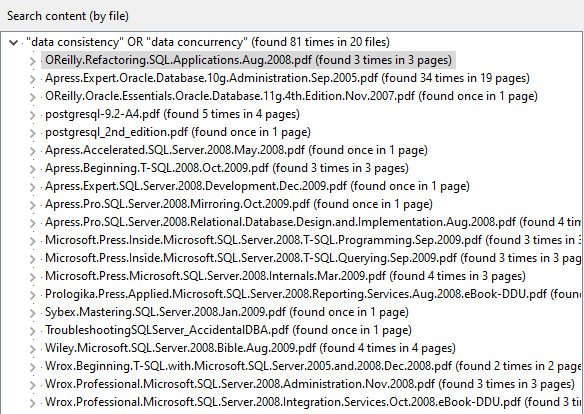
  • searching text values
    E.g. the Patient Name (tag group and element 0010,0010):SELECT patientID, studyID, ds_thumbnail, ds_filename FROM tags WHERE [00100010] = ‘Rubo’
  • searching for part of a text value
    E.g. to return all images where the patient name starts with Rubo:SELECT patientID, studyID, ds_thumbnail, ds_filename FROM tags WHERE [00100010] LIKE ‘Rubo%’E.g. to return all images where the patient name contains the word Rubo:SELECT patientID, studyID, ds_thumbnail, ds_filename FROM tags WHERE [00100010] LIKE ‘%Rubo%’

    E.g. to retrieve all images there the patient name ends with Rubo:

    SELECT patientID, studyID, ds_thumbnail, ds_filename FROM tags WHERE [00100010] LIKE ‘%Rubo’

  • searching date values
    E.g. the Study Date tag (tag group and element 0008,0020) for all studies made between Jan 1 1993 and Jan 1 1994:SELECT patientID, studyID, ds_thumbnail, ds_filename, [00080020] FROM tags WHERE [00080020] >= ‘1993-01-01’ AND [00080020] < ‘1994-01-01’Key point is you need to always enter the value you want to search for using yyyy-mm-dd format (year-month-date)
  • searching time values
    E.g. the Study Time tag (tag group and element 0008,0030), for all studies made between 1 PM and 2 PM.SELECT patientID, studyID, ds_thumbnail, ds_filename, [00080030] FROM tags WHERE [00080030] >= ’13:00′ AND [00080030] < ’14:00′Key point is you need to always enter the value you want to search for using hh:mm:ss format (hour:minutes:seconds).
  • searching numbers
    You can use all the usual equality and comparison symbols for numbers e.g. =, >, >=, <, <=E.g. the Intervention Drug Dose tag (tag group and element 0018,0028), where the value is greater than 25SELECT patientID, studyID, ds_thumbnail, ds_filename, [00180028] FROM tags WHERE [00180028] > 25

You can combine multiple conditions using the AND and OR operators e.g.

SELECT patientID, studyID, ds_thumbnail, ds_filename, [00080030] FROM tags WHERE ([00080020] >= ‘1993-01-01’ AND [00080020] < ‘1994-01-01’ AND [00080030] >= ’13:00′ AND [00080030] < ’14:00′) OR ([00100010] = ‘Rubo’)

To sort the results, use the ORDER BY option, and specify the field to sort by e.g. to sort the results by patient name (tag group and element

SELECT patientID, studyID, ds_thumbnail, ds_filename, [00080030] FROM tags WHERE ([00080020] >= ‘1993-01-01’ AND [00080020] < ‘1994-01-01’) ORDER BY [00100010]

To sort in descending order, add the DESC option after the field name e.g.

SELECT patientID, studyID, ds_thumbnail, ds_filename, [00080030] FROM tags WHERE ([00080020] >= ‘1993-01-01’ AND [00080020] < ‘1994-01-01’) ORDER BY [00100010] DESC

To limit the number of rows returned, use the LIMIT option.  For e.g. to retrieve the first 30 rows where the Intervention Drug Dose value is greater than 25, sorted by that field in descending order

SELECT patientID, studyID, ds_thumbnail, ds_filename, [00180028] FROM tags WHERE [00180028] > 25 ORDER BY [00180028] DESC LIMIT 30

See also:

DICOM Search – libraries (preview 1)

In DICOM Search, your DICOM images are organized into libraries.

You can populate each library with images from one or more databases, or from files on your computer.

Retrieving and indexing images from a database

DICOM Search can connect to PostgreSQL, SQL Server, Oracle, MariaDB, MySQL, and most popular database engines.  First, enter your connection details to connect to the database you want to process images from.

Enter the query to retrieve your images, together with the key fields used to uniquely identify the image.

You will then need to let DICOM Search know which are the key fields.

In our example, the patientID and studyID are the key fields.  Note that the key fields are for your own reference – when you query the tags database, the key fields are your link to the records in your source database.  When you want to extract the images or additional information from the source database, the key field values will help you in retrieving the relevant images.

DICOM Search will extract all the standard DICOM tag values and store them in a SQLite database.  You specify the name of this database file in the Tags database file name.

Indexing images from files on your computer

You can also index DICOM images if they are stored as files on your computer.   Enter the file paths and file search patterns to locate your DICOM files.  You can enter multiple values to search in.


Thumbnails

By default, only DICOM tag values are stored in the database e.g.

You can have DICOM Search create thumbnails for each of the image you process from your database or folder.

To create a thumbnail, select the Create thumbnail images option and enter the size of the thumbnail to create.

Once the thumbnails have been created, they will be displayed in a column named ds_thumbnail and can be displayed in DICOM Search together with the image tag values.

Exporting the images from your database

DICOM Search also helps you export your DICOM images from your database and store it in a folder on your computer.  To export the images, select the Extract images to folder option.

DICOM Search will then extract the images and store the file name in the ds_filename column.  When you run queries against the tags database and select this column, it will be highlighted in blue if the image file exists.  To open the file using your registered DICOM viewer, double click on the file name.


See also:

Search PDF using Easy PDF Search

Easy PDF Search lets you search PDF files you own fast.  Unlike other PDF tools, Easy PDF Search will create an index of your PDF file contents.  When you search the file for the first time, Easy PDF Search will index the files automatically.  Subsequent searches will use the index, which can be up to 100x faster than normal searches.

This guide gets you started on configuring Easy PDF Search to search PDF files, but broadly the steps are as follows:

Create a library

A library is a collection of PDF files.  You must create at least one library, and you can create as many libraries as you want.

A library tells Easy PDF Search where your PDF files are located.

When you search PDF files for words, you can choose to search all or some of your libraries.  This gives you great flexibility in limiting your search to specific sets of files.

The first time that Easy PDF Search searches your PDF files, it creates an index of the files’ contents.  On subsequent searches, it uses the indexes directly, which can speed up the search up to 100x faster.

If your PDF files get updated, Easy PDF Search will automatically recreate the indexes for that file.

Enter your search words/phrases

Enter one or more search words/phrases to search for.  This guide provides more details on how you can perform both simple and advanced searches.  Basically, advanced searches allow you to use operators to refine the search.

For e.g. entering the words

data consistency and data concurrency 

will return all files containing the words data, consistency, and, and concurrency.  Entering it in double quotes

“data consistency and data concurrency”

will return all files containing the phrase data consistency and data concurrency.  Entering it this way

“data consistency” OR “data concurrency”

will return all files containing the phrase data consistency or data concurrency.  Entering

“data consistency” AND “data concurrency”

will return only files containing the phrases data consistency and data concurrency. Entering

“data consistency” NOT “data concurrency”

will return only files containing the phrase data consistency and does not contain the phrase data concurrency.  Finally, entering

NEAR(“data consistency”, “concurrency”, 20)

will return files containing the phrase data consistency and where the word concurrency appears 20 words before or after that phrase.

Review the search results

The search results are summarized, and the pages where the search words/phrases are listed.

Expanding the file summary will list out all the pages where the words/phrases were located together with the number of occurrences.

Clicking on a listed page will display the page from your PDF file and the search words/phrases are highlighted.

Beyond just viewing your search results, you can perform additional tasks like combining all the pages from the search results into a single PDF file.  Using the search results, you can also  extract the pages into separate PDF files, extract text and images from those pages, and export those PDF pages as images.

Download a free 14-day trial now and experience how Easy PDF Search makes searching your PDF files so much easier and faster.

See also:

Speeding up searches in Easy PDF Search

When you enter words to search for in Easy PDF Search, you need to be mindful of whether you want to search by each individual word, or the phrase.

For e.g. if you enter the following:

Easy PDF Search will search your library of PDF files for pages that contain the word data, or consistency, or and, or concurrency.  This will slow down the search process significantly because of the inclusion of the word and, which is a common word.  The search will complete faster if you omit the word and.

If however you wanted to search for pages that contain the phrase data consistency and data concurrency, you need to enclose the entire phrase in double quotes i.e.

Now only your PDF files that contain the phrase data consistency and data concurrency are returned by the search.  The search will also complete faster because you are no longer searching for individual words.

You may also have wanted to search your PDF files for pages that contain the word data consistency or data concurrency.  You can do this in one of two ways.  Either enter each phrase on a separate line e.g.

or use the OR operator this way:

Both methods of entering the search phrases will return the same results.  The only difference lies in how the results are displayed.  In the first method, each phrase is displayed under separate headings.

while using the OR operator displays the results under a single heading.

So in summary, a phrase search is faster than a multiple word search, and if you must perform a multiple word search, omitting common words will speed up the search.


Cooking in the labs – a DICOM tags search application

This started out as a request from a user, and we thought it would be an interesting project for us.  We’re currently in the early stages of evaluating the feasibility of developing a DICOM tags search application.  The objective is to allow users to use SQL queries to search for DICOM images using values from the DICOM tags embedded in the images.

Step 1 – reading the tags from your DICOM images

We plan to allow you to read the DICOM images from a database, or from DICOM files already on your computer.

Step 2 – storing the data elements/tag values

This is the hardest part.  A DICOM image can contain both standard and private data elements/tags.  For a start, we will only be indexing most of the standard data elements/tags (over 2800).

Step 3 – querying the tag values

Once stored in a database, users can use SQL syntax to query the tag values.  We will also look into adding a query builder to help non-technical users.

Step 4 – displaying the images

Once we have the results of the query, we can display the images using the user’s preferred DICOM viewer.

Issues/bottlenecks

We do not have any experience working with PACS nor have access to any such system.  We are approaching this purely from a database developer perspective – read the images, store the tag values in a database, allow users to query the database, and display the results.

If you are interested in such an application and can spare some time to help us test the application as we go along, or there are features you would like to see in such an application, please drop us an email at support@yohz.com.  Thank you.

See also:

Raw image file support in SQL Image Viewer

SQL Image Viewer 10 adds support to display RAW camera image files.  If SQL Image Viewer fails to display your RAW images, please send us a copy of the file for further analysis, to support@yohz.com.

You need to take into account the following when exporting RAW image files from your database using SQL Image Viewer.  Raw image files are exported using the .raw extension by default.  This is because SQL Image Viewer is unable to distinguish between the different raw formats (cr2, crw, nef, tec).

To export the raw image files using the correct extension, you need to have a column that contains the source file name. For e.g our result set contains the file name in the source column.

We cannot use the source column as is in our naming convention like this:

because it would include the path portion.  To use only the file name portion, we use the FILENAME operator e.g.

The FILENAME operator tells SQL Image Viewer to treat the value in the column as a fully qualified file name, and to use only the file name portion of the value.

What is we wanted to name the exported images using the ID column?  We will need to use the FILEEXT operator in this case.  Our file naming convention will be entered like lthis:

The FILEEXT operator tells SQL Image VIewer to treat the value in the column as a fully qualified file name, and to use only the file extension portion of the value (including the . separator).

By using the FILENAME and FILEEXT operators, you have more control over how the exported files are named, and how you can use elements from columns containing file names.

If you have any questions or requests, please do drop us a line at support@yohz.com.

Extracting pages from PDF files to individual files using Easy PDF Explorer

In Easy PDF Explorer 2.5, we added the option to extract the pages from PDF files into individual files.

Select the file(s) you want to extract the pages from, and click on the Extract pages button.

The default option is to create a single PDF file containing the pages you want to extract.  For e.g. if we entered <FIRST:5>, <LAST:10> as the pages to extract:

Easy PDF Explorer will create a single file containing the first 5 pages and last 10 pages for each of our selected files.

To extract each page into an individual file, we select the Store each page in a separate file option.  The suffix value will append the page number to the end of our file name.

Now when we run the task, each page is extracted to a separate file, using the combined naming convention of the file name and suffix.

Let’s say we want to extract each file into a separate folder, and each folder contains the individual pages.  To do that, enter the following values for the folder, file name, and suffix name.

Using the above values:

  • each file will be extracted into its own folder using the file name (without the extension)
  • the base file name will simply be .pdf
  • and the suffix (page_<PAGENUM:0000>) will be appended to the base file name.

Running the task results in the following folders:

and in each folder, each page is exported to its individual file.

Each folder contains the files for the first 5 pages and last 10 pages of each selected PDF file.

If you want to extract all the pages instead of a range of pages, leave the Pages to extract value empty.

Download a 14-day trial of Easy PDF Explorer now and start extracting your PDF pages immediately.