Monthly Archives: July 2022

Searching PDF annotations

In Easy PDF Explorer 3, we added the option to also search annotations in addition to page content.  To search annotations, select the annotations option in the Find Text window.

In the search results, the number of times the word/phrase appears on a page is displayed e.g.

In the first PDF file, the word aperture was found on pages 5, 7, 9.  On page 5, the word was found 3 times on the page, and twice in annotations.  On pages 7 and 9, the word was found twice in annotations in those pages.

Download a 14-day trial of Easy PDF Explorer now and start experiencing an easier way to work with your PDF files.

Mouse and keyboard interactions in Easy PDF Explorer 3

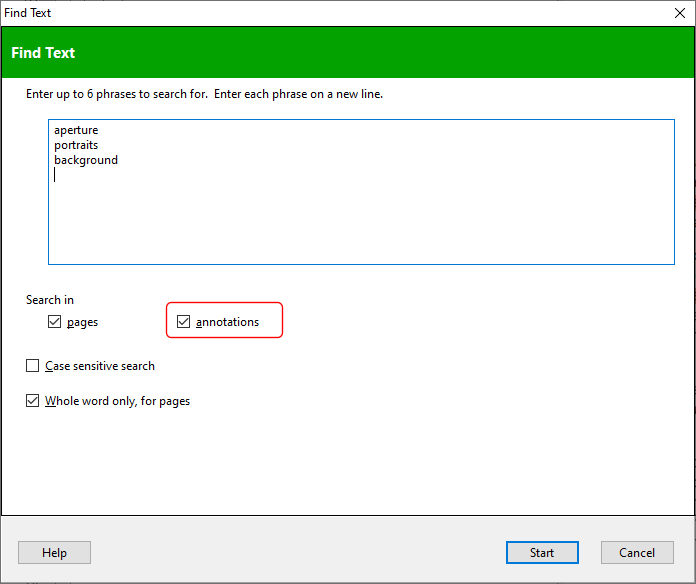
In Easy PDF Explorer 3, you can now perform more actions on your search results using the mouse and keyboard.

Selecting text

To select text on your PDF page, click and drag the mouse over the text you want to select.  The text will be highlighted and automatically copied to the clipboard.  You do not need to press CONTROL-C.

To select a single word, double click on the word.
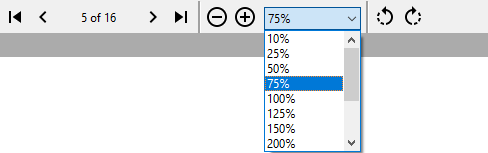
Zooming

Pressing the CONTROL key and scrolling the mouse wheel zooms in and out of the current page.  The zoom factor is determined by the currently selected item in the zoom options on the toolbar.

Panning

In addition to using the horizontal and vertical scrollbars to pan around the page, you can use the mouse wheel to scroll the vertical scrollbar, and SHIFT + mouse wheel to scroll the horizontal scrollbar.

Navigating the search results and pages

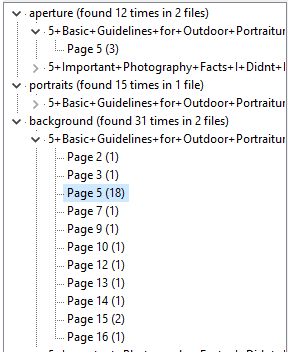
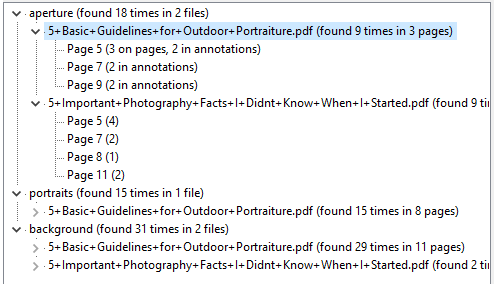
Say we have the above search results, and Easy PDF Explorer is displaying page 5.

Pressing the a key will open page 3, which is the previous page in the search result.

Pressing the z key will open page 7, which is the next page in the search result.

Pressing the A key will open page 4, which is the previous page in the file.

Pressing the Z key will open page 6, which is the next page in the file.

Note that the A and Z shortcuts only work when the CAPS LOCK key is active.  They will not work if used with the SHIFT key.

With the above mouse and keyboard interactions, you can now navigate and select text on your PDF pages with minimal mouse movements.

Download a 14-day trial of Easy PDF Explorer now and start experiencing an easier way to work with your PDF files.

Presenter mode in Easy DICOM Viewer

In Easy DICOM Viewer 4.1, we introduced a presenter mode to help you share images in presentations and zoom meetings while maintaining confidentiality of your images.

Anonymized tag values

In presenter mode,  sensitive tag values are automatically anonymized.  For e.g. in the image list, you would usually see the patient name:

In presenter mode, this is replaced by a generic label:

In the image itself, information profiles like these:

are replaced with anonymized values:

In the tags listing, these values are also anonymized.

Highlighted cursor position

In presenter mode, the cursor position is highlighted so that your audience can track your cursor position easily.

Customizing presenter mode

You can customize the presenter mode settings to fit your requirements.  For e.g. you may want to anonymize additional tags, or customize the appearance of the cursor highlight.

Setting the presenter mode

Turn presenter mode on by selecting the Presenter mode option from the Application item on the tool bar.

Summary

Easy DICOM Viewer‘s presenter mode allows you to present/screen share images easily without worrying about exposing confidential information.  Your images are unchanged – only the displayed values are modified.  This is a huge time saving over the previous practice where you had to anonymize the tag values before using them in any presentations.

Download a 14-day trial of Easy DICOM Viewer now and experience how the presenter mode makes it easy to display DICOM images without exposing any confidential information.

See also:


Grouping photos by EXIF values

Let’s say we want to search for photos taken with a focal length of between 12mm and 18mm.  We enter these values In Easy Photo Search:

and the results will be displayed like this:

as one long list of files on the left.

An alternative to just viewing this long list of files is to group the files.  Say we want to group by focal length, then by aperture.  In the grouping criteria, we select Focal length and Aperture.

Our search criteria then looks like this:

Our search results then shows the files grouped by focal length and aperture.

When we now click on the focal length or aperture item in the search results, Easy Photo Search will automatically display the first image in that grouping.

Download a 14-day trial of Easy Photo Search now and see for yourself how easy it is to index and search your images based on their EXIF values.

See also:


Working with PNG images containing Exif tags

We recently received a request from a user who asked if we could add support for PNG files in Easy Photo Search.  We weren’t even aware that PNG files could contain Exif tags, and after some quick googling, we thought that there was no ‘standard’ in how the Exif tags would be stored in the PNG files.

After some more research, we understood that while there is somewhat of a (belated) standard in how Exif data is stored in PNG files, the Exif data block itself does follow the JPEG specifications.  It was only in where the Exif data is stored that may change, depending on the software used to embed the Exif data.  We thus decided to add support in Easy Photo Search to read the Exif chunk in PNG files where possible, as we only need to locate the Exif data block and process it.

Thus, Easy Photo Search 1.2 can now read Exif values stored in PNG files.  Note that you cannot modify the Exif values, nor remove them, from the PNG files at this point.