Monthly Archives: January 2021

Full text index for your PDF files

Are you considering creating a full text index on your PDF files, so that you can frequently search for words and phrases fast?  That’s what Easy PDF Search was created for.

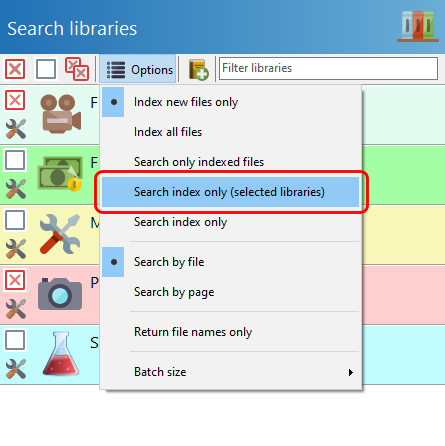
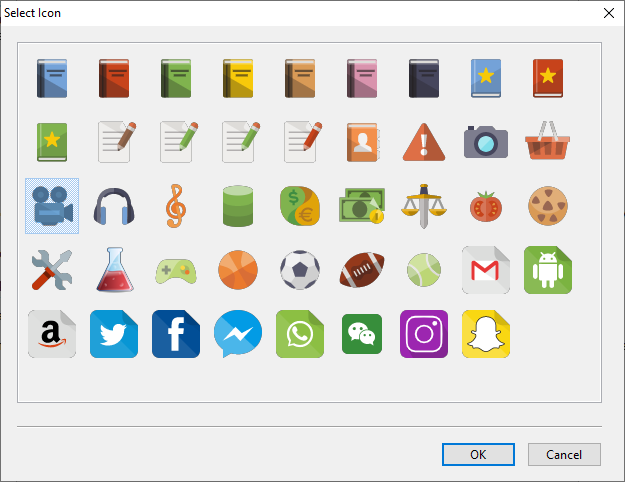
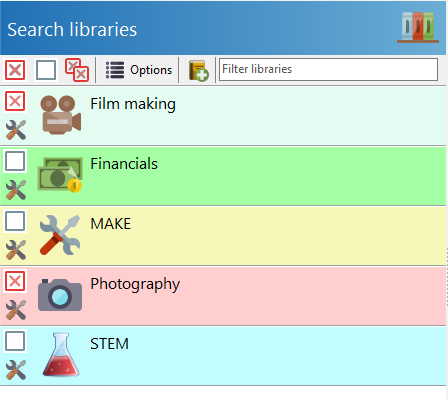
Say you have a collection of PDF files for various topics.  You can organize your files into libraries so that when you run your search, you can choose to search only in specific libraries.  You don’t have to always search your entire PDF collection.

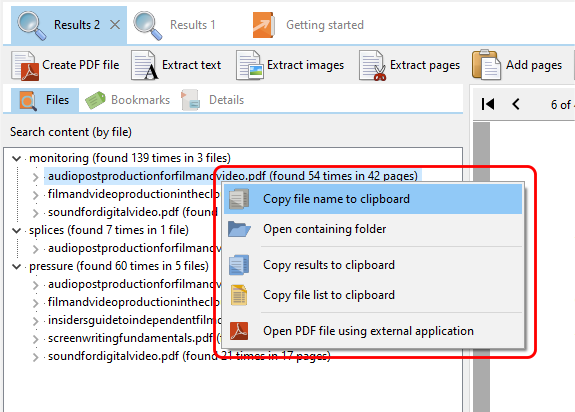
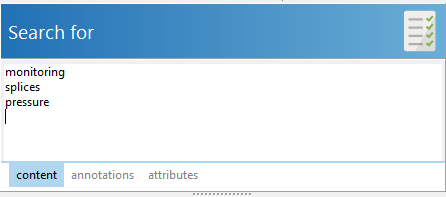
In Easy PDF Search, you can search for multiple words simultaneously.  Here, we are searching for all files containing the words monitoring, splices or pressure.

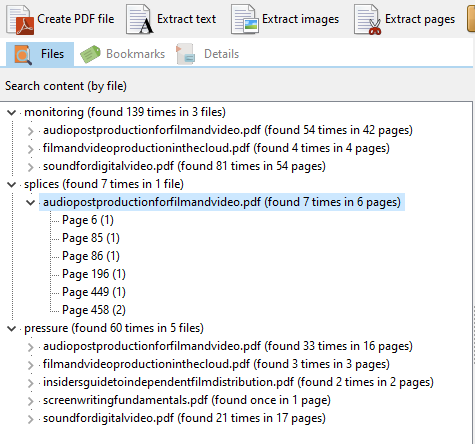
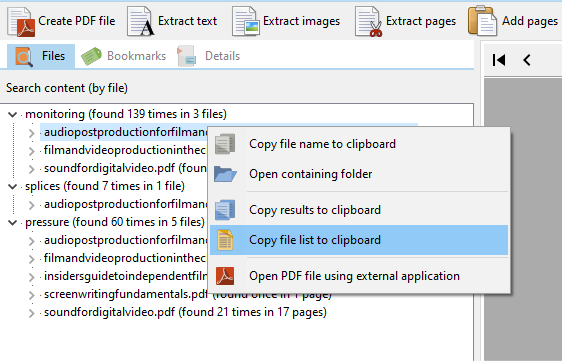
Our search results are then returned, grouped by each search word.

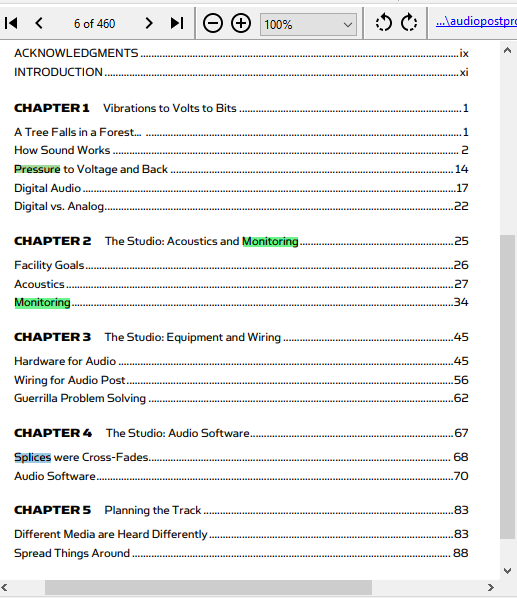
And on each page, our search words are highlighted in a different color.

Now what can you do with those search results?  In Easy PDF Search, lots.

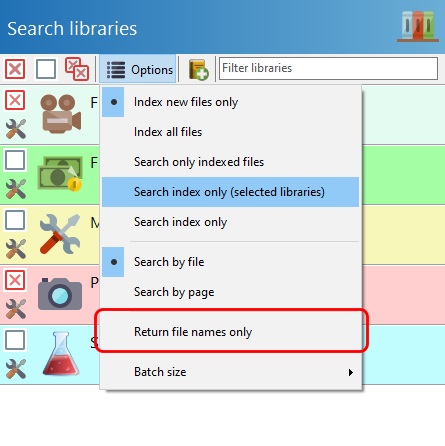
For starters, you can export the search results listing or just the file names, for future or offline reference.

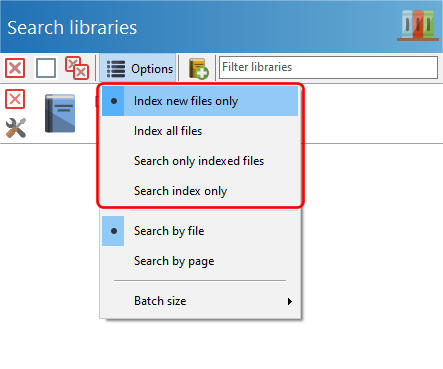
Next, you can work with the PDF pages from the search results.

You could extract each of the pages containing your search words and compile them into a single PDF file.  You could also extract the text found on those pages, or extract the pages into individual PDF files, and much more.

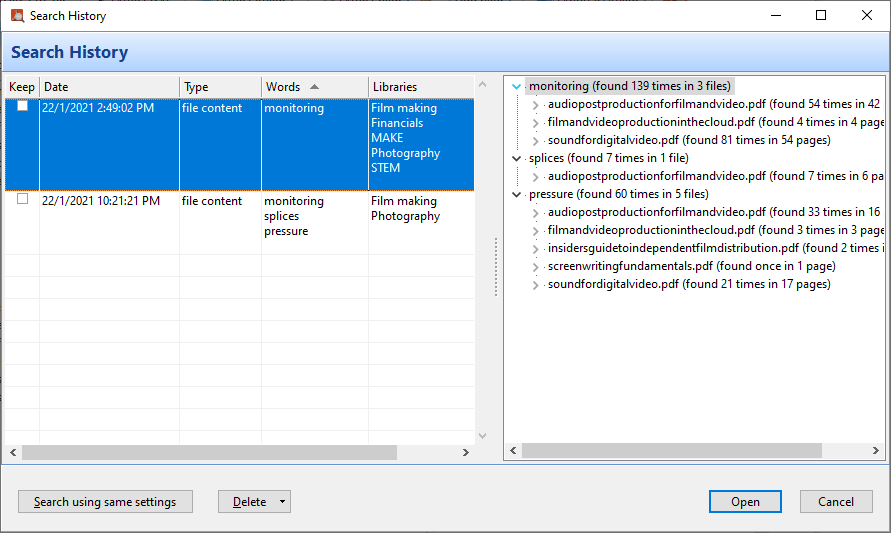
Easy PDF Search also keeps a search history, so you can just refer to it whenever the need arises without having to reperform the search.

Give Easy PDF Search a try.  We offer a 14-day fully functional trial so you can experience for yourself how easy it is to create a full text index for your PDF files and search those files fast.

Introducing Easy PDF Search 3

Easy PDF Search (EPS) 3 focuses on 3 areas – support more search options, more user actions on the search results, and general performance improvements.

More search options

In version 2, we added the option to search only the existing index.  This allows you to make very fast searches without having to check for new or modified files to index, or when the indexed files are not accessible.  In version 3, we added an additional option to search the existing index only for files in the selected libraries.

We also added the option to return only the file names from the search.

A good portion of the search duration is actually spent identifying which words to highlight in the search results.

When you only need the list of files where the search words were found, then selecting the  Return file names only option would speed up your searches even more.

User actions on search results

In previous versions, while you could work with the search results like combining all the pages into a single file, extracting the search pages into individual files etc, you could not work with the results listing itself.

In version 3, you now have a context menu that allows you to perform various actions on the search results listing, like copying the list of files to the clipboard, opening the containing folder etc.

General performance improvements

We have improved the performance where possible, especially when dealing with large collection of files.  The search history listing now loads faster too.

Miscellaneous UI improvements

We have also made various minor UI tweaks to improve usability.  An obvious addition is the availability of in-built icons you can easily add to your library definition.

This helps you to quickly make your libraries more distinctive.  Of course you can still always use your own icons.

If you would like to give Easy PDF Search a try, you can download a free 14-day fully functional trial here.

Standards and audit compliance in PostgreSQL databases

In DB Doc 9, we made a couple of additions to our existing reports that help in ensuring compliance with company standards with regards to table and column definitions.

At the database level, there is now a listing of all the tables across all schemas.  This allows you to easily look for similarly named tables, and ensure that they conform to your naming standards.

Similarly, there is now a listing of all the table columns across all schemas.  This allows you to easily ensure that the column naming conventions are consistent, and that the data types are also consistent for similar columns.

At the schema level, there is also a listing for all the columns in the schema.

What can you do with these reports?

  • you get a quick overview of all tables across all schemas in your entire database, allowing you to compare attributes like naming convention, size, estimated rows, etc
  • you get a quick overview of all columns across the entire database and across all schemas, allowing you to easily check for compliance with naming convention and data types/domains
  • your database administrators and developers get a single point of reference of your database schema, which can be updated as frequently required using DB Doc’s command line execution

Customizing the reports

By default, all the above 3 listings are included in the HTML, XML, CHM, PDF, and DOC reports.  You can remove one or more of the above listings by simply omitting the relevant user defined values, as explained in the help file here.

You can also easily customize what is displayed in each of the listings using DB Doc’s advanced scripting and report template features.  For e.g. you could include the index size in the table listing, or display the nullable and unique attributes in the column listing

Give DB Doc a try now

Download the installer here and see how DB Doc can help you generate accurate and timely database documentation in minutes.  We have a walkthrough available here to guide you for new users.

Easy PDF Search – the search options explained

When searching for words and phrases in Easy PDF Search (EPS), you have 4 options:

For the first option, the process flow is as follows:

  • EPS looks for all the folders set up in the selected libraries
  • in each folder, EPS compiles a list of all the files matching the search pattern
  • for each new file, EPS will index that file
  • for each modified file, EPS will rebuild the index
  • EPS then searches for the entered words/phrases in the list of files it compiled in step 2 above

For the second option, the process flow is as follows:

  • EPS looks for all the folders set up in the selected libraries
  • in each folder, EPS compiles a list of all the files matching the search pattern
  • for each file, EPS deletes any existing index, and builds the index again
  • EPS then searches for the entered words/phrases in the list of files it compiled in step 2 above

For the third option, the process flow is as follows:

  • EPS looks for all the folders set up in the selected libraries
  • in each folder, EPS compiles a list of all the files matching the search pattern
  • EPS then searches for the entered words/phrases only in the files where an index has already been created

For the fourth option, the process flow is as follows:

  • EPS searches for the entered words/phrases in its existing index.

The point to note is that in the first 3 options, Easy PDF Search only returns results from files that exist.  If a PDF file has already been indexed previously but no longer exists, EPS will not search the index of that file.

Converting DICOM images to png, tif, jpeg

In DICOM Search 1.3, you can now convert the DICOM images in your search results to other formats, like png, tif, jpeg, bmp, and gif.

You need to first run a query to retrieve some images.  Let’s search for all MR images for the brain, from the sample images used by our tutorial.

This returns 13 images.

Let’s convert those 13 images to another format.  Click on the Copy images button.

This brings up the Copy Images window.

Enter the folder to copy/export the images to.  If you don’t select the Convert image to another format, then the files will just be copied from the source folder to the selected folder.

If you do select the Convert image to another format option, you can select the format to convert to.

Note that only the TIFF format supports multi-frame images.

In this example, we will also add a gray border around our image, so that the tag values from our information profile do not overlap with our images.

When converting our DICOM images, we also have the option of using our information profile to embed DICOM tag values into the converted images.

Let’s select the Generic information profile, and click Next to start the export/conversion process.

This is one of the exported images.

As you can see, we added a gray border around our image, but perhaps we could have made the left border larger, as the tag value covers part of the image.  Or we could have made the information profile font smaller.  Or we could adjust our information profile so that the values are only displayed on the right sides.  There are so many options open to us, so do experiment to see what works best for you.

Creating a slideshow using DICOM images

In DICOM Search 1.3, we added the option to create a HTML slideshow from the images in your search results.  Click here to see a sample slideshow.

You need to first run a query to retrieve some images.  Let’s search for all MR images for the brain, from the sample images used by our tutorial.

This returns 13 images.

Let’s create a slideshow containing these 13 images.  Click on the Create HTML slideshow button.

This brings up the Create HTML Slideshow options.

The HTML file name is the name of the html file you want to create.  The Slideshow template file name is the slideshow template to use.  DICOM Search ships with 2 templates, which you can easily customize to your needs.

You can also resize the images to fit a specific width and height in pixels.  Additionally, you can also add a colored border around the image.  This is useful when you want to display information profiles in the images.

For this example, we will create a gray border of 360 pixels on the left, 80 pixels on the right, and 10 pixels for top and bottom.

On the next page, you can choose to embed DICOM tag values in your images using information profiles.  You can also set various attributes like margins and fonts.  Here, we’ll just select the Common details information profile.

DICOM Search then creates your slideshow.  When completed, click on the Open slideshow button.

Windows should then open the slideshow file in your browser.

Note the following:

  • you can customize the slideshow templates to change the appearance
  • the DICOM tag values from the selected information profile are embedded in the image
  • the margins are used so that the tag values do not cover the image
  • you can easily create information profiles that display a lot more information to be embedded in the slideshow images