Author Archives: bloggyadmin

Creating a slideshow using DICOM images

In DICOM Search 1.3, we added the option to create a HTML slideshow from the images in your search results.  Click here to see a sample slideshow.

You need to first run a query to retrieve some images.  Let’s search for all MR images for the brain, from the sample images used by our tutorial.
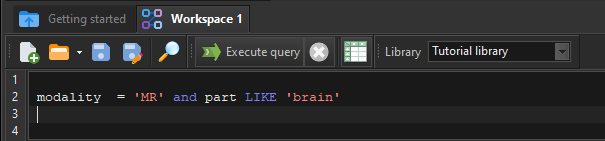
This returns 13 images.
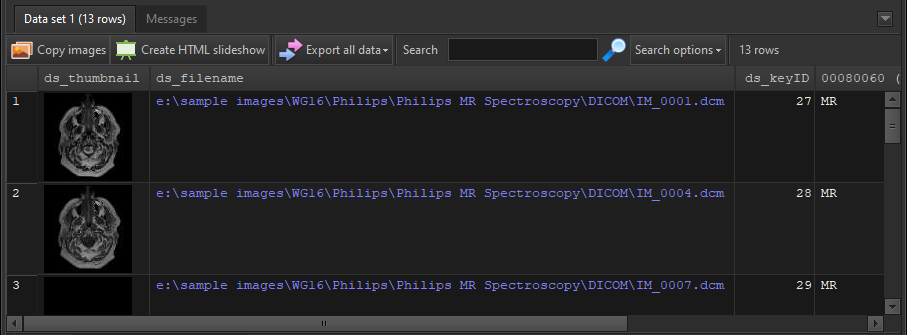
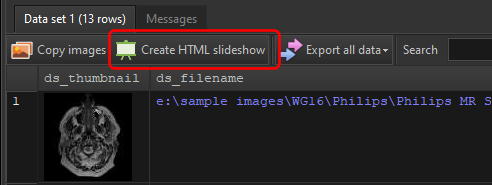
Let’s create a slideshow containing these 13 images.  Click on the Create HTML slideshow button.
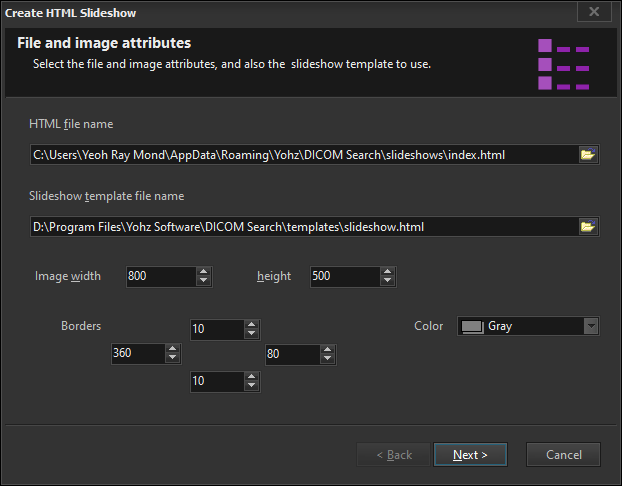
This brings up the Create HTML Slideshow options.
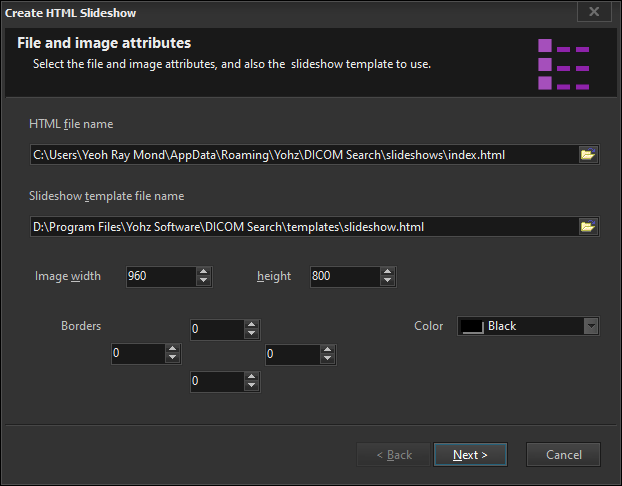
The HTML file name is the name of the html file you want to create.  The Slideshow template file name is the slideshow template to use.  DICOM Search ships with 2 templates, which you can easily customize to your needs.

You can also resize the images to fit a specific width and height in pixels.  Additionally, you can also add a colored border around the image.  This is useful when you want to display information profiles in the images.

For this example, we will create a gray border of 360 pixels on the left, 80 pixels on the right, and 10 pixels for top and bottom.
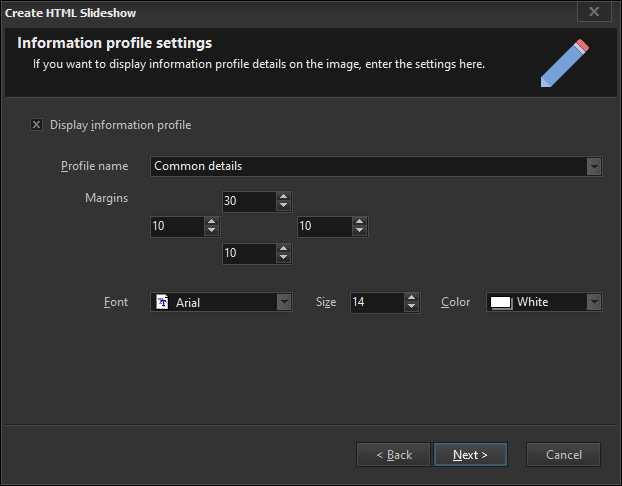
On the next page, you can choose to embed DICOM tag values in your images using information profiles.  You can also set various attributes like margins and fonts.  Here, we’ll just select the Common details information profile.
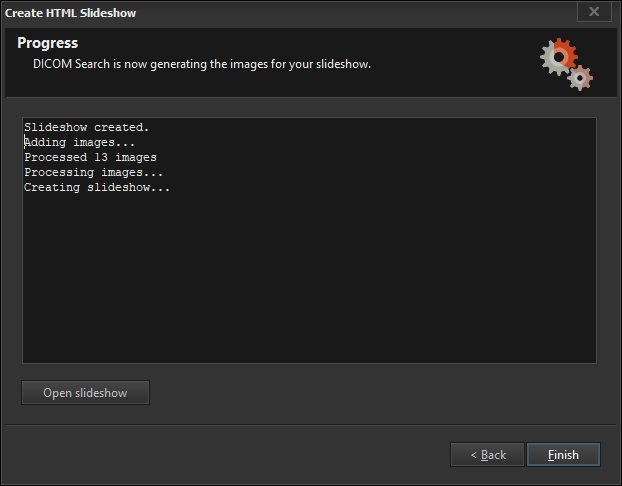
DICOM Search then creates your slideshow.  When completed, click on the Open slideshow button.
Windows should then open the slideshow file in your browser.
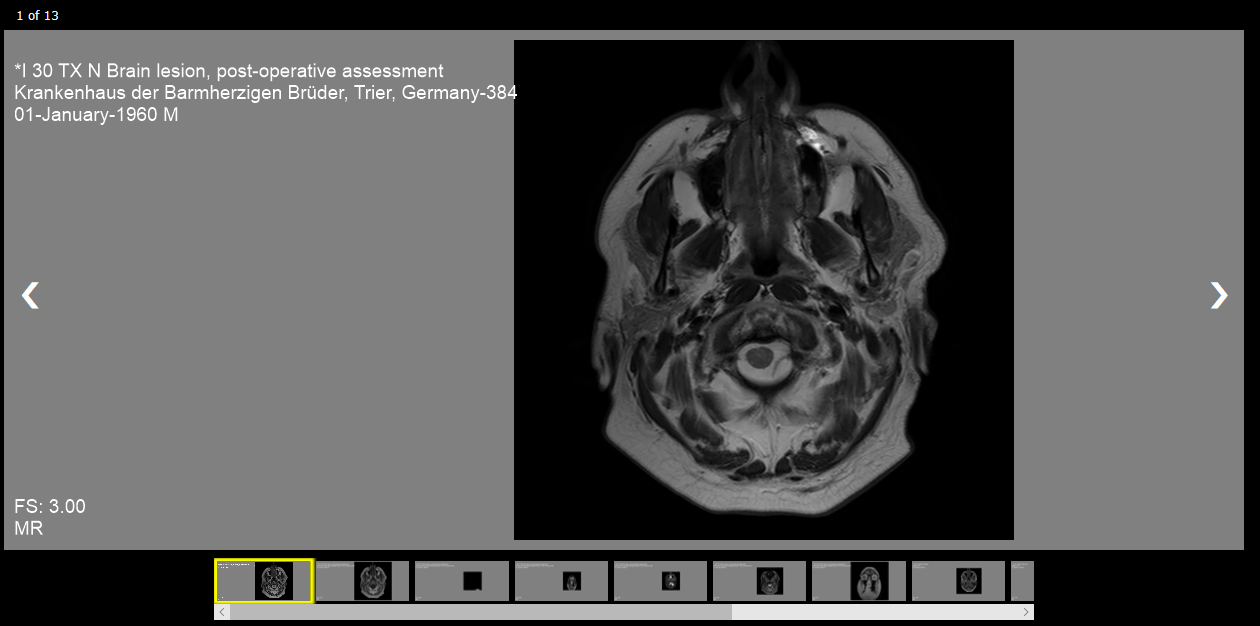
Note the following:

  • you can customize the slideshow templates to change the appearance
  • the DICOM tag values from the selected information profile are embedded in the image
  • the margins are used so that the tag values do not cover the image
  • you can easily create information profiles that display a lot more information to be embedded in the slideshow images
Connecting to SQL Server via ODBC using SQL authentication

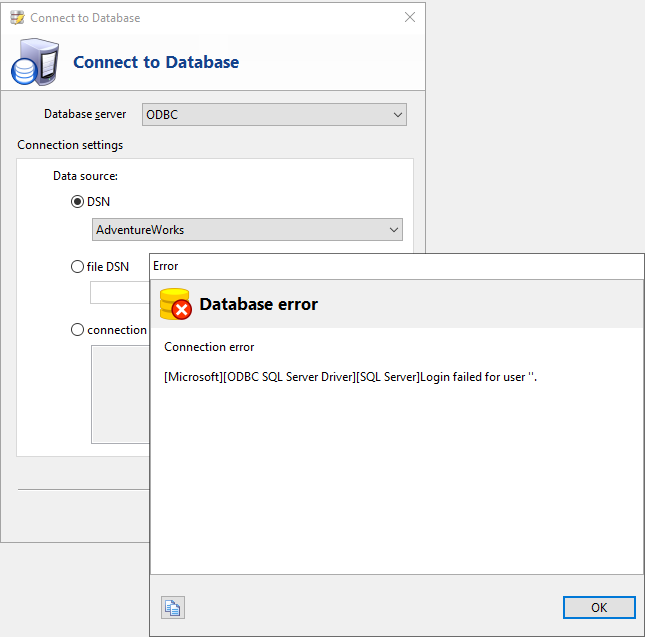
We recently had a user who had his SQL Server hosted in a data center, and needed to extract files from his database.  He could connect to the instance remotely, but it took too long to extract the files this way.  He tried connecting to the database via another computer in the data center, but received the ‘TCP Provider: An existing connection was forcibly closed by the remote host.‘ error.

This suggests a network configuration setting issue.  Instead of getting the data center to change the server settings, we instead set up an ODBC connection and used that connection in SQL Blob Export.

Using Windows authentication to connect to the instance via ODBC was easy enough.  However, if using SQL Server authentication, the password is not stored in the ODBC settings, and the connection would still fail.

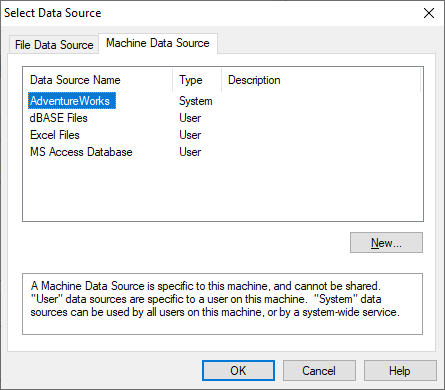
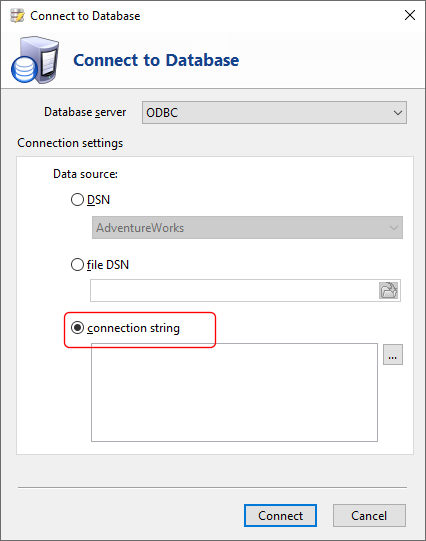
In order to connect to the SQL Server instance via ODBC using SQL Server authentication, choose the Connection string option instead.

Click on the Browse button

and select the ODBC connection to your SQL Server database.

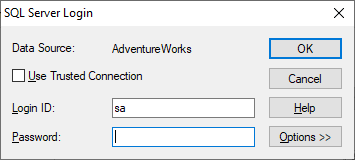
The SQL Server ODBC connection manager will then prompt you to enter the password.

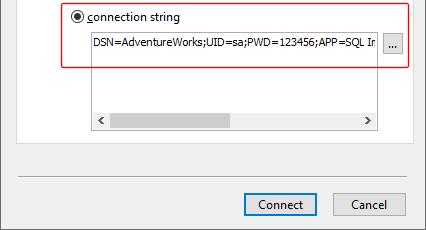
Enter the password in the provided area and click OK.  The ODBC connection string is then filled out, together with your password.

Click on the Connect button.  SQL Blob Export should now successfully connect to your SQL Server database using SQL Server authentication.

The same steps apply to our other database products that support SQL Server and ODBC connections.

If you require further assistance, you can post your questions in our support forum.

Searching an existing index in Easy PDF Search

Easy PDF Search indexes your PDF files and allows you to search your files for keywords.  When you perform a search in Easy PDF Search, it first scans your library paths for PDF files.  New and modified files will be indexed, then only existing files are searched.

In some situations, you may not have the source PDF files with you, but only the Easy PDF Search index database.  Or you may not want Easy PDF Search to spend time scanning for existing files, but just want to search for keywords in the already indexed files.

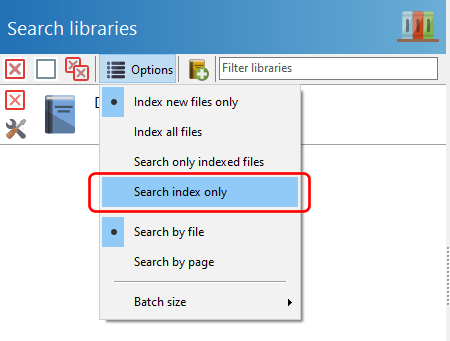
In Easy PDF Search 2.1, we added the option to skip the file scanning process and directly search the existing index.  This is available under the Options menu.

Selecting the Search index only option will search the existing index and return the results, regardless of whether the file exists.

To recap the 4 options:

  • Index new files only
    This option scans the search folders defined in each library, and indexes only the new and modified files it finds, then searches for keywords in those indexed files that exist.
  • index all files
    This option scans the search folders defined in each library and indexes all the files it finds, deleting any existing index for each file.  It then searches for keywords in those indexed files that exist.
  • search only indexed files
    This option scans the search folders defined in each library for files, and searches for keywords in those indexed files.  It ignores any new or modified files.
  • search index only
    This option performs searches on the existing index, and does not scan to check if the indexed files exist.


Easy PDF Search – updating the PDF file locations

You may sometimes move your PDF files to another folder, and you don’t want to have to re-index all the files again in Easy PDF Search.

For e.g. you may have one or more libraries that indexes the files in g:\pdflib\.  Let’s say you’ve now moved all the PDF files to a larger drive, say h:\pdfs\.  If you don’t want to have to reindex all the files again, do this.

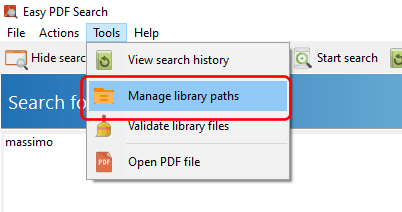
Select the Tools > Manage library paths item from the main menu.

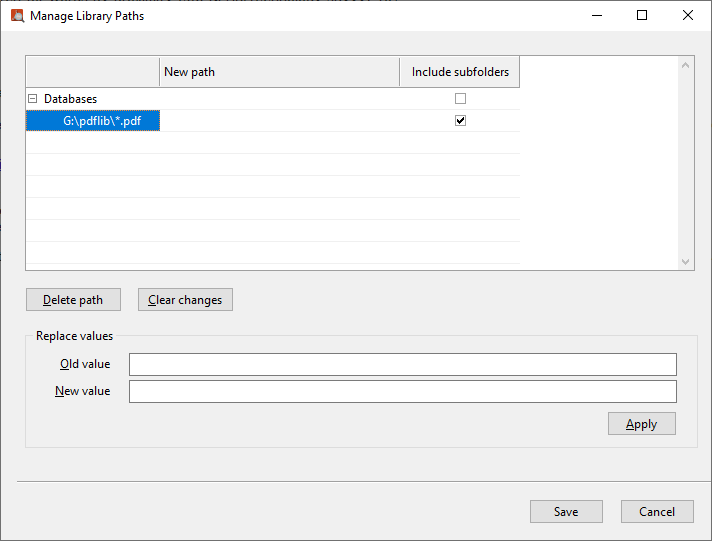
Easy PDF Search then displays the list of libraries and the paths associated with each library.

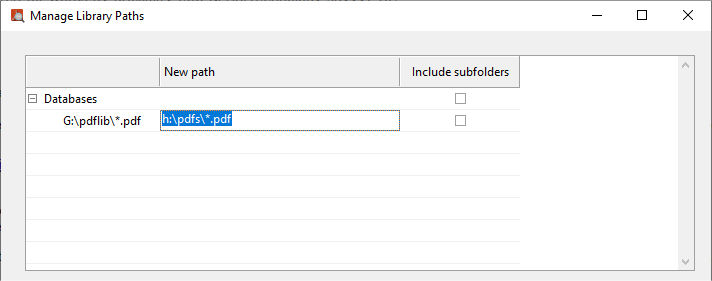
As our PDF files have moved from g:\pdflib\ to h:\pdfs\, we need to make the change to our libraries’ paths.

Once you save the new values, DICOM Search will update all the details of the indexed files accordingly, so files previously indexed in g:\pdflib\ will have their source locations updated to h:\pdfs\, if they now exist in h:\pdfs\.  The search path for the libraries will also be updated.

In this way, you do not need to reindex all the files that you have moved.

Moving your Easy PDF Search database

Sometimes you may want to move your Easy PDF Search database to a faster or bigger drive, or to another computer, without having to rebuild the index again.

Moving the database file

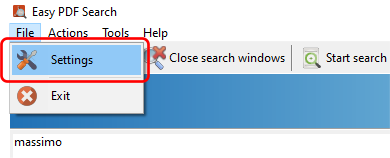
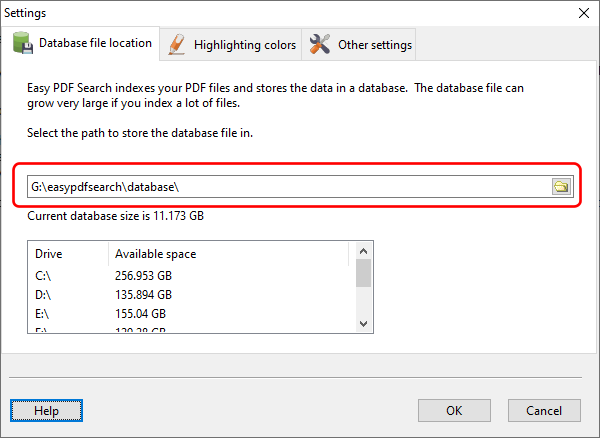
Select the File > Settings item from the main menu.

The path value indicates the location where the database file is stored.

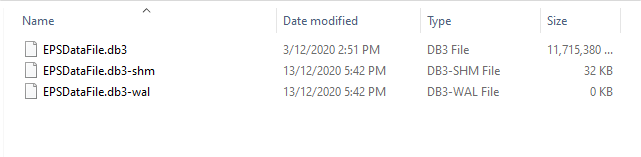
In that folder, you should see 3 files.  EPSDataFile.db3  is the main database file.  The other 2 files are support files, and only exist when Easy PDF Search is active.

Enter the new folder where you want to store the database file in.

Once you save the new settings, Easy PDF Search will then copy the database file from the old folder to the new folder.

DICOM Search on Linux

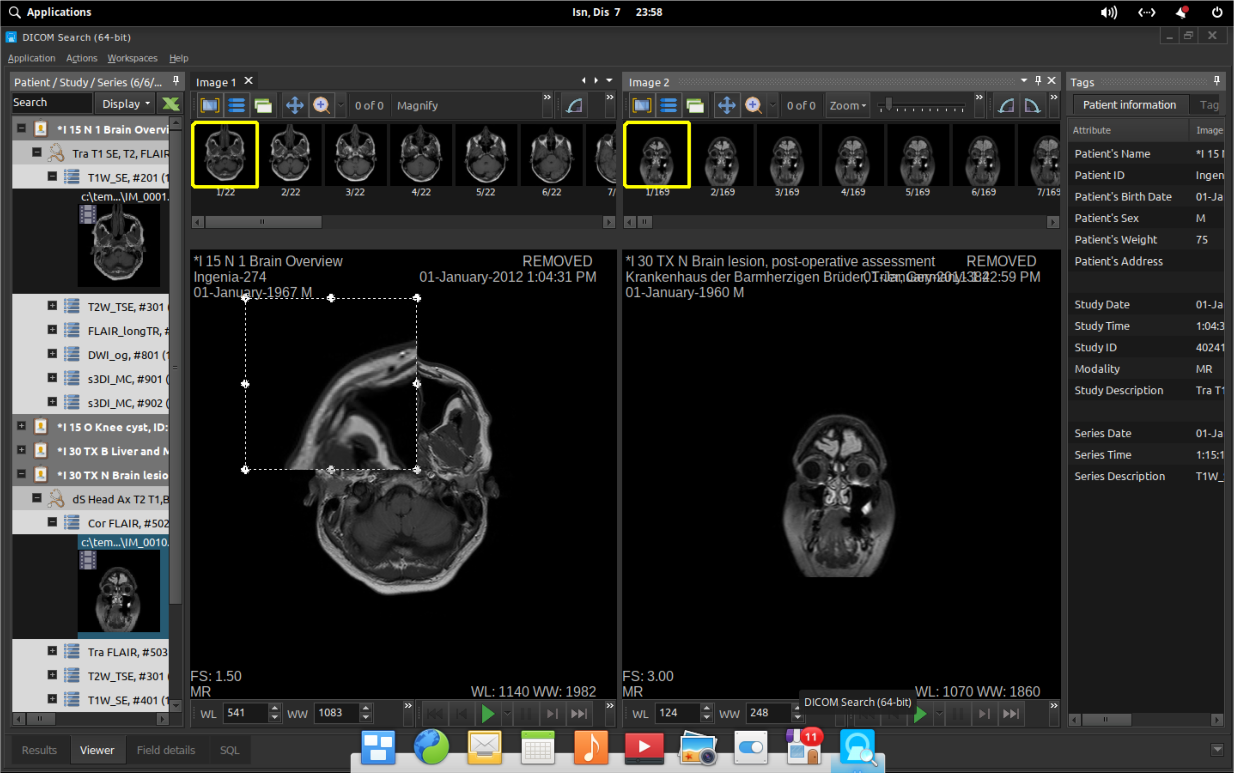
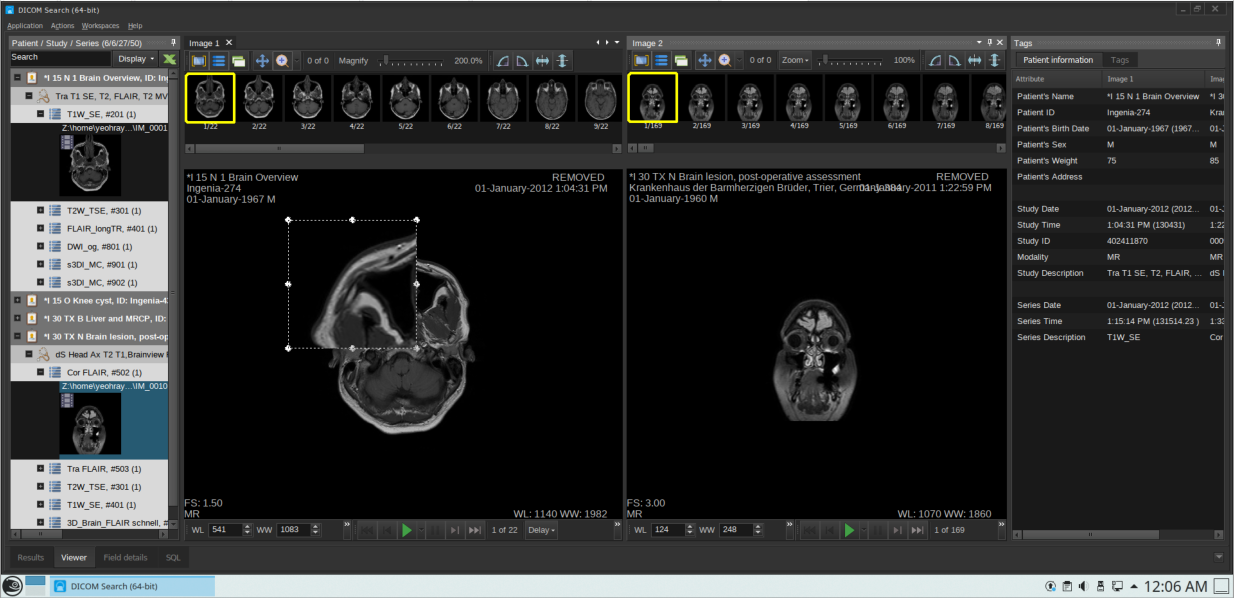
DICOM Search is a Windows application and cannot run natively on Linux or MacOS.  Recently, we had a go at installing and running DICOM Search on Ubuntu 20.04.  We had it installed and running, but there were some issues with using the dark theme, some text were getting cropped, and the overall look was ugly (to put it mildly).

We have since resolved this, and you can now install and run DICOM Search on Ubuntu 20.04.  If you do encounter any issues or GUI abnormalities, please do drop us a line at support @yohz.com.

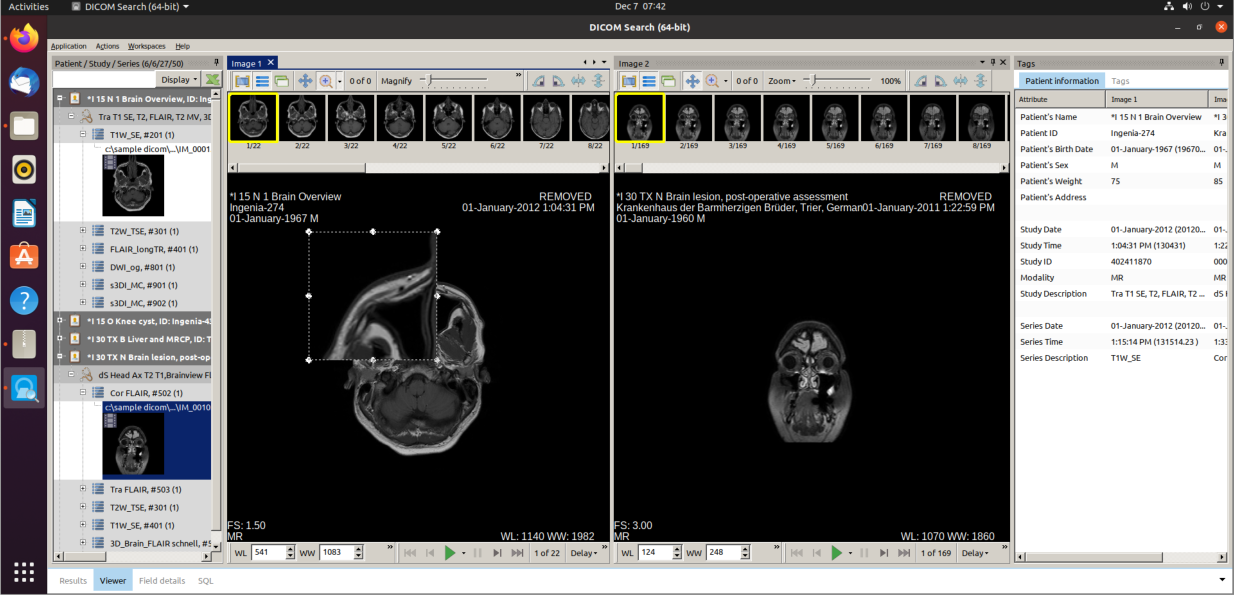
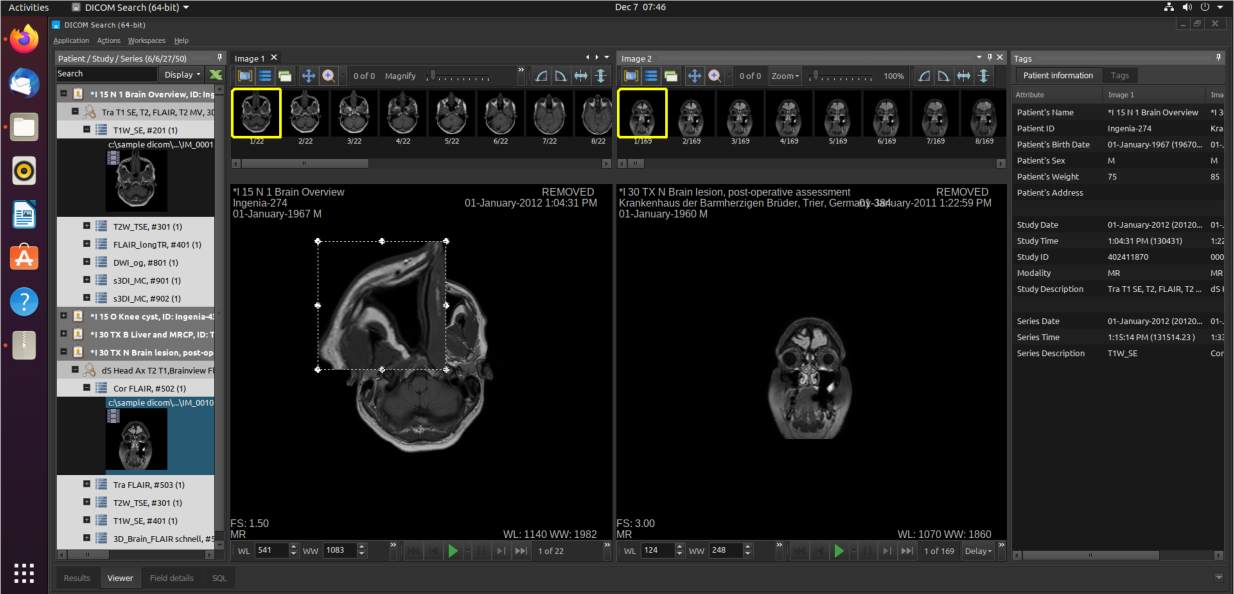
Here’s DICOM Search running on Ubuntu 20.04 via Wine:

(windows theme)

(dark theme)

We also tested DICOM Search on Elementary OS 5.1 and OpenSUSE 15.2.

(Elementary OS 5.1, dark theme)

(OpenSUSE 15.2, KDE Plasma desktop, dark theme)

If you do encounter any strange behavior when running DICOM Search on your Linux distribution, please do let us know at support@yohz.com.  Thank you.

Now, if only we had a Mac to test on…

Searching for numbers in DICOM text tags

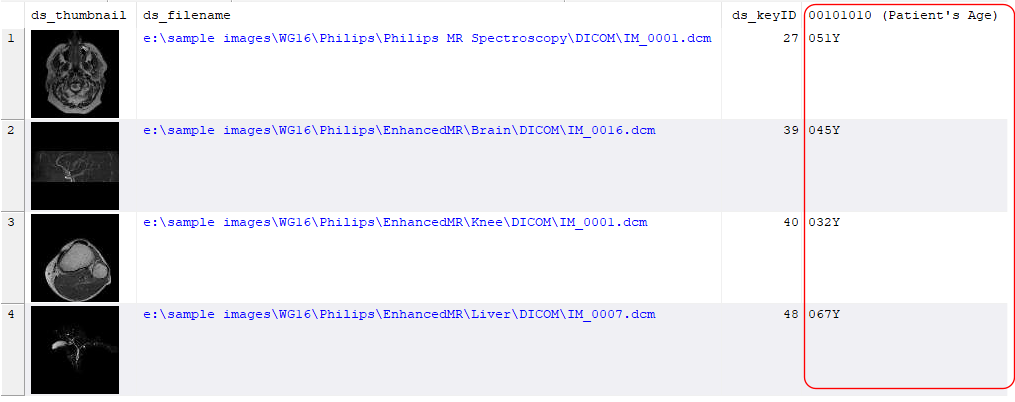
Some DICOM tags store a numerical value along with some textual information.   This makes it difficult to search for a specific value using mathematical operators.

For e.g. the age tag [00101010] in my DICOM images store the patient age together with a prefix (0) and a suffix (Y) i.e.

If we want to search for images where the patient age is between 50 and 60, we would need to write our search query like this:

age IN (‘050Y’, ‘051Y’, ‘052Y’, ‘053Y’, ‘054Y’, ‘055Y’, ‘056Y’, ‘057Y’, ‘058Y’, ‘059Y’, ‘060Y’)

which is very tedious and error-prone.  In DICOM Search 1.2, we added the EXTRACTNUMBER and EXTRACTNUMBERDEF functions to deal with this issue.

EXTRACTNUMBER will extract the first sequence of digits from the tag value and return the number.  If there is no valid digits, the value 0 is returned.  We can then rewrite our search query this way:

EXTRACTNUMBER(age) >= 50 AND EXTRACTNUMBER(age) <= 60

or

EXTRACTNUMBER(age) > 49 AND EXTRACTNUMBER(age) < 61

or

EXTRACTNUMBER(age) IN (50, 51, 52, 53, 54, 55, 56, 57, 58, 59, 60)

The EXTRACTNUMBERDEF function accepts a 2nd parameter as the default value to use when no digits exist in the value.  If our search query was written this way:

EXTRACTNUMBERDEF(age, -1) = -1

then any images where the age tag value does not contain numbers will return the value -1, and we can then easily see which of our images does not contain a valid age value.

Redirecting OLE-Object linked files during export

In SQL Image Viewer 10.3, and Access OLE Export/SQL Blob Export 3.18 we added the option to redirect where to look for OLE-Object linked files during the export process.

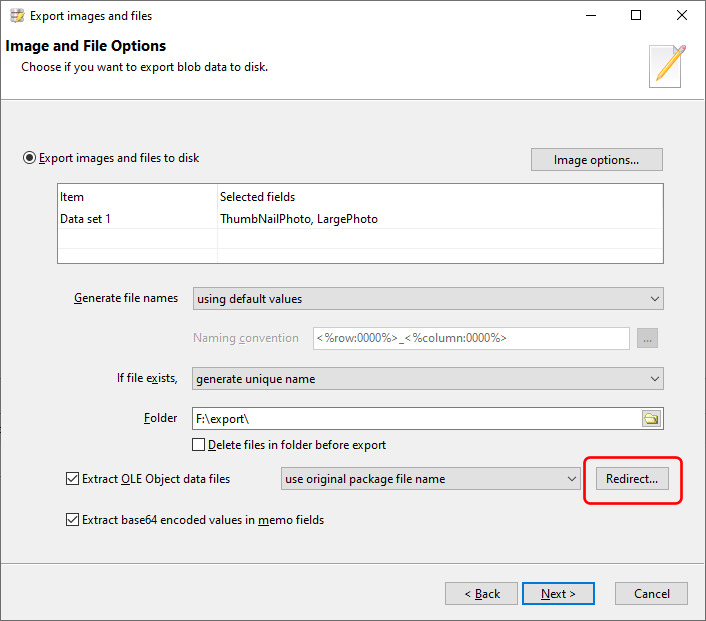
A common issue when using OLE-Object linked files is that the location of the linked files have changed.  For e.g. you may have previously linked files from the g:\customer_invoices\ folder, but say those files have now been moved to g:\archive\customer_invoices\2018\.

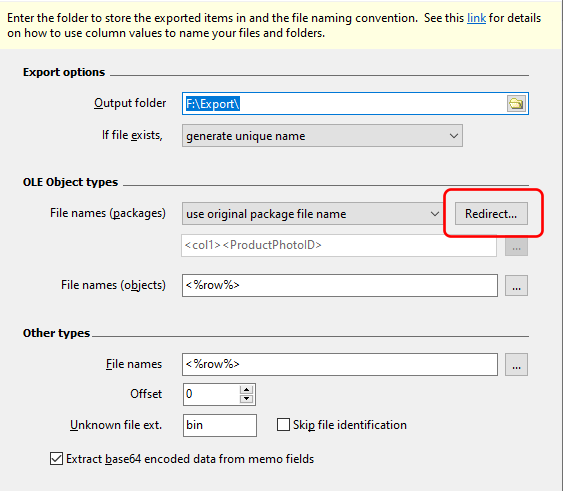
Previous versions of SQL Image Viewer will fail to locate these items during the export process.  In version 10.3, you will now find a redirect button in the Image and File Options screen.

In Access OLE Export/SQL Blob Export, you will find the Redirect button in the Options screen.

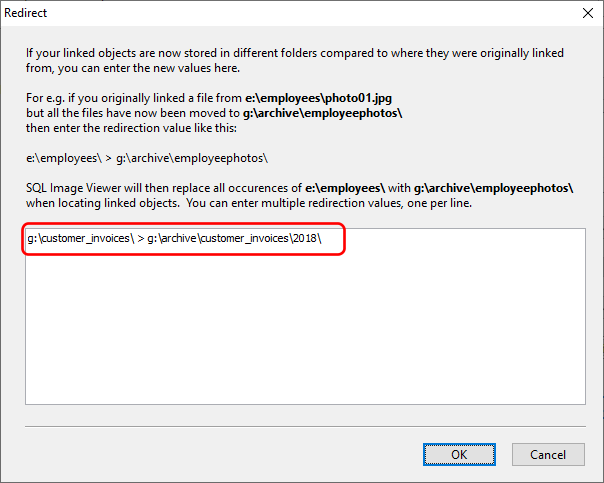
Click on that button to bring up the Redirect window.  Here, you can define how the old folders map to the new folders.  For our previous example, we would enter the following:

Now during the export process, when SQL Image Viewer fails to find the files in the original folder, it will look to the redirection rules defined here and look in the new folder for the files.  It will then export the files that it finds.  You can enter multiple redirection entries, and each entry must be on a new line.

Note that the redirection entries are essentially a search/replace process.  Anything entered prior to the redirection symbol (>) is replaced with the value entered after the symbol.  Thus, the entries are not just limited to redirecting entire paths.

Exporting content from Navision Incoming Document Attachment table

In SQL Image Viewer 10.3, we added support for Navision compressed files stored in the Incoming Document Attachment table.

# Note that this applies only to Navision 2013 and newer databases.

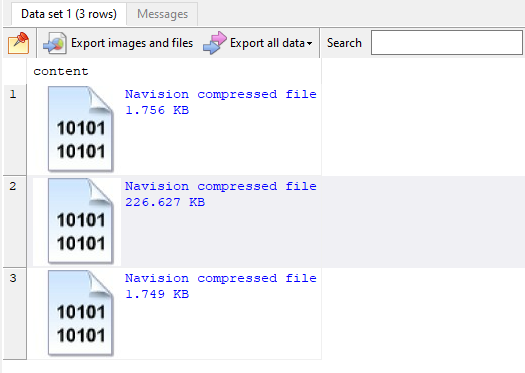
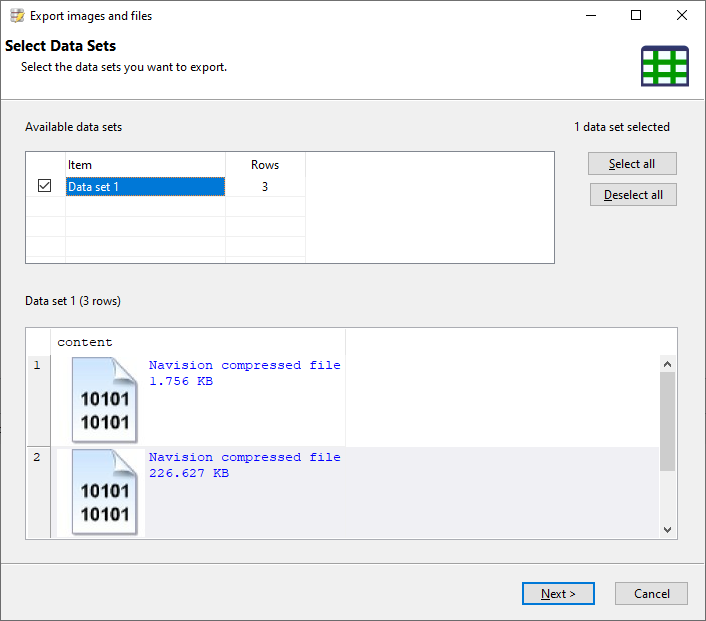
When you run a query on the Incoming Document Attachment table, the Content field will display the following if it contains compressed data.

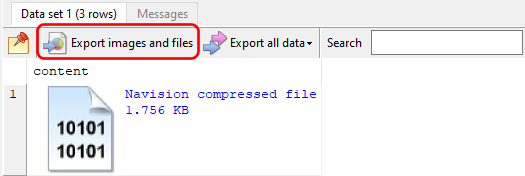
To extract the contents, click on the Export images and files button.

This opens the Export images and files dialog.

Walk through the steps, and SQL Image Viewer will extract and export the files stored in the Content field for you.

Learn more about SQL Image Viewer here, and download a free 14-day trial now and see how SQL Image Viewer can export your Navision compressed content in minutes.

Setting up a SQL Image Viewer export task in Windows Task Scheduler

SQL Image Viewer Professional Edition allows you to save your export tasks and run them unattended using the SQL Image Viewer command line interface.  This blog describes how to set up a Windows Task Scheduler recurring task to run SQL Image Viewer export tasks.

You must first set up and save an export settings file using the SQL Image Viewer GUI, described here.   Before setting up the export task in Task Scheduler, we should make sure that the export task can be ran successfully from the command prompt.

To do that, open a command prompt window and navigate to the folder where the SQL Image Viewer command line interface executable file (SQLImageViewerCmd.exe) is located.

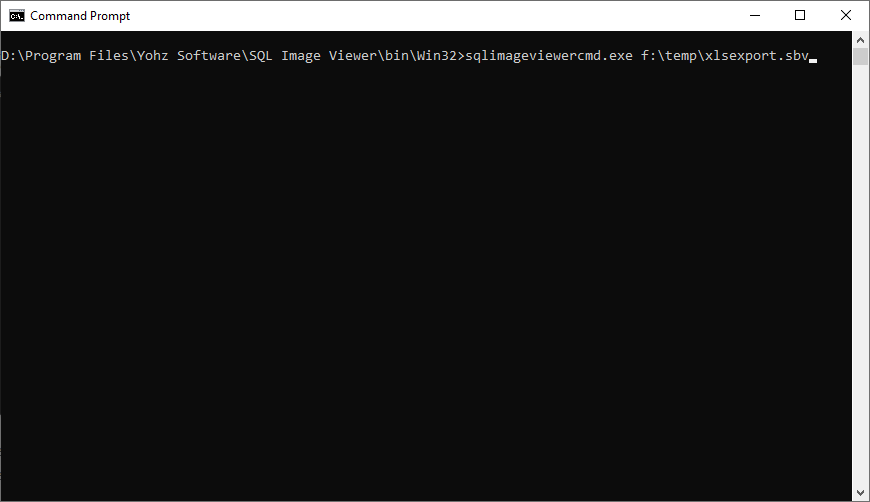
Enter the command line interface file name, and provide the fully qualified export settings file name as the first parameter.  You must enclose the parameter in double quotes if it contains spaces.

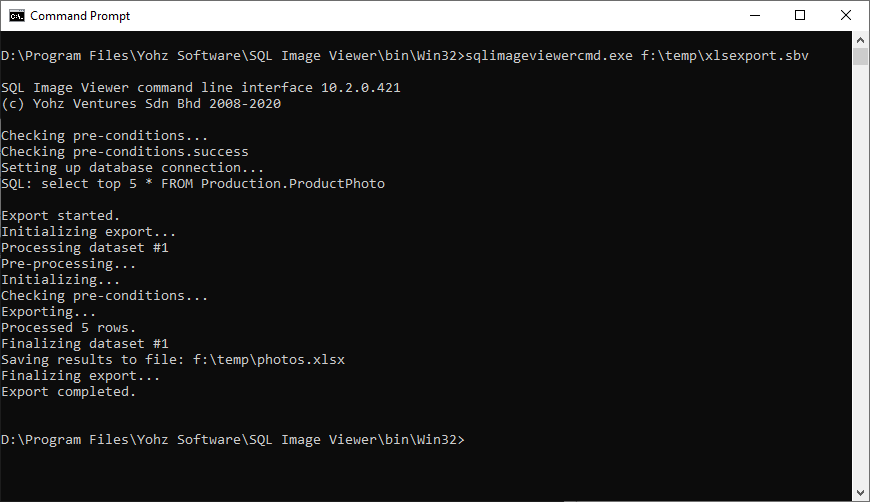
Run the command and check that the export task ran successfully.

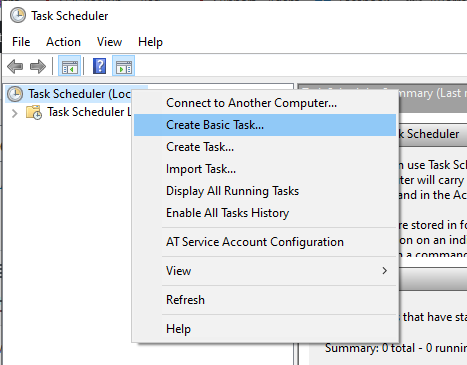
Now we can start up the Task Scheduler.  We will create a basic task in this example.

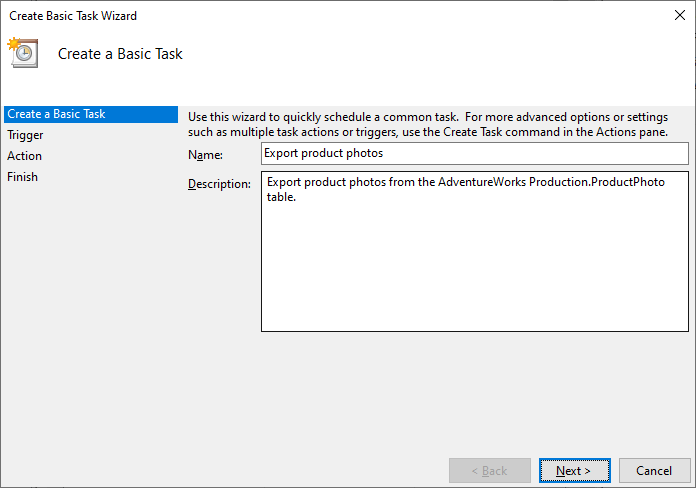
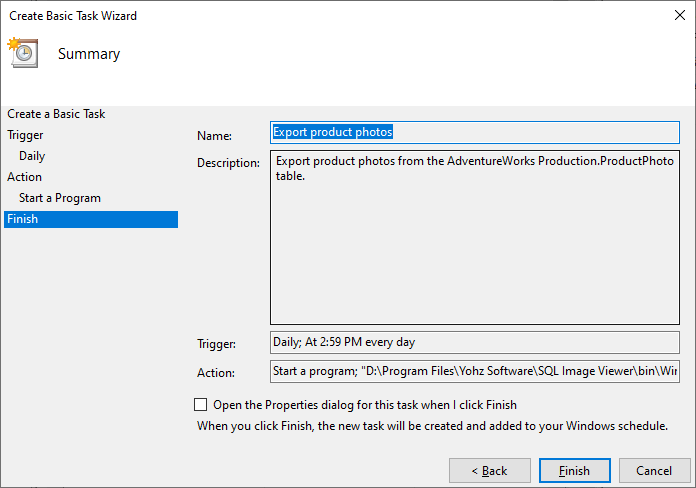
Enter a name and description for the task.

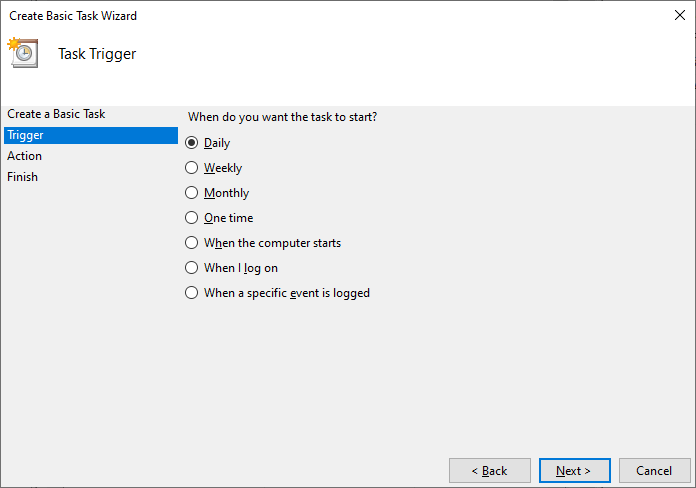
Select your required frequency to run the task, and the frequency settings on the subsequent page.

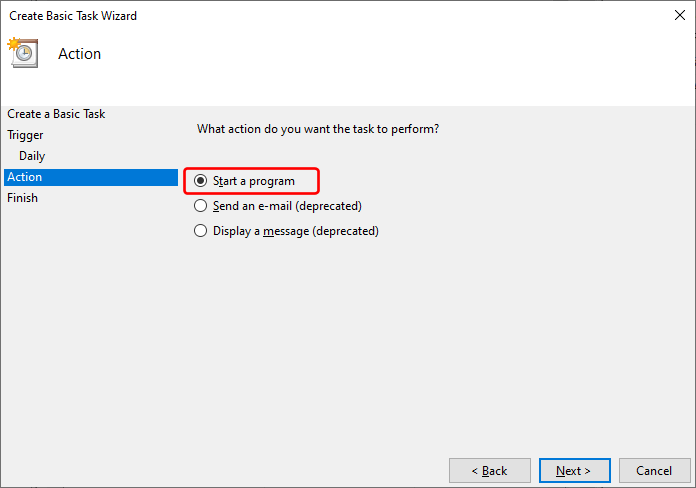
Select the Start a program action.

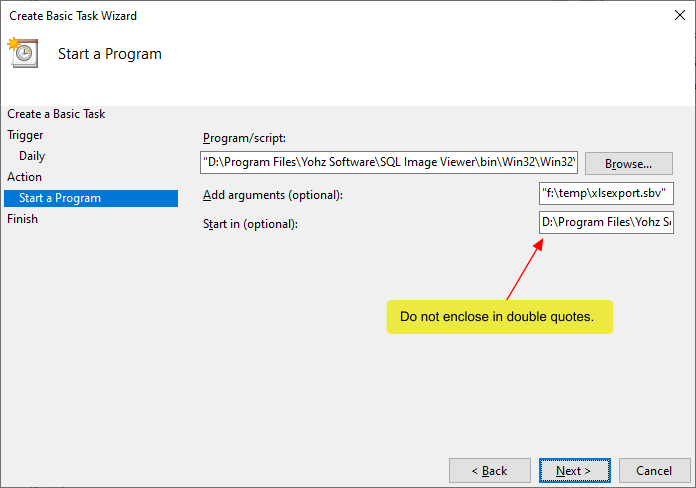
In the program settings window, enter the fully qualified file name to SQLImageViewerCmd.exe, enclosed in double quotes.  For the arguments, enter the fully qualified file name to the export settings file, enclosed in double quotes.  For the Start in value, enter the fully qualified folder name of the folder where SQLImageViewerCmd.exe is located, without the double quotes.

And you’re done.

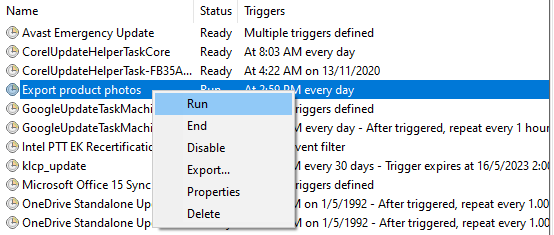
You can run the task to check if everything has been set up correctly.

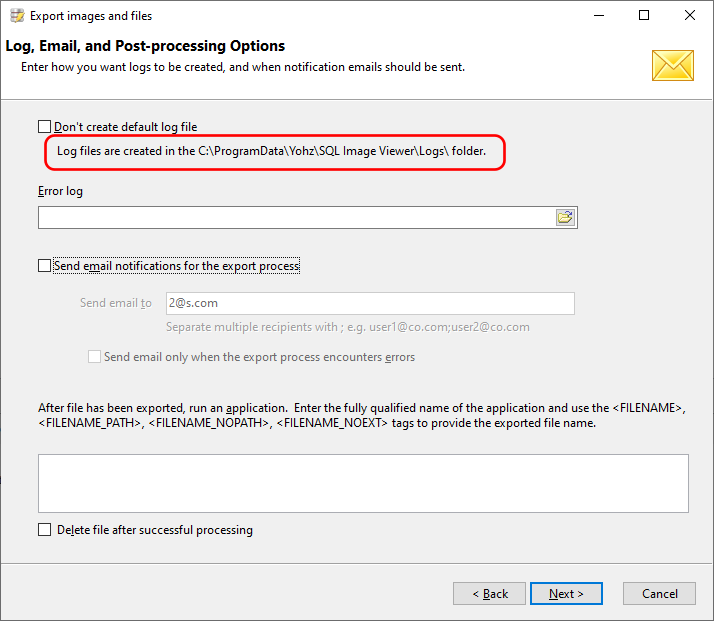
A log file is automatically created every time the SQL Image Viewer command line interface runs.  The folder where the logs are stored is displayed in the GUI:

You would inspect the log files if your export task no longer runs successfully.