Category Archives: SQL Image Viewer

Extracting attachments from an Access database using SQL Image Viewer

Access has a curiously interesting data type – attachment.

I say interesting because it does so much, but much of it is done behind the scenes.  To the user, it’s just so easy to attach one or or more files to that column.

For starters, some file types seem to be compressed automatically by Access.  I attached a 23 MB text file, and the database size only increased by 3 MB, which is about the size of what my text file would have compressed to.

Also, a single attachment-type column contains 4 sub-columns in them – FileName, FileType, FileData and FileURL (for Sharepoint databases).  These are the sub-columns we need to include in our query in SQL Image Viewer when we want to extract the files from the attachment-type columns.

Say we have a table defined as such:

with the following data:

Row 1 has 1 attachment, and row 2 has 2 attachments.  If we run a query that selects just the 3 columns from the table in SQL Image Viewer, we get this:

The files column, which is the attachment-type column, displays only the names of the attached files, and is returned as a text column.  If however we selected the sub-columns:

Access returns 3 rows instead of 2.  Because our 2nd row contained 2 attachments, Access returns 2 data rows, one for each attachment.

Thus, to extract the data from the attachment-type columns in SQL Image Viewer, we need to select the filedata sub-column of the attachment-type column.

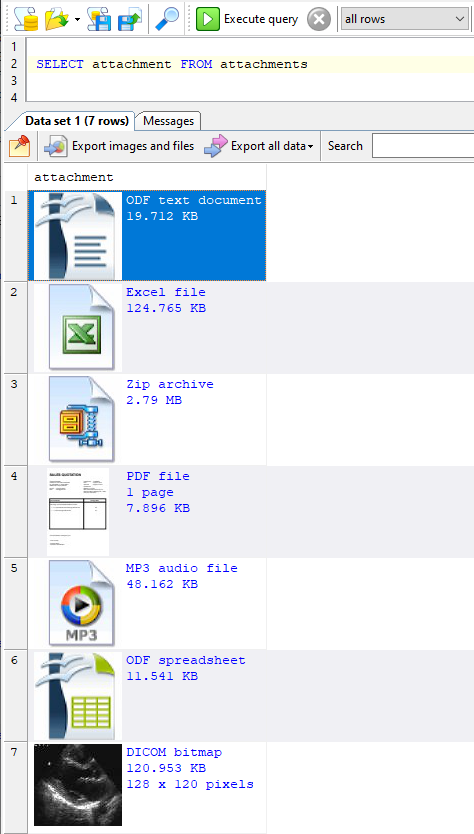
Since we added support for attachment-type columns in SQL Image Viewer 11, the same query above now returns this:

Download a 14-day trial of SQL Image Viewer now and experience how easy it is to extract attachments from your Access databases.

Connecting to SQL Server via ODBC using SQL authentication

We recently had a user who had his SQL Server hosted in a data center, and needed to extract files from his database.  He could connect to the instance remotely, but it took too long to extract the files this way.  He tried connecting to the database via another computer in the data center, but received the ‘TCP Provider: An existing connection was forcibly closed by the remote host.‘ error.

This suggests a network configuration setting issue.  Instead of getting the data center to change the server settings, we instead set up an ODBC connection and used that connection in SQL Blob Export.

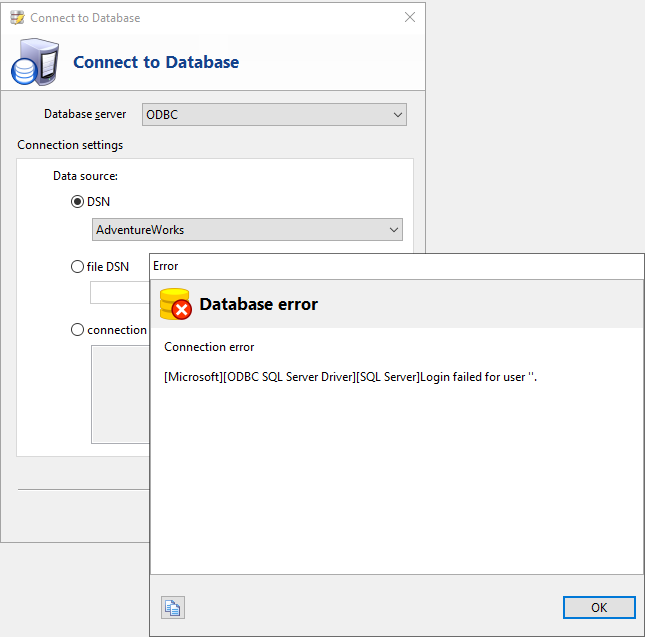
Using Windows authentication to connect to the instance via ODBC was easy enough.  However, if using SQL Server authentication, the password is not stored in the ODBC settings, and the connection would still fail.

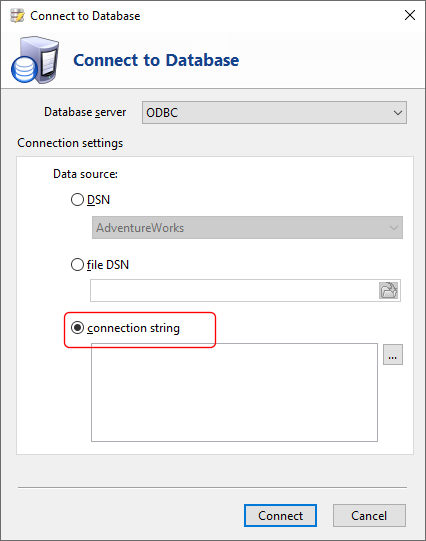
In order to connect to the SQL Server instance via ODBC using SQL Server authentication, choose the Connection string option instead.

Click on the Browse button

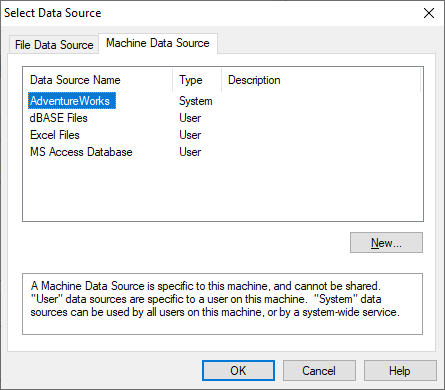
and select the ODBC connection to your SQL Server database.

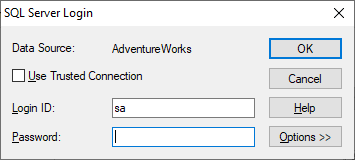
The SQL Server ODBC connection manager will then prompt you to enter the password.

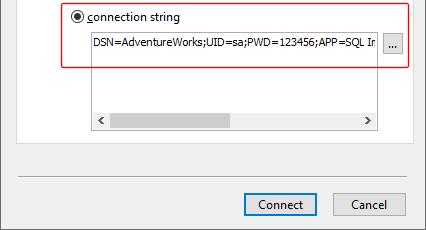
Enter the password in the provided area and click OK.  The ODBC connection string is then filled out, together with your password.

Click on the Connect button.  SQL Blob Export should now successfully connect to your SQL Server database using SQL Server authentication.

The same steps apply to our other database products that support SQL Server and ODBC connections.

If you require further assistance, you can post your questions in our support forum.

Redirecting OLE-Object linked files during export

In SQL Image Viewer 10.3, and Access OLE Export/SQL Blob Export 3.18 we added the option to redirect where to look for OLE-Object linked files during the export process.

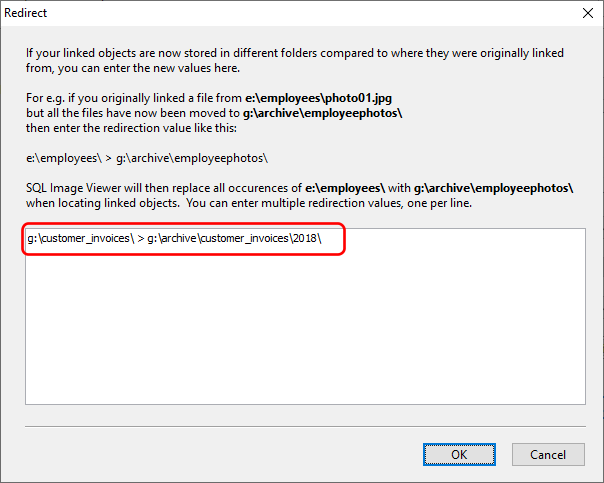
A common issue when using OLE-Object linked files is that the location of the linked files have changed.  For e.g. you may have previously linked files from the g:\customer_invoices\ folder, but say those files have now been moved to g:\archive\customer_invoices\2018\.

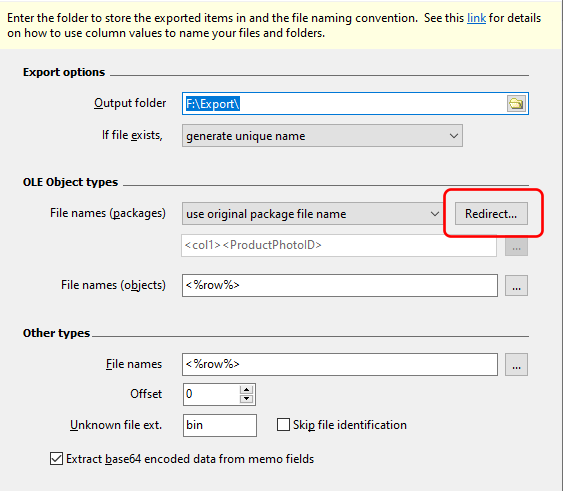
Previous versions of SQL Image Viewer will fail to locate these items during the export process.  In version 10.3, you will now find a redirect button in the Image and File Options screen.

In Access OLE Export/SQL Blob Export, you will find the Redirect button in the Options screen.

Click on that button to bring up the Redirect window.  Here, you can define how the old folders map to the new folders.  For our previous example, we would enter the following:

Now during the export process, when SQL Image Viewer fails to find the files in the original folder, it will look to the redirection rules defined here and look in the new folder for the files.  It will then export the files that it finds.  You can enter multiple redirection entries, and each entry must be on a new line.

Note that the redirection entries are essentially a search/replace process.  Anything entered prior to the redirection symbol (>) is replaced with the value entered after the symbol.  Thus, the entries are not just limited to redirecting entire paths.

Exporting content from Navision Incoming Document Attachment table

In SQL Image Viewer 10.3, we added support for Navision compressed files stored in the Incoming Document Attachment table.

# Note that this applies only to Navision 2013 and newer databases.

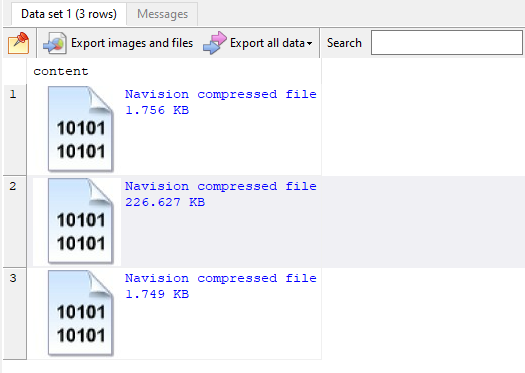
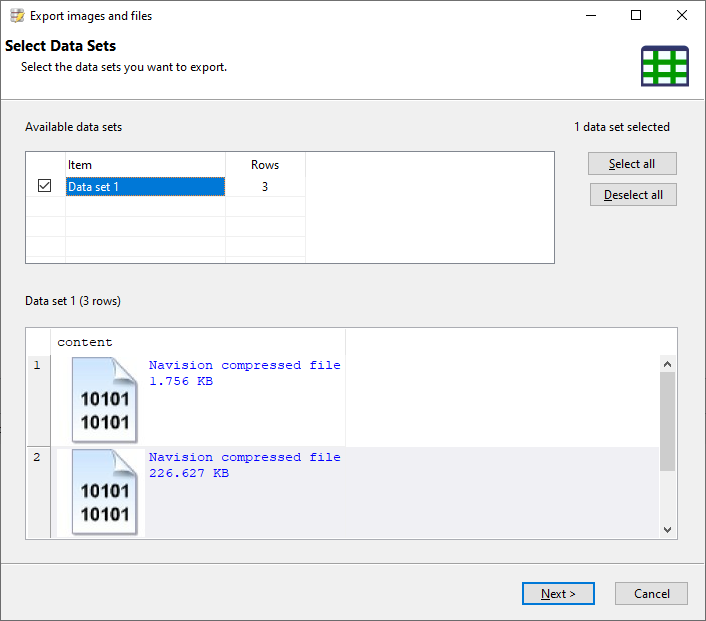
When you run a query on the Incoming Document Attachment table, the Content field will display the following if it contains compressed data.

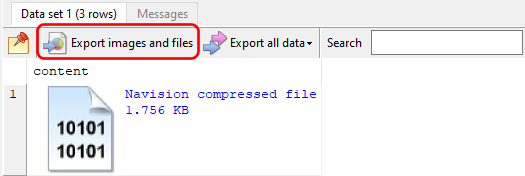
To extract the contents, click on the Export images and files button.

This opens the Export images and files dialog.

Walk through the steps, and SQL Image Viewer will extract and export the files stored in the Content field for you.

Learn more about SQL Image Viewer here, and download a free 14-day trial now and see how SQL Image Viewer can export your Navision compressed content in minutes.

Setting up a SQL Image Viewer export task in Windows Task Scheduler

SQL Image Viewer Professional Edition allows you to save your export tasks and run them unattended using the SQL Image Viewer command line interface.  This blog describes how to set up a Windows Task Scheduler recurring task to run SQL Image Viewer export tasks.

You must first set up and save an export settings file using the SQL Image Viewer GUI, described here.   Before setting up the export task in Task Scheduler, we should make sure that the export task can be ran successfully from the command prompt.

To do that, open a command prompt window and navigate to the folder where the SQL Image Viewer command line interface executable file (SQLImageViewerCmd.exe) is located.

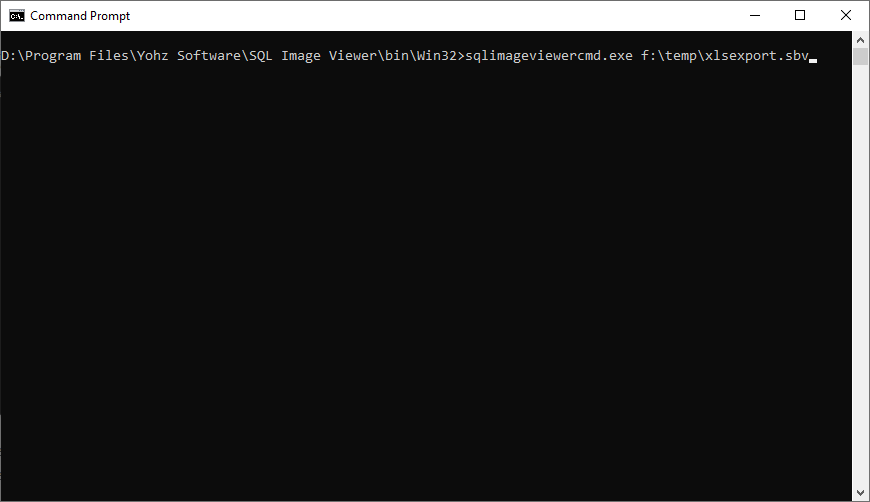
Enter the command line interface file name, and provide the fully qualified export settings file name as the first parameter.  You must enclose the parameter in double quotes if it contains spaces.

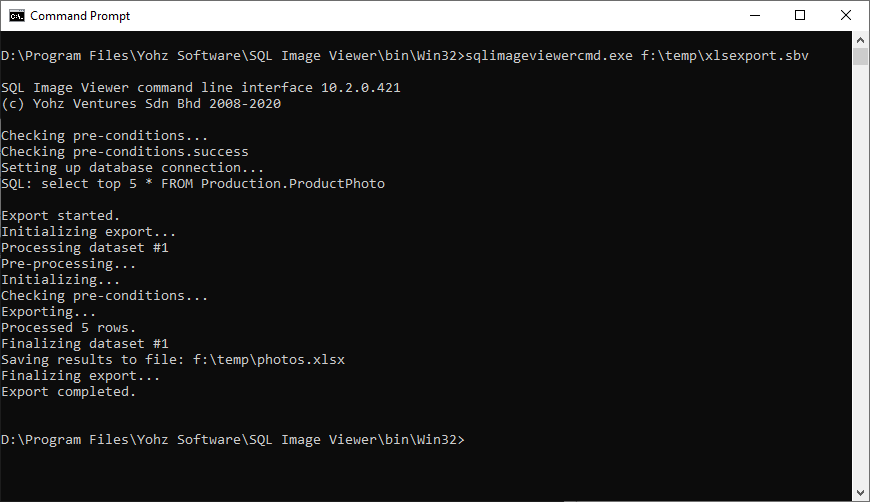
Run the command and check that the export task ran successfully.

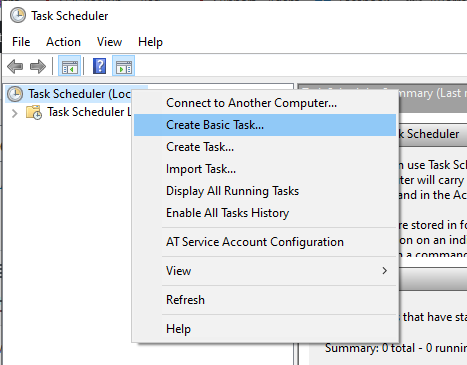
Now we can start up the Task Scheduler.  We will create a basic task in this example.

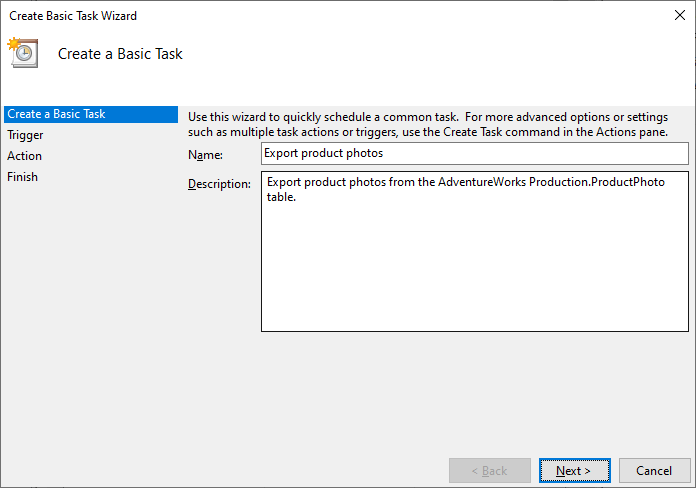
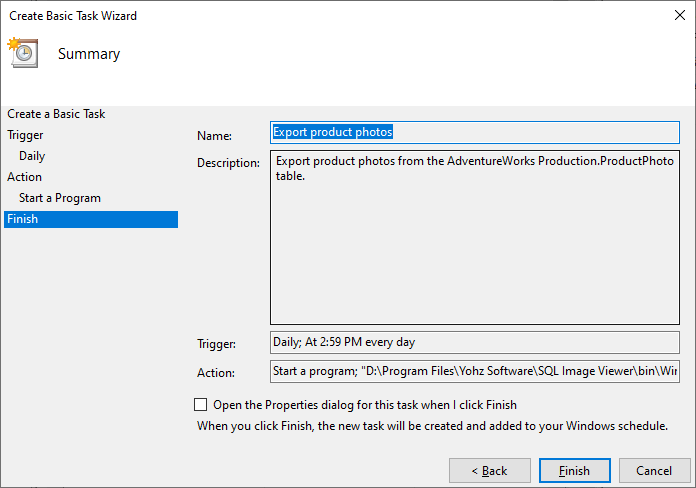
Enter a name and description for the task.

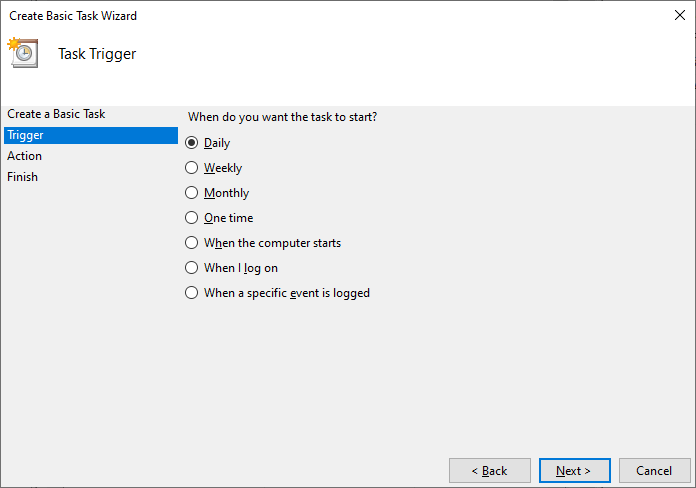
Select your required frequency to run the task, and the frequency settings on the subsequent page.

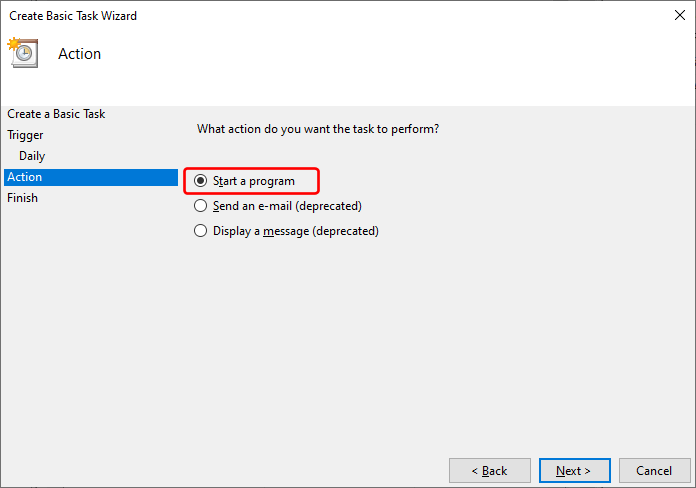
Select the Start a program action.

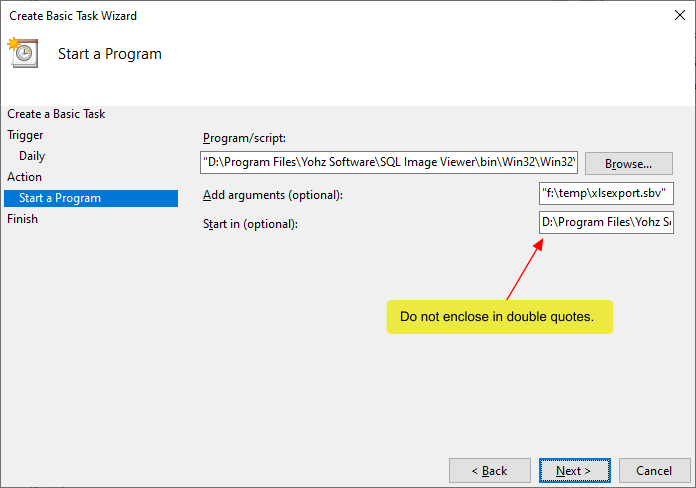
In the program settings window, enter the fully qualified file name to SQLImageViewerCmd.exe, enclosed in double quotes.  For the arguments, enter the fully qualified file name to the export settings file, enclosed in double quotes.  For the Start in value, enter the fully qualified folder name of the folder where SQLImageViewerCmd.exe is located, without the double quotes.

And you’re done.

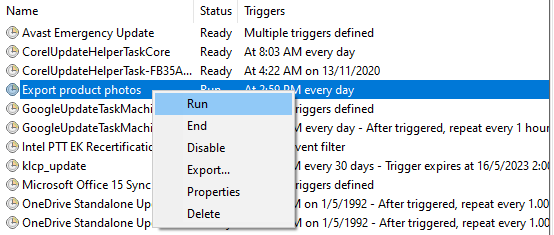
You can run the task to check if everything has been set up correctly.

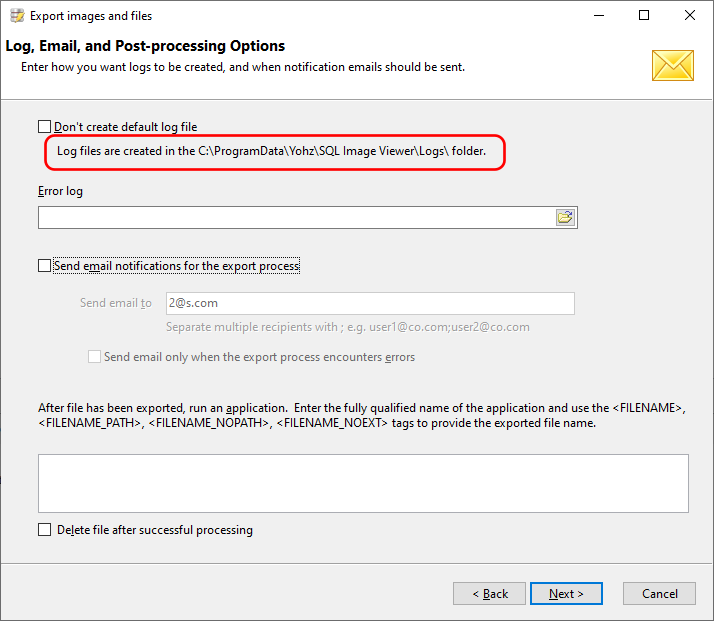
A log file is automatically created every time the SQL Image Viewer command line interface runs.  The folder where the logs are stored is displayed in the GUI:

You would inspect the log files if your export task no longer runs successfully.

Using the column name in your file naming convention in SQL Image Viewer

In SQL Image Viewer 10.2, we’ve added a new option to the system values for your file naming convention.

Using this example:

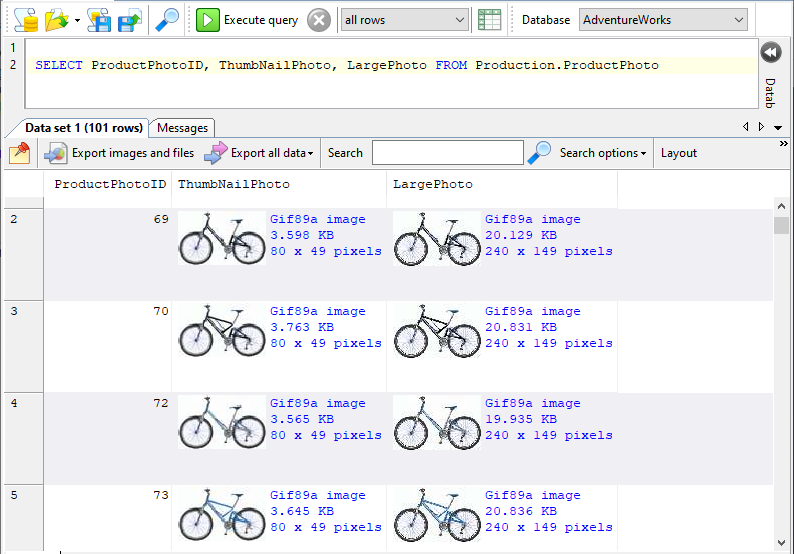
Each row contains 2 binary-type columns.  We can name our exported images using the ProductPhotoID column, but to identify the source column for the images, we could previously only use the column index

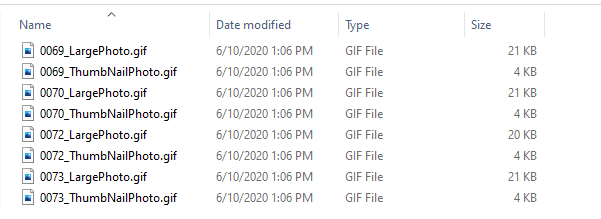
resulting in file names like these:

The first part of the file name is the ProductPhotoID value, formatted to 4 digits, and the second part is the column index (columns 2 and 3).

From SQL Image Viewer 10.2 onwards, you can now use the column name as part of the naming convention.

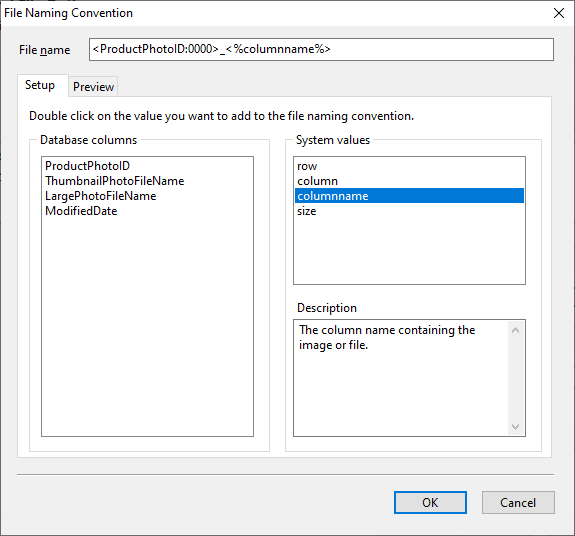
which is used to name the exported files

You can select this new option (columnname) in the File Naming Convention page.

If you want to use a different value for the column name, simply use the alias syntax applicable to your database engine.  For SQL Server, this would be using the AS option e.g.

How to view image data type in SQL Server

The image data type in SQL Server is frequently used to store variable length binary data.  It does not have to store only ‘images’, though most people associate that data type with images.

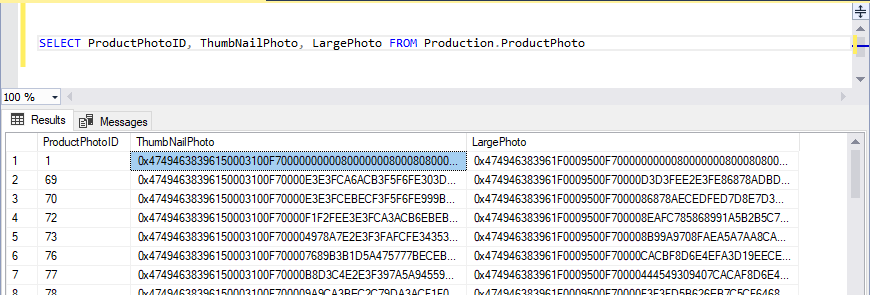
You may occasionally need to view the type of data that’s stored, but SQL Server Management Studio can only display the binary representation of the data (we’re using the AdventureWorks sample database here).

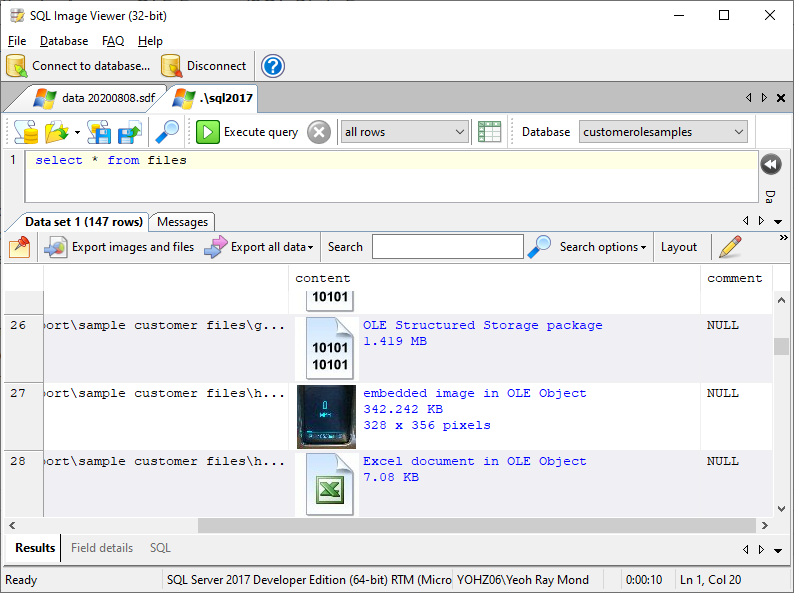
SQL Image Viewer is one tool that can display the image directly in the result set.

Interesting points to note:

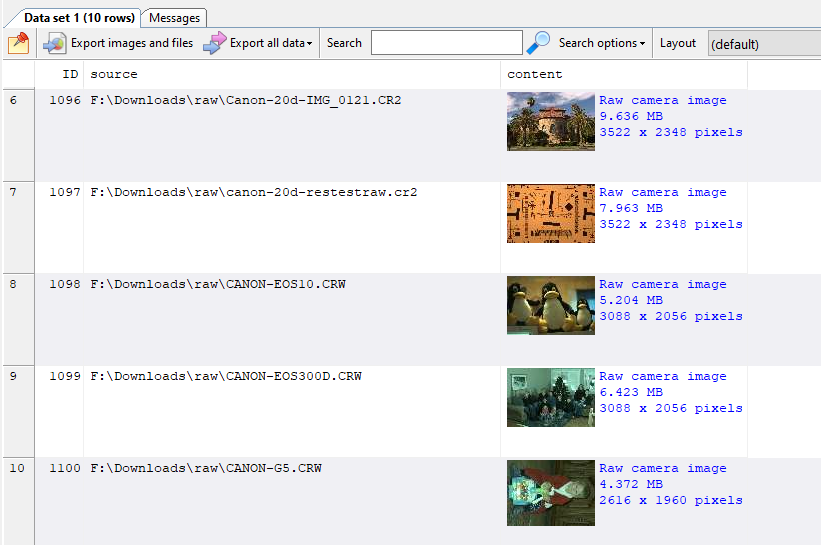
  • the image format was never provided.  SQL Image Viewer can read the binary data and determine the image format itself.  It recognizes png, gif, jpg, tiff, bmp, wmf, emf, dicom, and raw camera formats.
  • details of the image like size and resolution are provided automatically

Though its name might suggest otherwise, SQL Image Viewer doesn’t just support ‘images’.  It recognizes a wide variety of file formats, including Microsoft Office documents, OpenOffice documents, PDF, epub, multimedia files (avi, wav, mp3, mp4, svg, swf, flv, mkv, webm, m4v, mov, 3gp), and compressed archives (zip, 7zip, rar, bzip2, gzip).

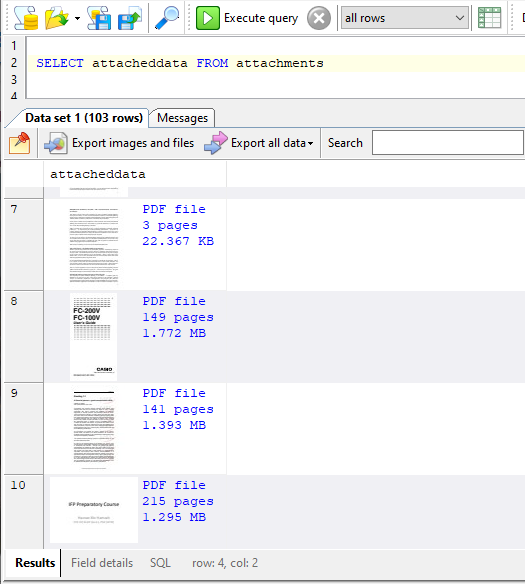
For PDFs, SQL Image Viewer is able to display a thumbnail of the first page, and also the number of pages in the file.

Once retrieved, you can export the binary data.  You can export them to a spreadsheet:

or simply export them as individual files:

You can name the files using values from other columns.  You can also convert the exported images to other formats:

For images that contain EXIF values, you can view these values using the internal viewer:

In addition to SQL Server, SQL Image Viewer also supports Oracle, PostgreSQL, MySQL, MariaDB, Microsoft Access, SQLite, Firebird/Interbase and ODBC supported databases.

Thus, you can easily view the data that’s stored in

  • binary and varbinary columns in Oracle databases
  • bytea columns in PostgreSQL databases
  • binary and varbinary columns in MySQL and MariaDB databases
  • binary and varbinary columns in Microsoft Access databases
  • OLE-Object columns in Microsoft Access databases

Download a free 14-day trial now and see how SQL Image Viewer can make working with image data types in SQL Server so much easier.

If writing SQL scripts is not your thing, SQL Blob Export is a wizard-driven alternative to SQL Image Viewer.

Using the newer Excel format (xlsx) in your exports

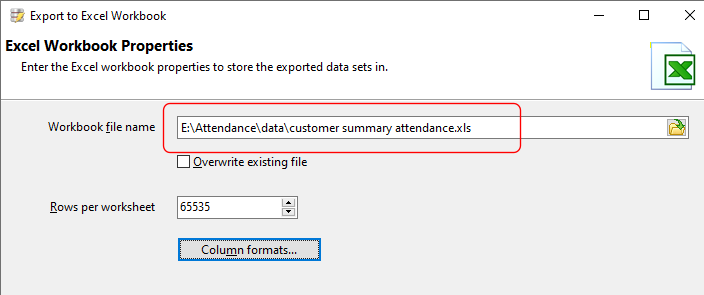
When SQL Image Viewer first supported exporting your result sets to Excel spreadsheets, it only supported the older .xls format.

Since version 9.7 (released in December 2019), the newer Excel format (.xlsx) is now supported.  However, because SQL Image Viewer uses your last export settings when you choose the Excel file name, you may still be using the older .xls format.

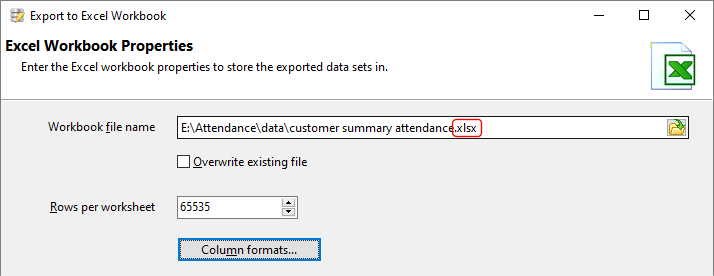
To export your data and images to the new Excel format, simply change the file extension from xls to xlsx.

For new users, and users who have never exported to Excel previously, the default extension used is xlsx,  so no action is required on your part to use the new Excel format.

The main advantage in using the xlsx format is that the maximum number of rows in your worksheet increases to 1,048,576 from 65,536 rows.


Merge or combine TIFF files

We had a user who recently asked if SQL Blob Export is able to merge or combine the extracted single-page TIFF files from her database into multi-page TIFF files.  This feature isn’t built-in, but we have provided an external command line application (MergeTiff) that you can freely use to perform the same task.

You can use MergeTiff on any tif files, including those extracted using SQL Image Viewer, SQL Blob Export, and Access OLE Export.  It is important that the extracted files use names that group the pages into the right order.

For e.g. the default naming convention for exported files in SQL Image Viewer is row and column index, so assuming each row in your result set only had 1 blob column, your exported files would be named this way:

0001_0001.tif
0002_0001.tif
0003_0001.tif

This isn’t going to help MergeTiff determine how to group the files.  What you need is a ‘grouping’ value e.g. say a CustomerID column that identifies the customer each image belongs to.  We then use this naming convention in SQL Image Viewer/ SQL Blob Export/ Access OLE Export:

<CustomerID>_<%row:0000%>

and our exported files may be named this way:

A00123_0001.tif
A00123_0002.tif
A00123_0003.tif
C72186_0006.tif
D12472_0007.tif
E88822_0004.tif
E88822_0005.tif

In this way, we know that for customer A00123, we need to merge 3 files, for customer E88822, we need to merge 2 files, and so on.

To use MergeTiff, you need to provide at least 1 parameter:

  • the search pattern for the files to process using the -i  parameter e.g.

MergeTiff.exe -i “g:\exported images\*.tif” 

Other parameters supported by MergeTiff:

-o

this is the output folder to store the merged files.  If not provided, the merged files will be stored in the same folder as the source files.  If you want to store the merged files in a different folder, you would need to provide the -o parameter e.g.

MergeTiff.exe -i “g:\exported images\*.tif” -o “g:\exported images\merged\”

-d

this is the delimiter that the source file name uses to separate elements, default value is _

In our example, our file name elements use the underscore character e.g. _.  You might use another symbol e.g.

A00123-0001.tif
A00123-0002.tif
A00123-0003.tif
E88822-0004.tif

In this case, you need to provide the -d parameter and the delimiter character e.g.

MergeTiff.exe -i “g:\exported images\*.tif” -o “g:\exported images\merged\” -d “-“

-g

this is the grouping element index, default value is 1.  In our example, the grouping element is the first element i.e. all the characters before the first delimiter i.e.

A00123
E88822
C72186
D12472
E88822

If instead our file named had been named this way:

scanneddocsA00123_invoice1005_A00123_0001.tif
scanneddocsA00123_invoice1005_A00123_0002.tif
scanneddocsA00123_invoice1006_A00123_0003.tif
scanneddocsC72186_invoice1008_C72186_0006.tif
scanneddocsD12472_invoice2010_D12472_0007.tif

and we still wanted to merge all documents belonging to the same customer, then our grouping element is the 3rd element, and we would need to use the -g parameter e.g.

MergeTiff.exe -i “g:\exported images\*.tif” -o “g:\exported images\merged\” -g 3

-n

this is the naming element index, default value is 1.  Following on from the above example, supposing we merge our files by invoice number instead of customer code, we would need to use both the -g and -n parameters e.g.

MergeTiff.exe -i “g:\exported images\*.tif” -o “g:\exported images\merged\” -g 2 -n 2

-ow

use this parameter to overwrite any existing files of the same name

If you want MergeTiff to overwrite any existing files, use the -ow parameter e.g.

MergeTiff.exe -i “g:\exported images\*.tif” -ow

-r

use this parameter to also process files in the input path subfolders

To process files recursively beneath the input path, use the -r parameter e.g.

MergeTiff.exe -i “g:\exported images\*.tif” -r

You can download MergeTiff from here.
Incorrectly extracted files in Access OLE Export/SQL Blob Export

Access OLE Export / SQL Blob Export may sometimes extract items that appear to be wrong.  For e.g. it might extract an expected PDF file as an image file.  To troubleshoot such issues, we need your help in sending us the data exactly as stored in your database to us for further investigation.
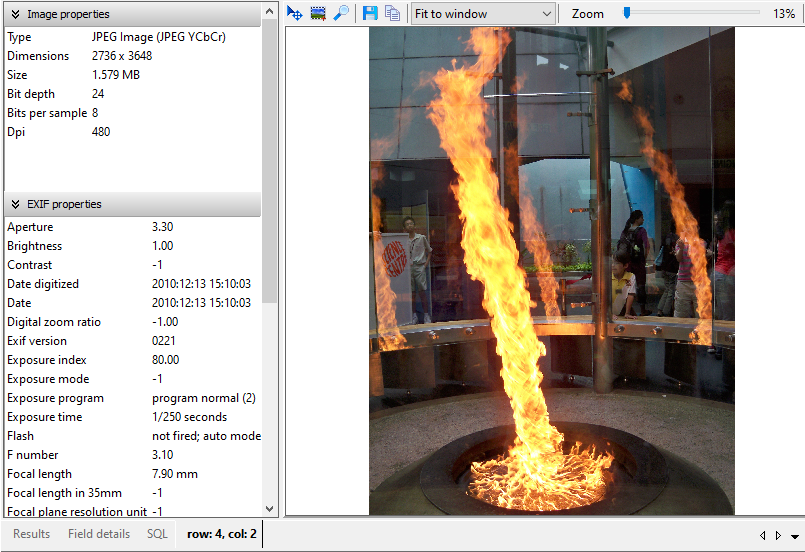
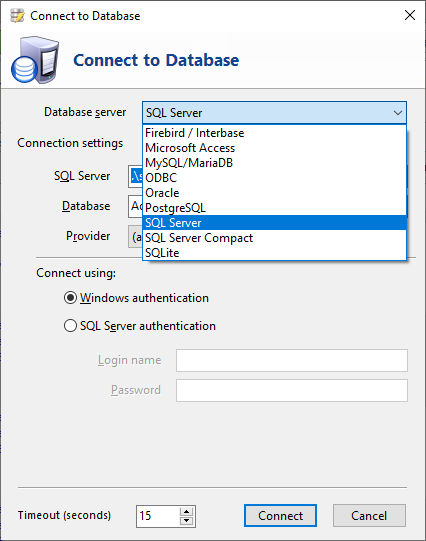
One way to extract the data is to use SQL Image Viewer.  Once installed, connect to the same database you were trying to extract your items from, and run your query to select the wrongly extracted item(s).

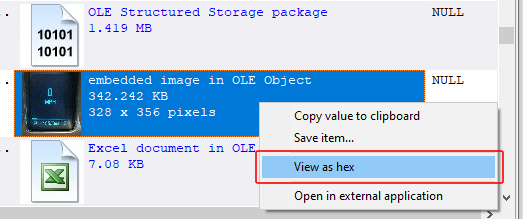
Select the item you’re having problems with, right click to bring up the context menu, and select the View as hex option.

SQL Image Viewer will display the selected item in a hex viewer.  Click on the Save button to save the raw data to a file.

and send us that file at support@yohz.com.  Having the raw data to work with will help us immensely to determine why Access OLE Export / SQL Blob Export appears to be extracting your files wrongly.