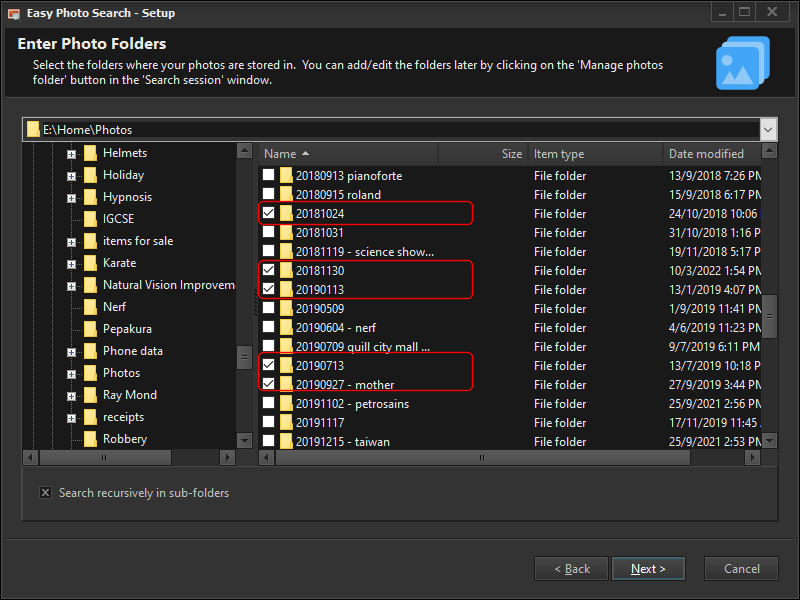
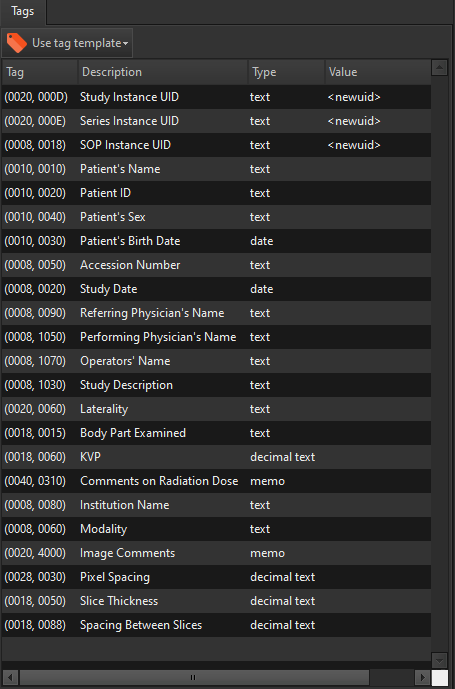
By default, the search results In Easy PDF Search displays the physical page numbers where the search words/phrases are found.
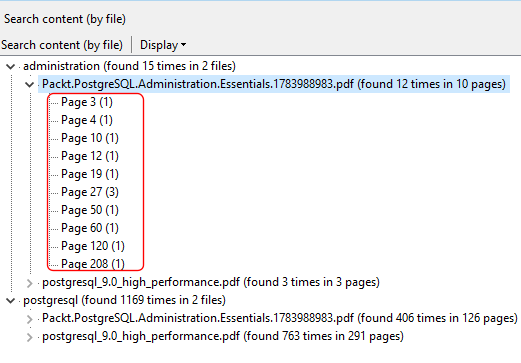
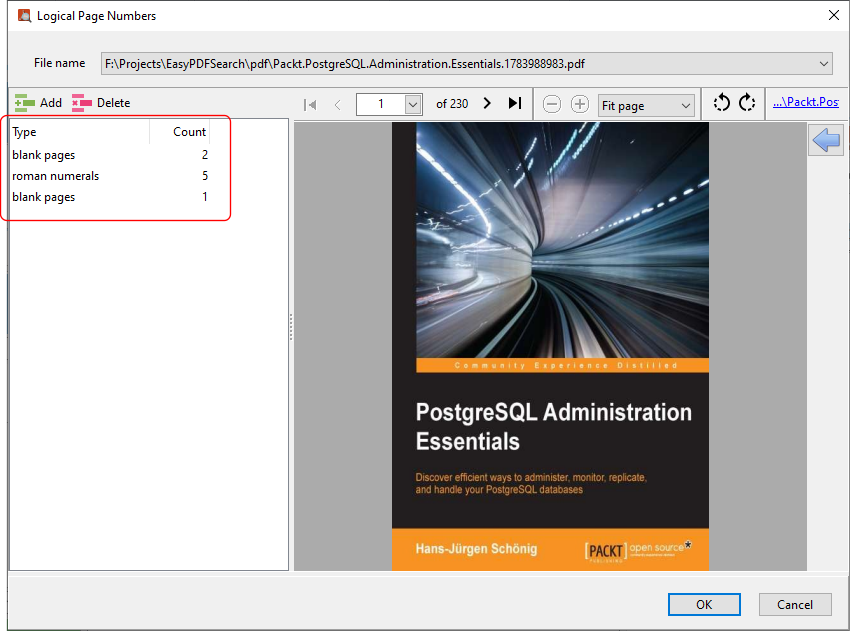
You may sometimes want to display the logical page numbers instead. For e.g. say we have a PDF file that has a cover, followed by a blank page, then 5 pages of prefaces using roman numbering, followed by another blank page, then finally the actual content.
The logical numbering of the PDF would look something like this:
- cover (physical page 1)
- blank page (physical page 2)
- page I (physical page 3)
- page II (physical page 4)
- page III (physical page 5)
- page IV (physical page 6)
- page V (physical page 7)
- blank page (physical page 8)
- page 1 (physical page 9)
- page 2 (physical page 10)
- …
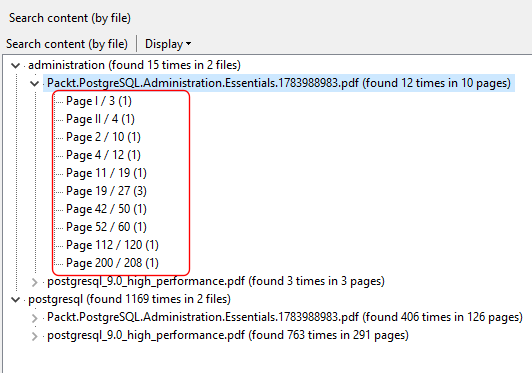
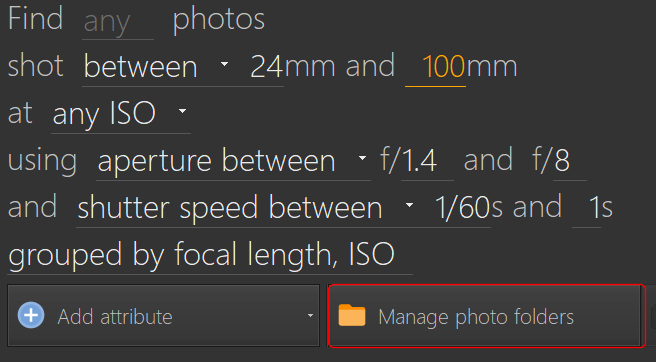
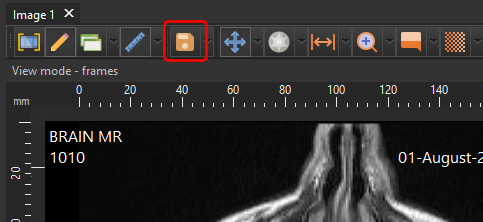
In Easy PDF Search 5.2, you can now define the logical page numbering for a PDF file and display that numbering scheme in your search results. The search results using logical page numbering for the above example will then be displayed this way:
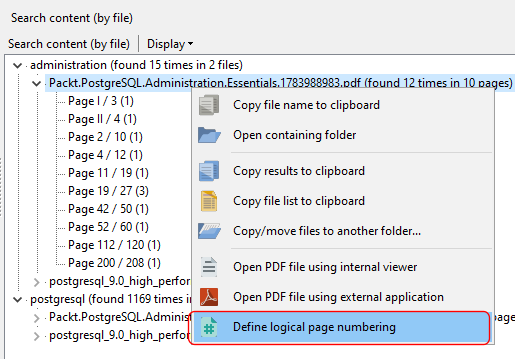
To define the logical page numbering for a PDF file, right click on the PDF file name in the search results and click on the Define logical page numbering item.
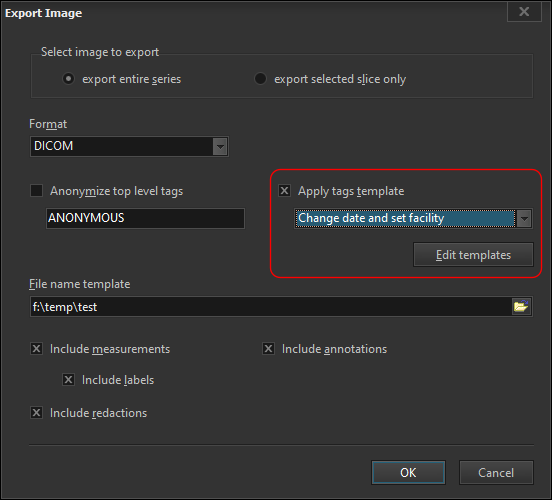
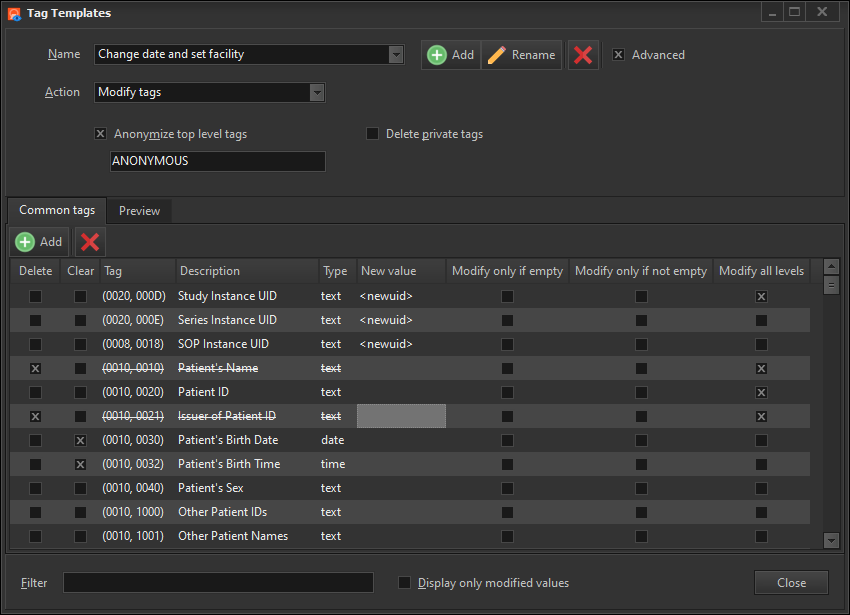
In the Logical Page Numbers screen, enter the page count for each page type that have their own numbering scheme or none at all. Using the example above, this is how we would define the logical page numbers.


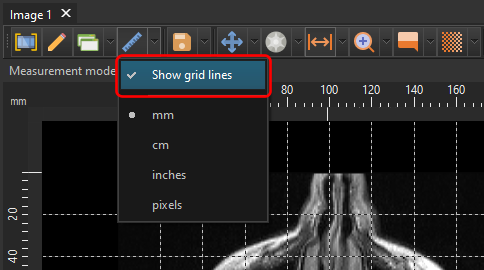
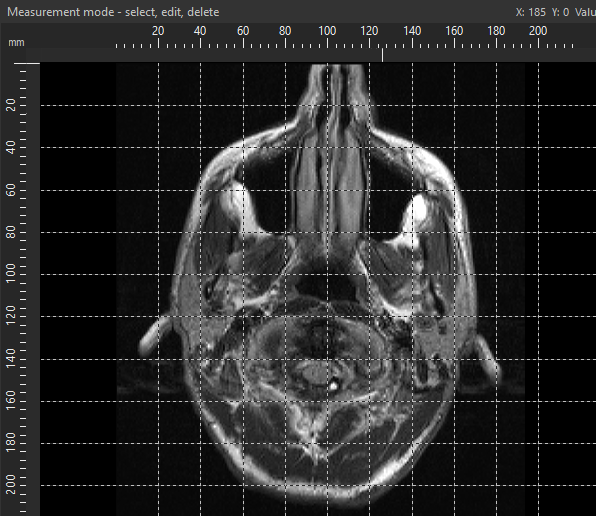 To display this grid overlay, select the Show grid lines option in the Show ruler drop down menu.